Developing and testing applications that interact with your APIs can present a unique set of challenges. These can include inconsistent responses from the backend, dependencies between teams, and the unavailability of APIs during testing phases. These obstacles can slow down the development process and make testing less efficient. One solution to these issues is API mocking, a technique that can expedite development and enhance the flexibility of testing.
In this article, we will delve into the optimization of Maestro UI testing through the use of mock APIs with WireMock. We will provide a comprehensive, step-by-step guide to this process.
WireMock seamlessly integrates with both Maestro CLI and Cloud. In this blog, we show the setup of WireMock locally as well as WireMock Cloud!
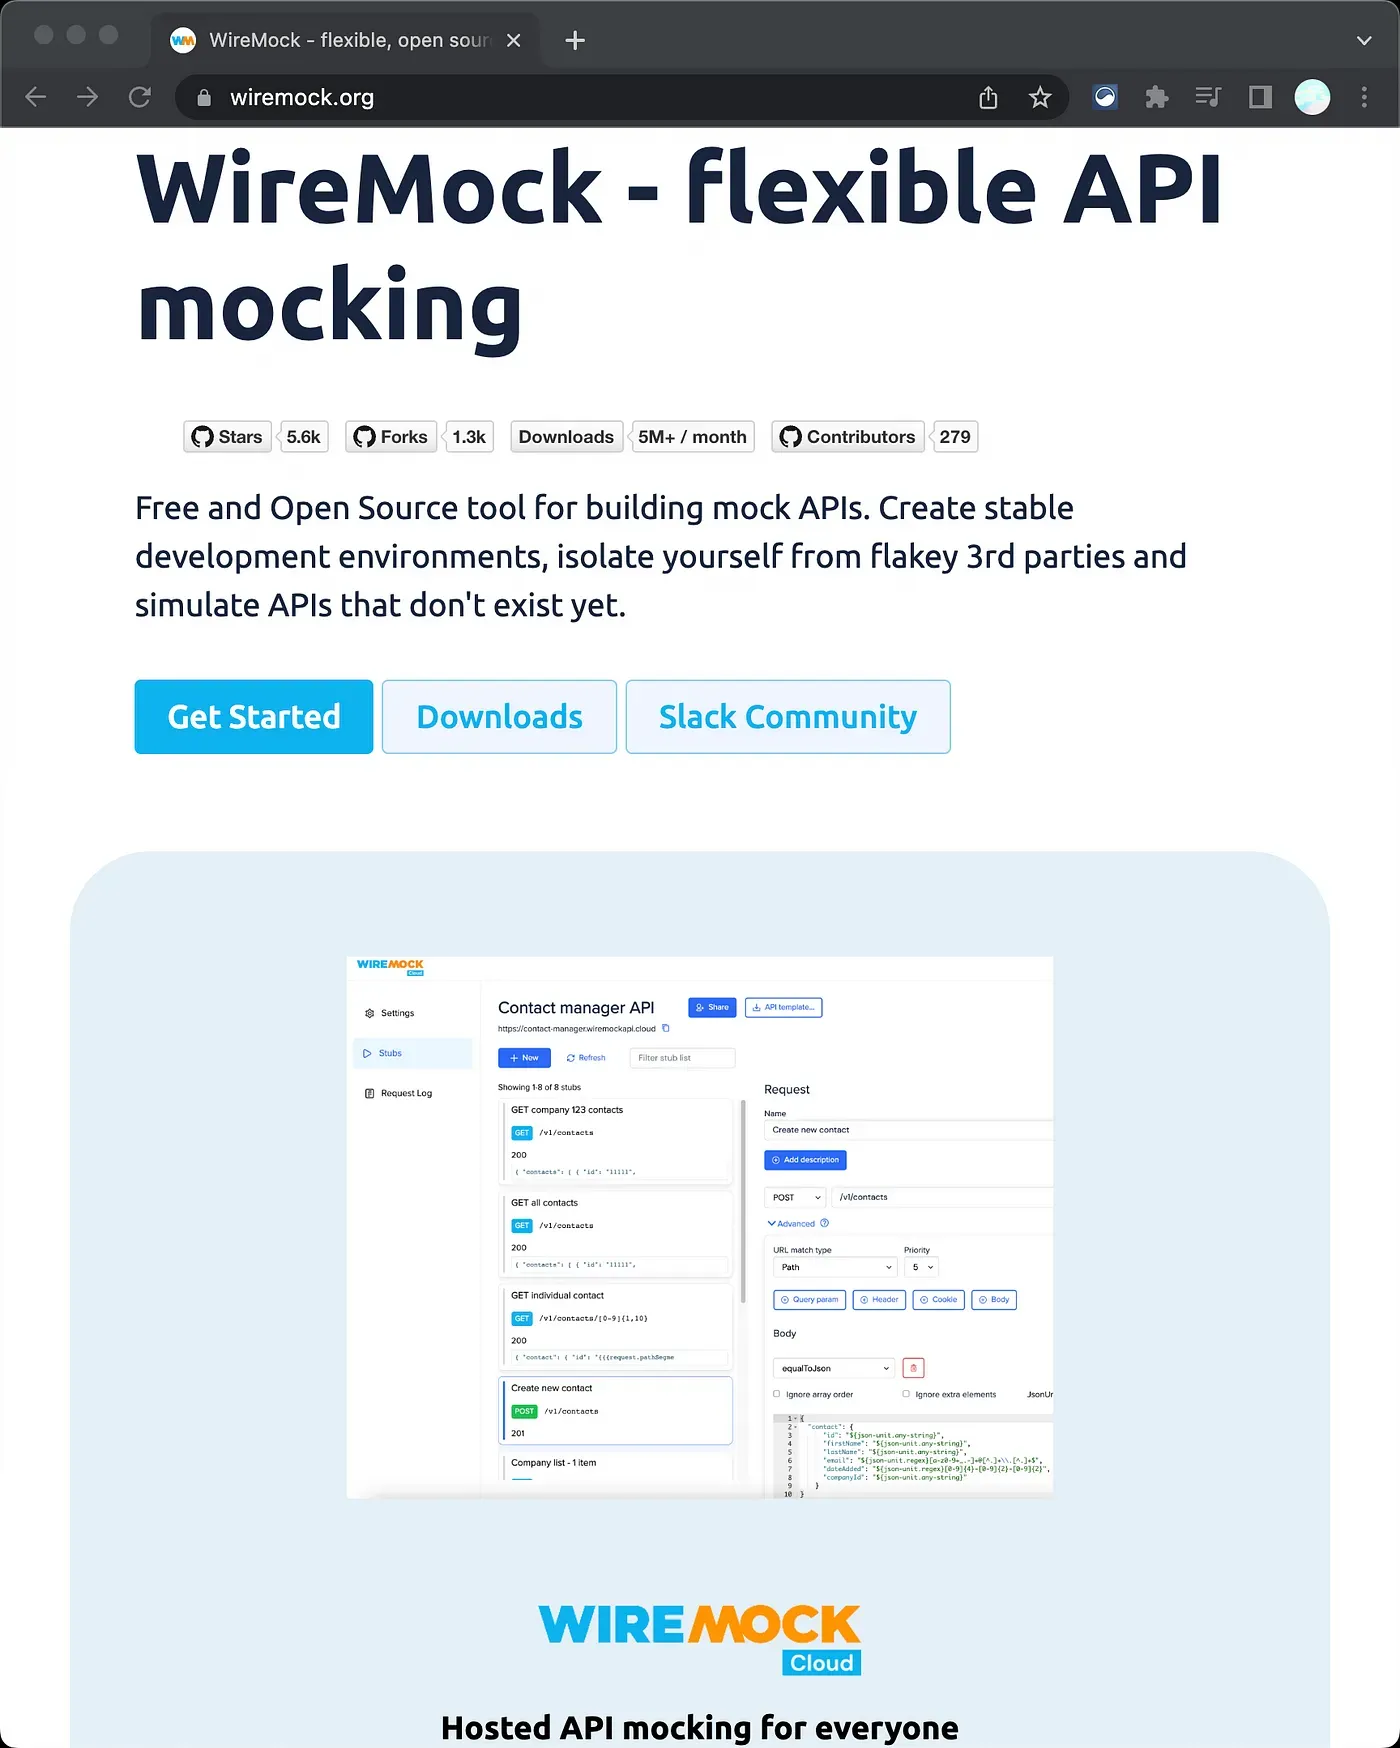
A Brief Overview of WireMock
WireMock is used for stubbing and mocking web services. It works by creating an actual HTTP server that your code under test can connect to as it would a real web service. It supports HTTP response stubbing, request verification, proxy/intercept, record/playback of stubs and fault injection.
WireMock offers several key advantages:
- Faster Development: WireMock makes it easier to create, modify, and manipulate API responses during the development process, drastically reducing the time spent handling real API interactions.
- Isolated Testing: By simulating various API responses and error scenarios, developers can effectively test the app’s behavior without affecting the live API. This isolation allows for more comprehensive testing, ensuring that the app behaves correctly under different conditions.
- Selective Mocking: WireMock’s Proxy mode enables developers to mock specific endpoints while keeping the rest of the app’s interactions with the live API unchanged. This flexibility permits fine-grained control over the testing process, allowing developers to focus on specific app components.
- WireMock Cloud: WireMock Cloud offers a secure HTTPS URL, making it easy to use the mock API from anywhere.
In this guide, we’ll look at two ways to create mocks:
- Locally
- Web UI with WireMock Cloud
We suggest using Web UI with WireMock Cloud because it’s easy and efficient. But, it’s also good to know how the fundamental JSON code works and how to use Wiremock locally. So we dive into how to use WireMock Locally first and then move on to using WireMock Cloud Web UI!
Let’s get started!
Setting Up WireMock Locally
Install the WireMock standalone server. Place the downloaded jar in your workspace.
For this demonstration, we will use an Android app that connects to The Movie Database (TMDB) API. Note that the principles explained in this post apply to any frontend, including Android, iOS, and the web.
You can optionally set up an Android app to try out! Or just follow the instructions and implement them for your own app!
App Source Code: https://github.com/thekharche/maestro-wiremock-tmdb
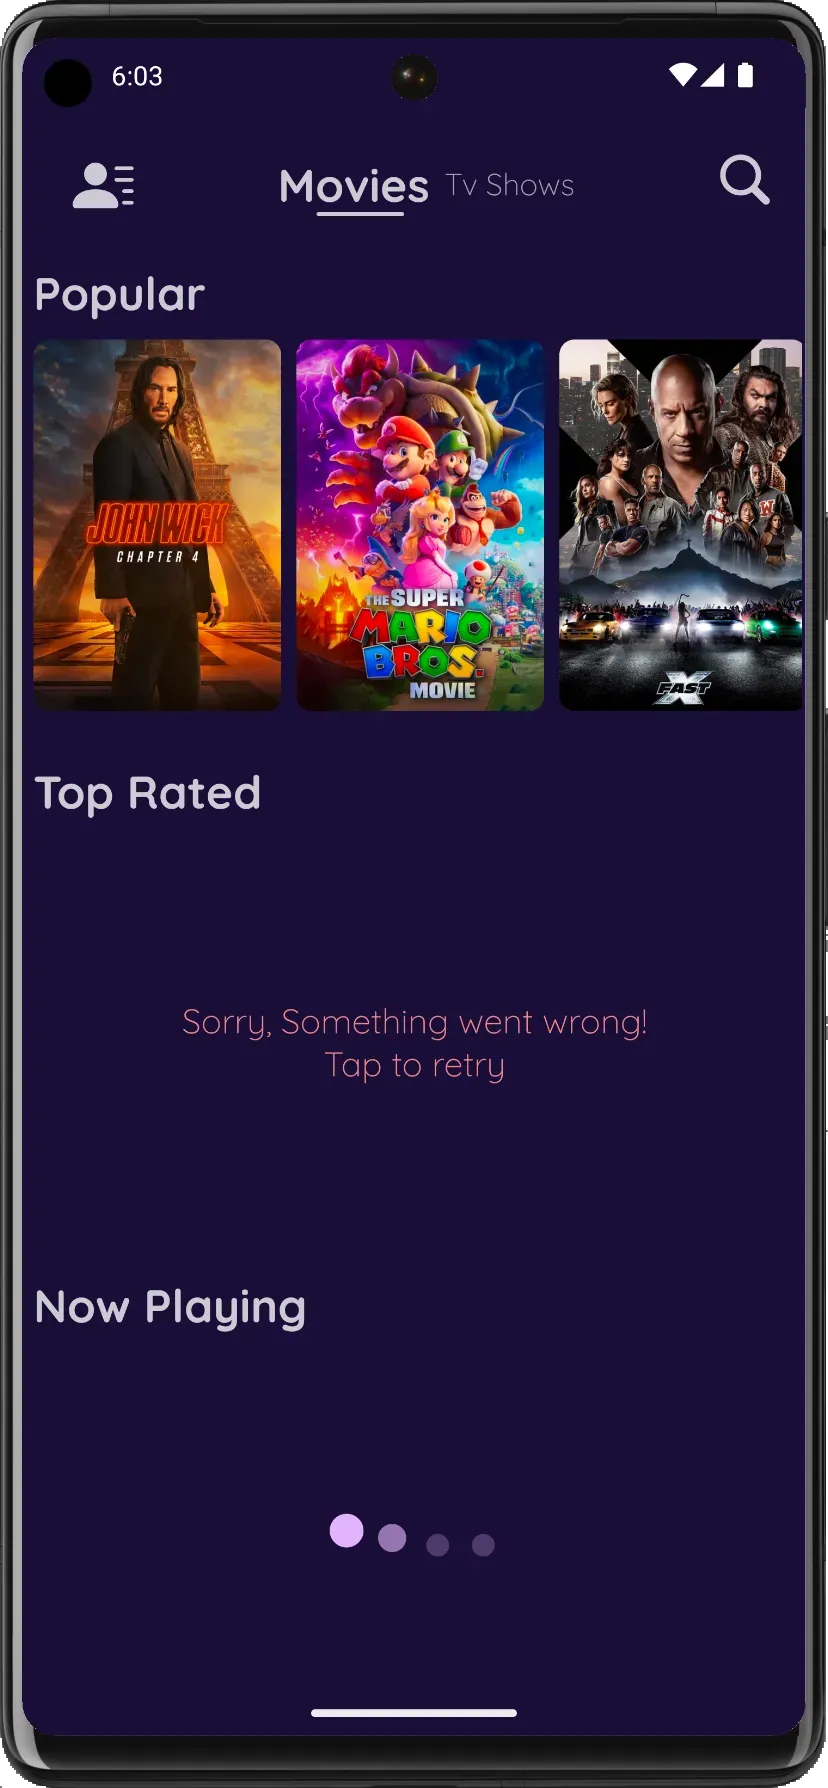
App with different states (data, error, loading) made possible with Mock APIs:
Creating Your First Mock Endpoint
To get started with WireMock, follow these steps:
- Start the WireMock server by running the following command in your terminal:
java -jar wiremock.jarThis will create __files and mappings in your workspace.
2. Create a new mapping in WireMock by creating a new JSON file in the mappings directory. Name it root.json and add the following content:
{
  "request": {
    "method": "GET",
    "url": "/"
  },
  "response": {
    "status": 200,
    "body": "Welcome to Maestro Blog!"
  }
}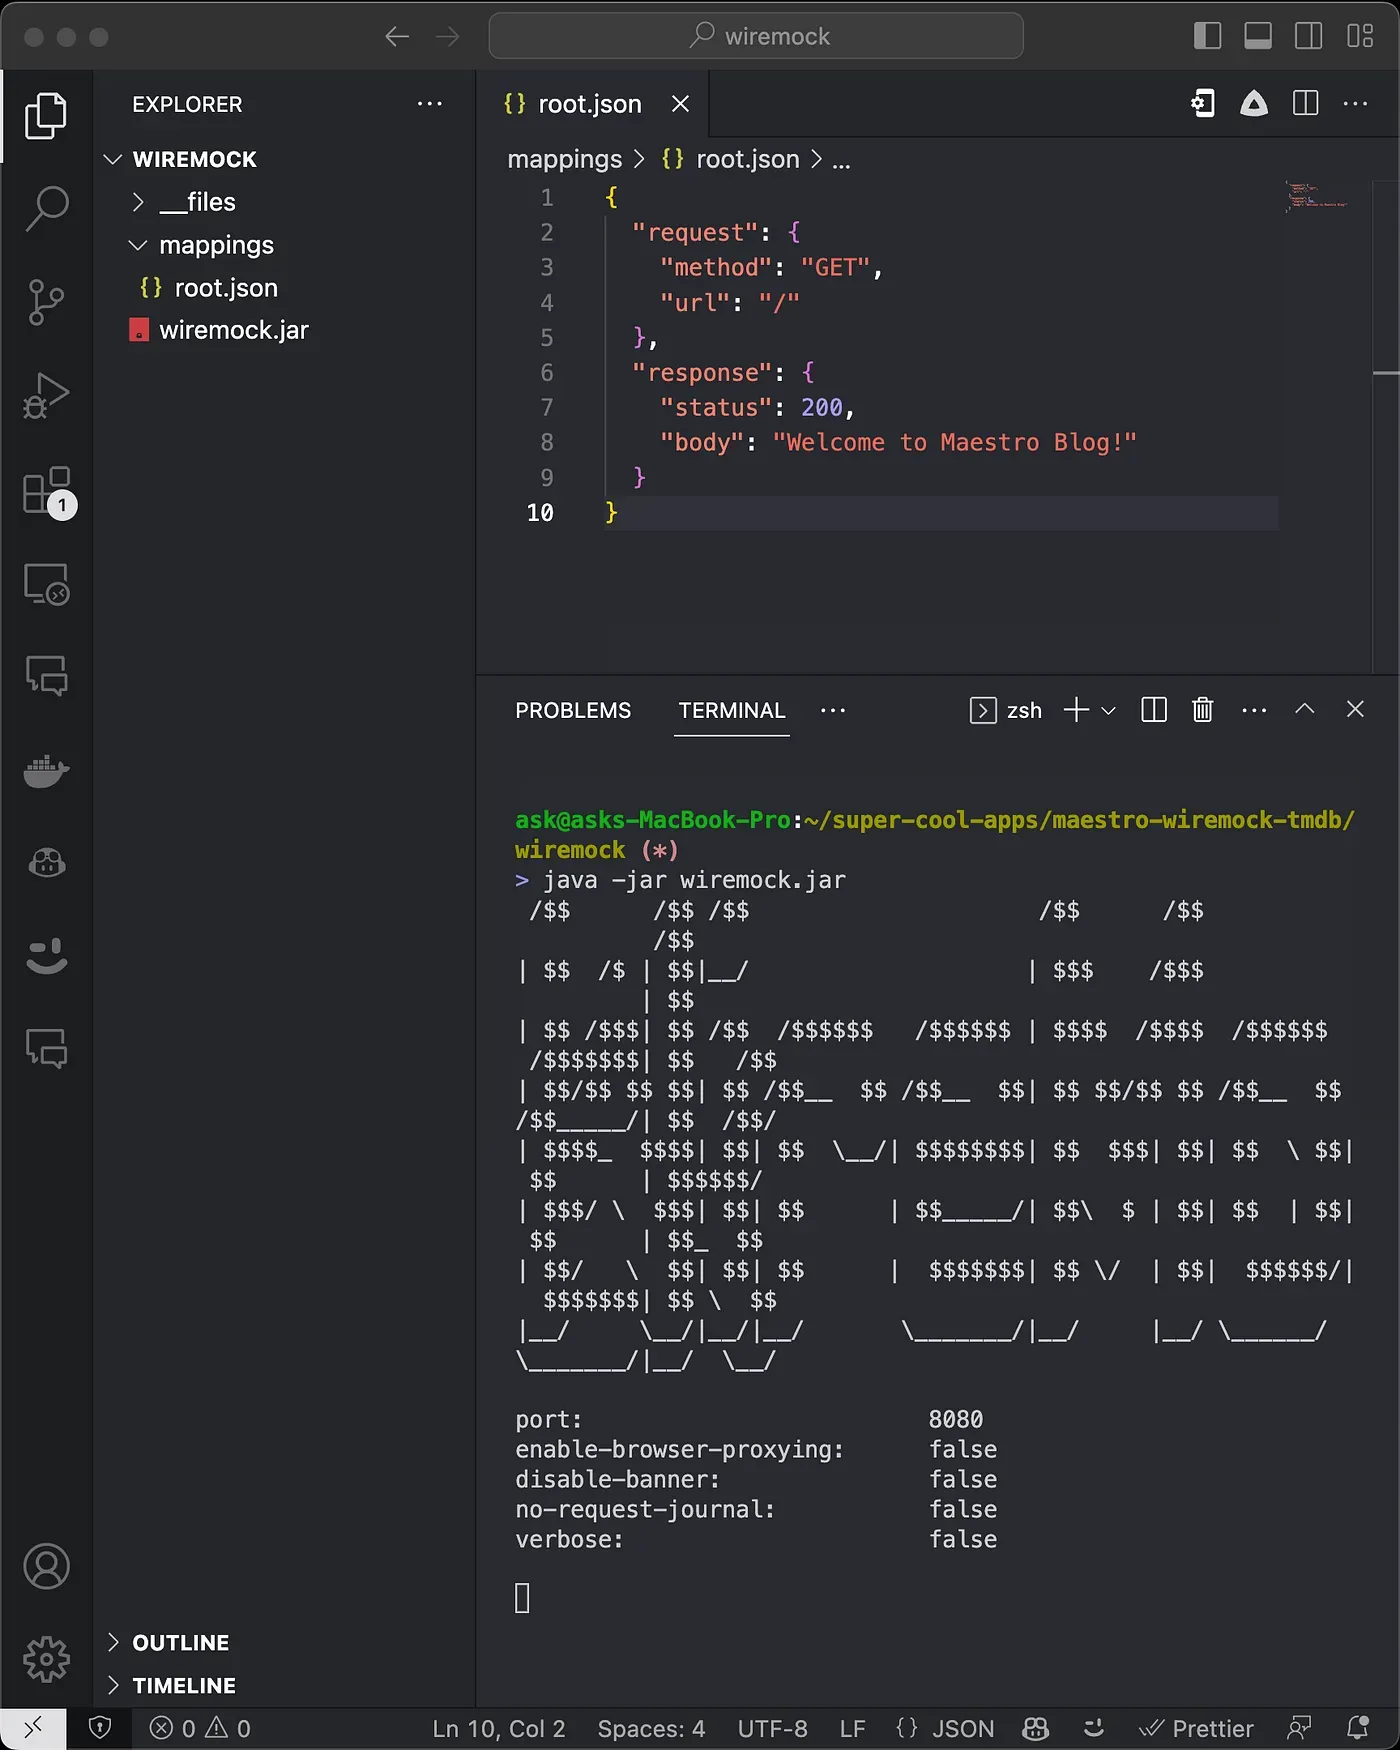
3. Visit http://localhost:8080/in your browser to see the response: “Welcome to Maestro Blog!”
You have just mocked your first endpoint!
Restart your server (ctrl + c) and java -jar wiremock.jar for changing to take into effect.
Enhancing the Mocked Endpoint
1. Update the JSON body in the “root.json” file to replicate the actual response when visiting [**https://api.themoviedb.org/3/**](https://api.themoviedb.org/3/.).
[**root.json**](https://github.com/thekharche/maestro-wiremock-tmdb/blob/main/wiremock/mappings/root.json)
{
  "request": {
    "method": "GET",
    "url": "/"
  },
  "response": {
    "status": 200,
    "jsonBody": {
      "status_code": 7,
      "status_message": "Invalid API key: You must be granted a valid key.",
      "success": false
    }
  }
}
2. Check the updated response in your browser by visiting http://localhost:8080/.
Mocking Other TMDB Endpoints
We will now mock three other endpoints used by our app:
- Now Playing (Locally using WireMock jar)
- Popular (Proxy Mode)
- Top Rated (Web UI using WireMock Cloud)
Mocking the Now Playing Endpoint
1. Create a new mapping in WireMock by creating a new JSON file in the mappings directory. Name it now-playing-200.json and add the following content:
[**now-playing-200.json**](https://github.com/thekharche/maestro-wiremock-tmdb/blob/main/wiremock/mappings/now-playing-200.json)
{
    "request": {
      "method": "GET",
      "urlPathPattern": "/movie/now_playing.*"
    },
    "response": {
      "status": 200,
      "fixedDelayMilliseconds": 1000,
      "headers": {
        "Content-Type": "application/json"
      },
      "jsonBody": {
        "dates": {
          "maximum": "2023-06-03",
          "minimum": "2023-04-16"
        },
        "page": 1,
        "results": [
          // JSON body results, hidden for brevity
        ],
        "total_pages": 2,
        "total_results": 9
      }
    }
  }
2. Copy the JSON response from the actual TMDB endpoint for Now Playing by using tools like Postman. Paste it into the jsonBody section of your new mapping in WireMock.
3. Confirm that your newly created mock endpoint is working by visiting http://localhost:8080/movie/now_playing in your browser.
Note, the fixedDelayMilliseconds is set to 1000 that means your request will be delayed by 1 second!
Read the WireMock Documentation for more configurations or use WireMock Cloud to configure much easily and intuitively via Web UI!
Request Matching
For endpoints that require different responses based on query parameters, you can use request matching. To create a request matcher:
1. In your mapping file, add a queryParameters section to the request section.
2. Create a condition for each query parameter you want to match, such as:
"queryParameters": {
  "page": {
    "equalTo": "2"
  }
}
3. Adjust the response settings accordingly, such as updating the jsonBody. For example, let’s say our TMDB API returns different responses for page=1 and page=2. We can create a matcher within the Now Playing mapping to return different jsonBody based on the page query parameter.
[**now-playing-200-page-2.json**](https://github.com/thekharche/maestro-wiremock-tmdb/blob/main/wiremock/mappings/now-playing-200-page-2.json)
{
  "request": {
    "method": "GET",
    "urlPathPattern": "/movie/now_playing.*",
    "queryParameters": {
      "page": {
        "equalTo": "2"
      }
    }
  },
  "response": {
    "status": 200,
    "fixedDelayMilliseconds": 1000,
    "headers": {
      "Content-Type": "application/json"
    },
    "jsonBody": {
      "dates": {
        "maximum": "2023-06-03",
        "minimum": "2023-04-16"
      },
      "page": 2,
      "results": [
        // JSON Body Results, hidden for brevity
      ],
      "total_pages": 2,
      "total_results": 9
    }
  }
}
Using Proxy Mode Locally
WireMock allows you to mock specific endpoints while leaving the rest of the app’s interactions with the live API unaffected.
To enable proxy mode:
1. Start the WireMock server with the -proxy-all option followed by the target URL (e.g., https://api.themoviedb.org/3/):
java -jar wiremock.jar --proxy-all="https://api.themoviedb.org/3/"Now, endpoints that you have not explicitly mocked will continue to interact with the live API, allowing for seamless and selective mocking!
Let’s move on to creating Mocks using WireMock Cloud!
The principles remain the same as using WireMock locally, but now we have a Web UI to simplify our tasks. Additionally, WireMock Cloud offers the advantage of an “https” base URL, enabling you to use your Mock APIs anywhere whether be Maestro CLI or Cloud!
Using WireMock Cloud
WireMock Cloud allows you to create, and import the mocks you’ve prepared for easy access and management.
In this guide, we’ve focused on how to migrate your Local Mocks to WireMock Cloud.
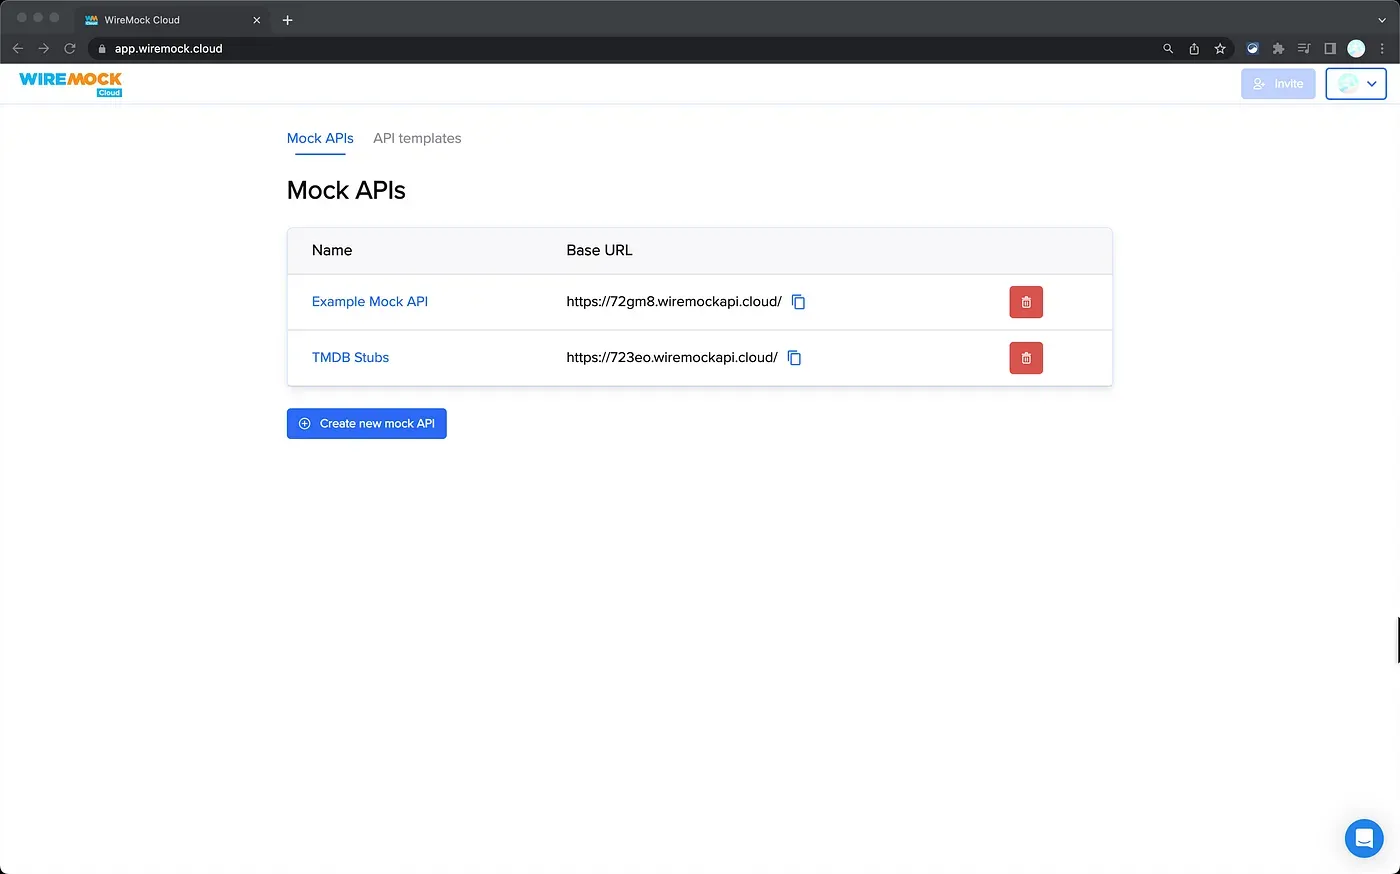
But remember, you can also start creating new mock APIs directly in WireMock Cloud. Just hit the “Create new mock API” button and you’re good to go.
WireMock Cloud is the preferred way to use Mock APIs with Maestro!
Here’s how to use it:
-
Create a WireMock Cloud Account: Start by setting up your account on WireMock Cloud: https://app.wiremock.cloud/
-
Start the WireMock Server Locally: Open your local terminal and initiate the WireMock server using the command:
java -jar wiremock.jar3. Export Your Local Mappings: In a separate terminal, run the following curl command to export your local mappings:
curl --output tmdb-stubs.json http://localhost:8080/__admin/mapping4. Create a New Mock API on WireMock Cloud: Navigate to WireMock Cloud and create a new mock API. Select ‘Blank’, provide an API name, and choose your preferred hostname: https://app.wiremock.cloud/mock-apis/create
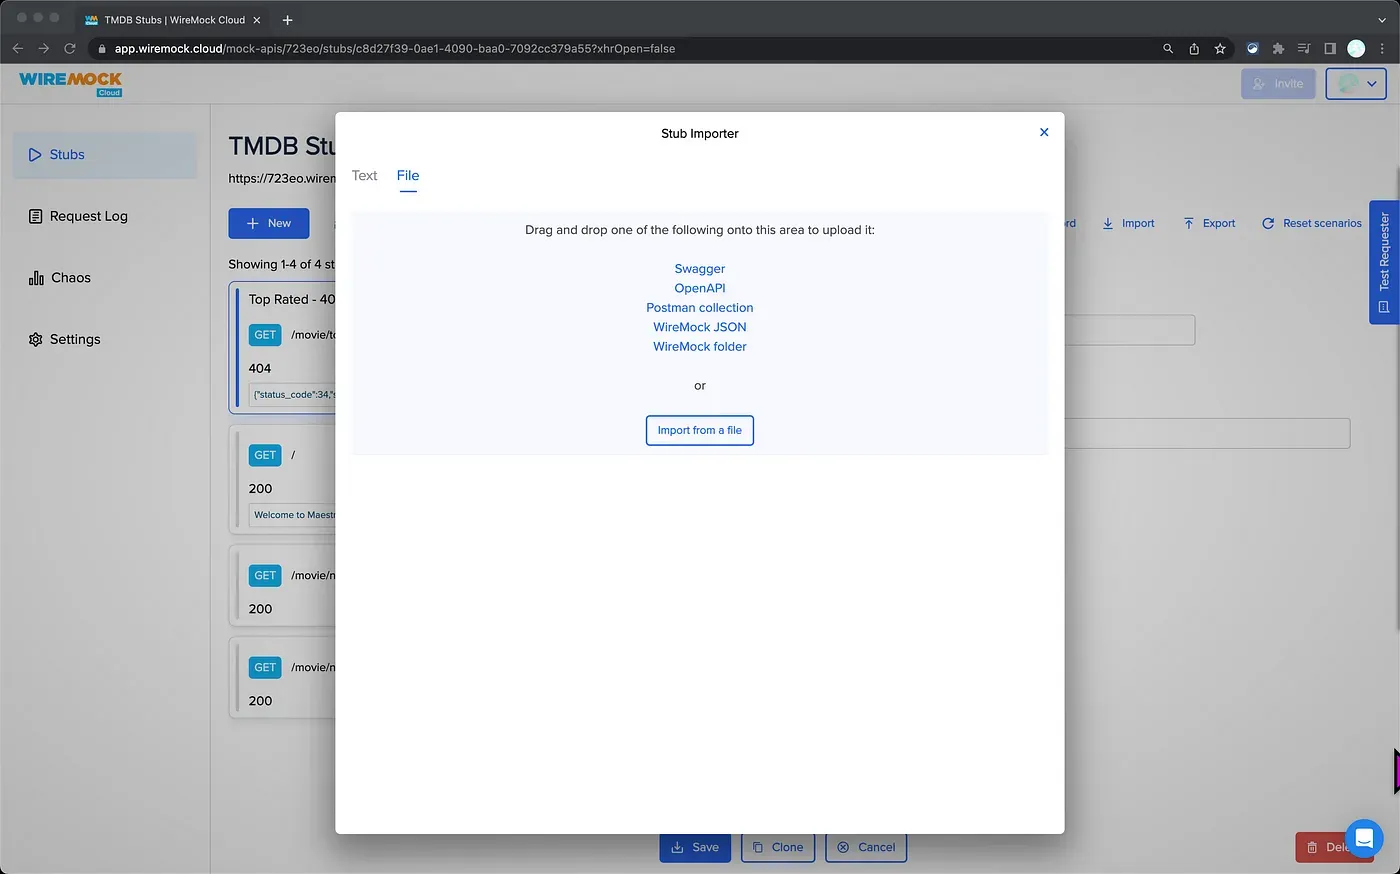
5. Import Your Local Mappings: Click on ‘Import’, then ‘File’, and upload the tmdb-stubs.json file you created earlier.
6. Note your base URL: Take a note of your base URL in WireMock Cloud, you can switch to this URL in your app code when you want to use Mock APIs when UI testing with Maestro!
Additionally, there’s a method to identify Maestro within your app. This can be helpful if you need to change how your app works depending on whether it’s being used with Maestro. So, in our case if we are under Maestro environment we switch the base URL to the WireMock Cloud provided one otherwise we continue to use the original base URL!
Learn More on Maestro Docs for Android, iOS and also checkout React Native library.
Alternatively, you can also skip the import step and directly create new endpoints on WireMock Cloud!
Simulating Error Statuses
Simulating error statuses is a great way to ensure your application handles errors properly.
Here’s how to simulate an error status using WireMock Cloud:
1. Click on ‘New’ to create a new endpoint, and set the endpoint as /movie/top_rated.
2. Provide a name for the endpoint, for example, “Top Rated — 404”.
3. Change the ‘Response Status’ to 404.
4. Set the ‘Body Type’ to JSON.
5. Add the following JSON to simulate an error message:
{"status_code":34,"status_message":"The resource you requested could not be found.","success":false}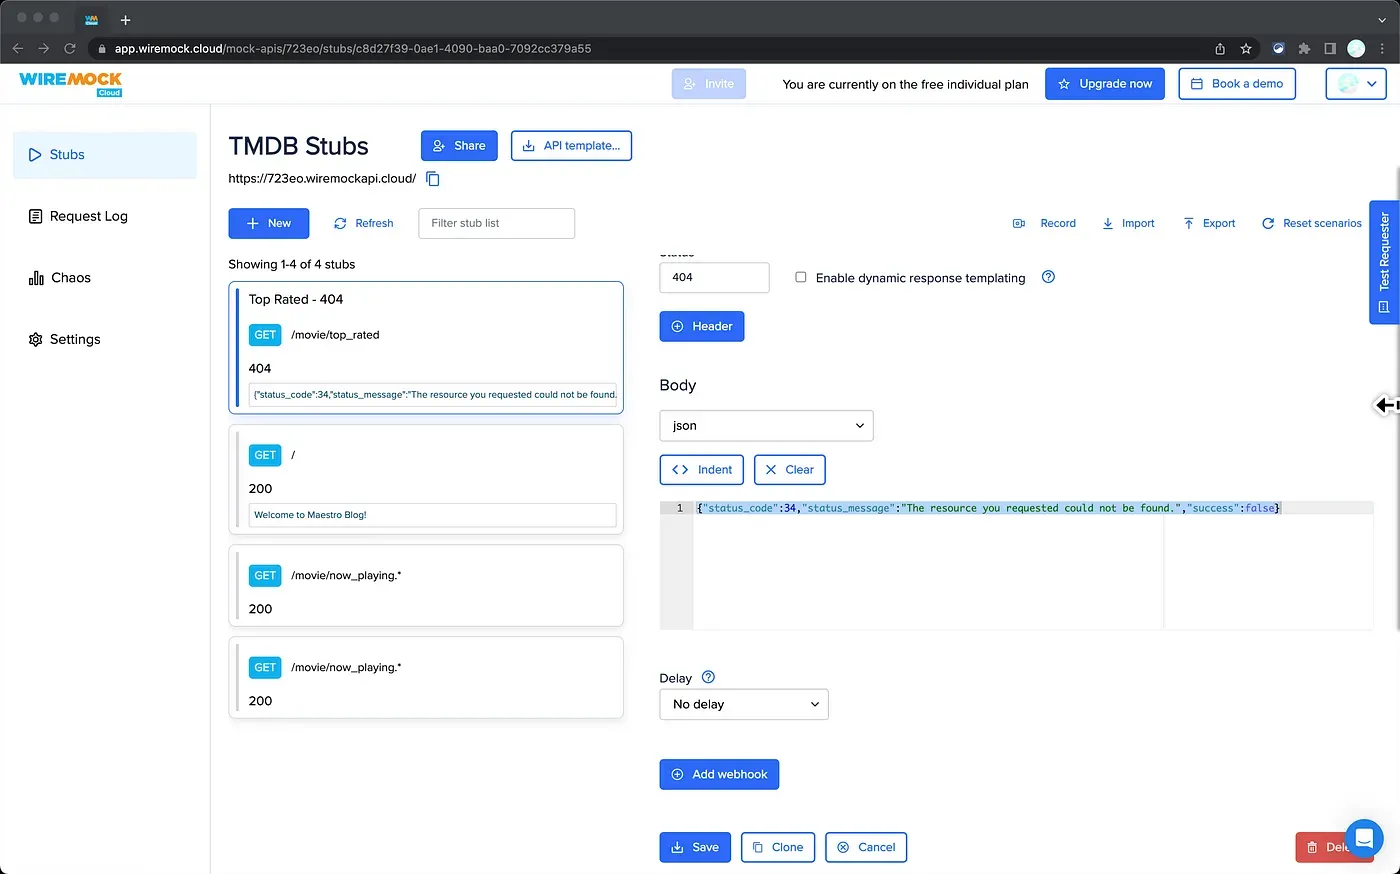
Using Proxy Mode on Web UI
WireMock’s proxy mode is a powerful feature that allows you to direct certain requests to another service. This can be particularly useful when you want to mock some endpoints while allowing other requests to interact with a live API.
To set up proxy mode in WireMock Web UI, follow these steps:
- Create a New Endpoint: Navigate to the endpoint creation section and use
/.*as the endpoint. This is a regular expression that matches any path, allowing this rule to act as a catch-all for requests that don’t match any of the more specific stubs. - Set URL Type: Choose ‘Path and query regex’ as the URL type. This ensures that the rule matches based on both the path and the query parameters of the request.
- Set Priority: Assign the lowest priority to this rule (e.g., 10). WireMock uses the priority to determine which stub to use when a request matches multiple stubs. By giving this rule the lowest priority, we ensure that it only gets used when no other stub matches the request.
- Set Base URL: Enter https://api.themoviedb.org/3 as the base URL.
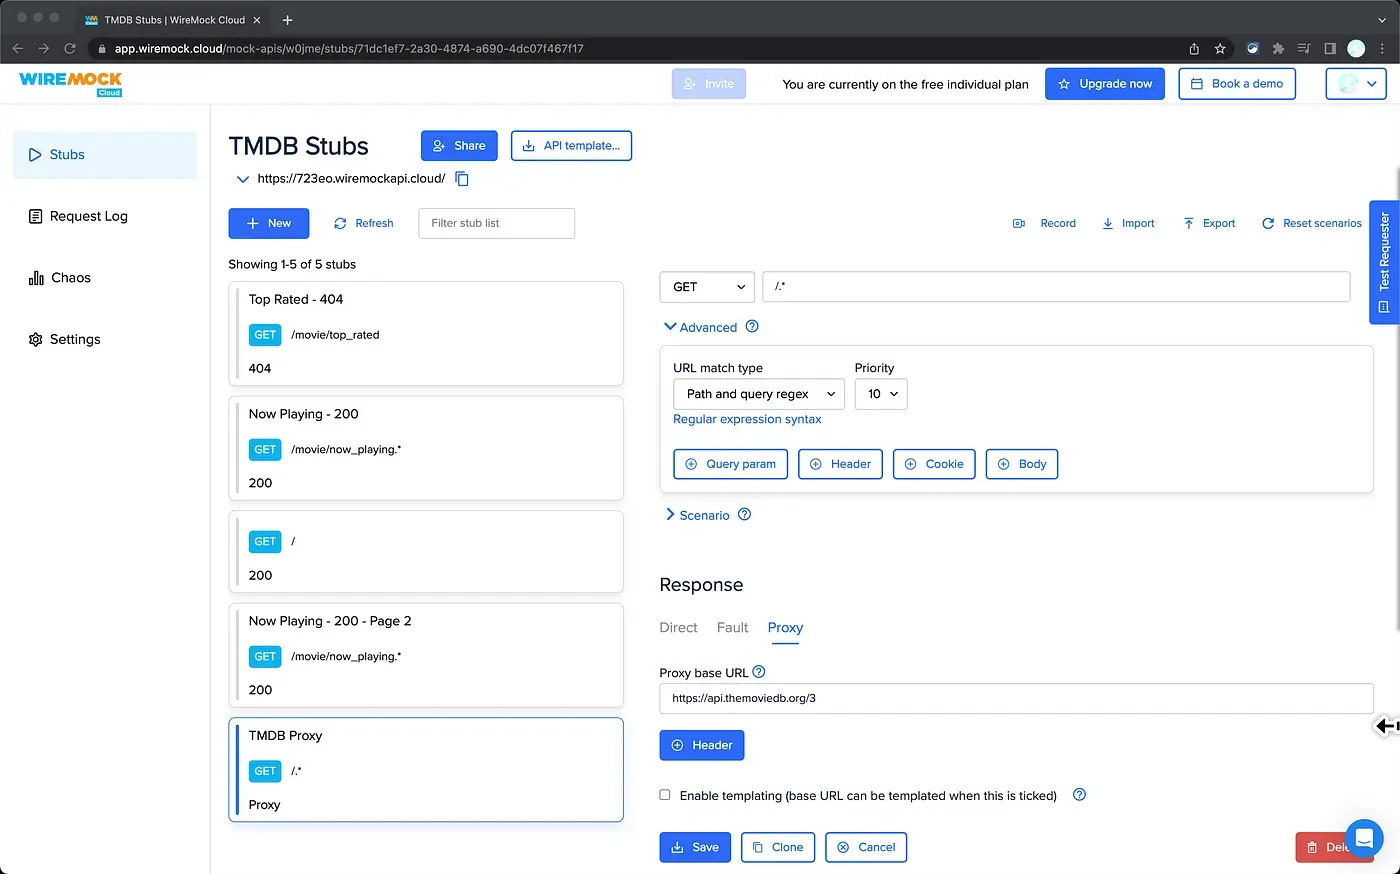
By following these steps, you can set up a proxy mode in WireMock Web UI, allowing you to seamlessly blend mocked and real API interactions in your testing.
UI Testing with Maestro
Whether you use Maestro locally or use Maestro Cloud, the WireMock setup requires no changes to your UI Testing! Just run your tests like you would normally!
Conclusion
WireMock is a powerful tool that allows for the creation of mock APIs, speeding up development, isolating testing, providing control over test scenarios and seamlessly integrates with Maestro!
References
WireMock:
Maestro:
App Source Code:
🎹