Community-Driven Innovation 🚀
Last week, we proposed this feature in our community Slack channel: A visual interface that surfaces the exact Maestro commands needed to interact with your app’s UI.
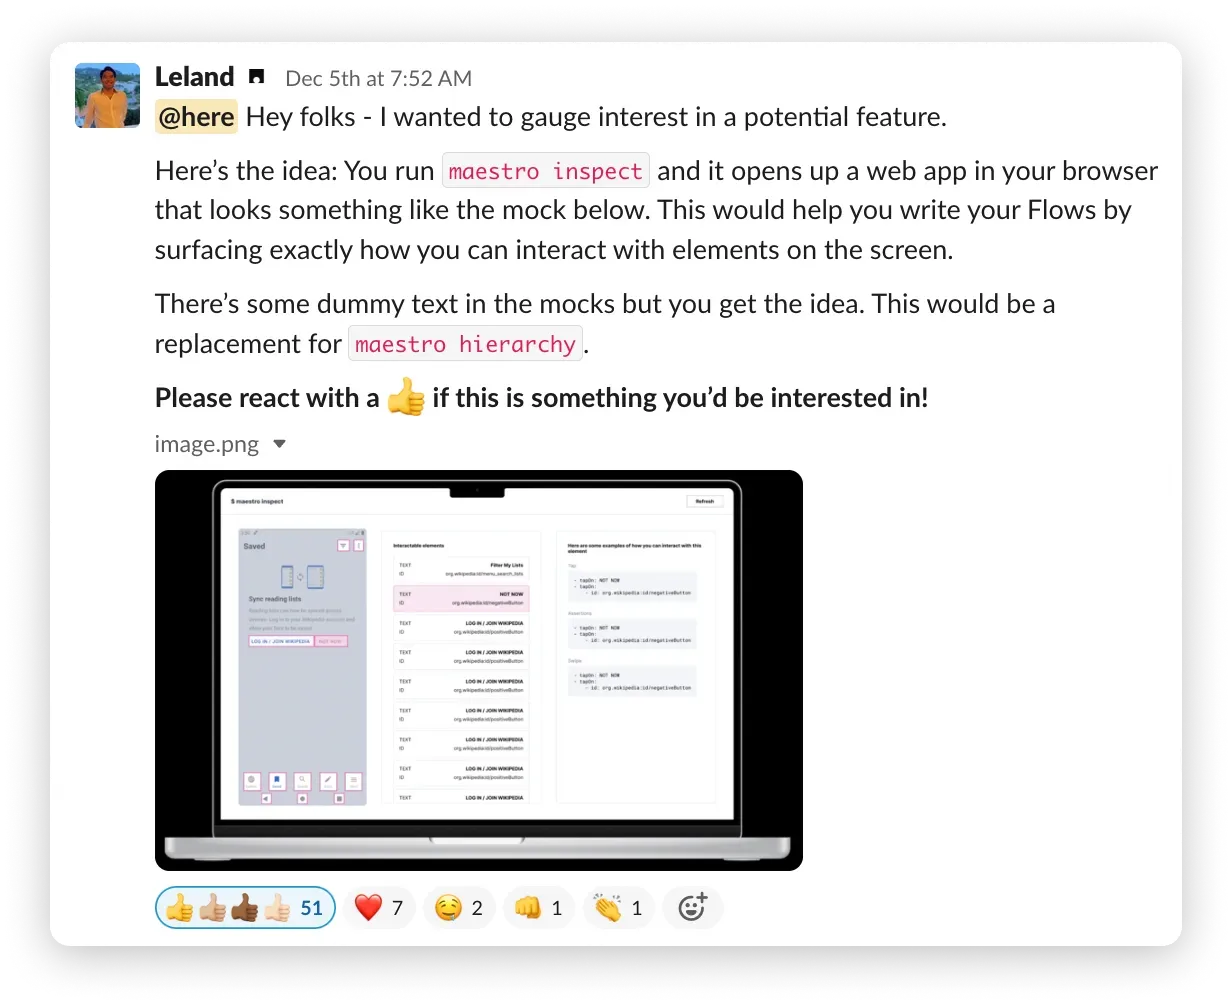
This feature represents a major leap forward for Maestro users. But more importantly, it lays the foundation for a new generation of Mobile automation tooling. And all of this was directly driven by feedback from the community!
Today, we’re excited to announce a game-changing addition to the Maestro Ecosystem:
Maestro Studio
Meet your new favorite Maestro tool, Maestro Studio:
Use Maestro Studio to instantly discover the exact commands needed to interact with your app.
Here’s how it works:
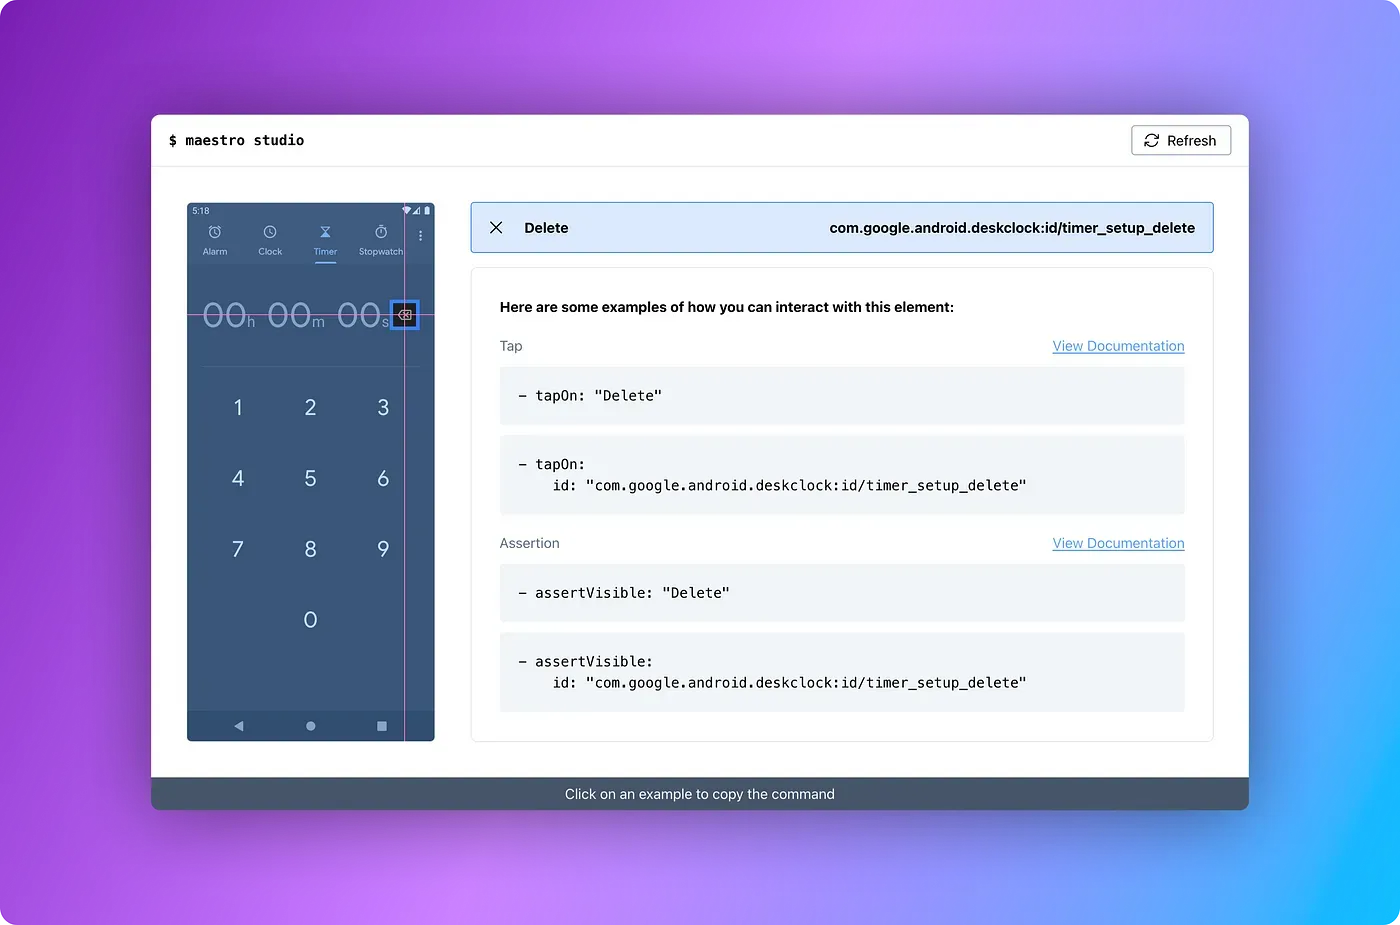
Launch Maestro Studio
Maestro Studio is built right into the Maestro CLI. Upgrade your CLI to the latest version, and run the command below to launch Maestro Studio in your browser:
maestro studioHere’s what you’ll see:
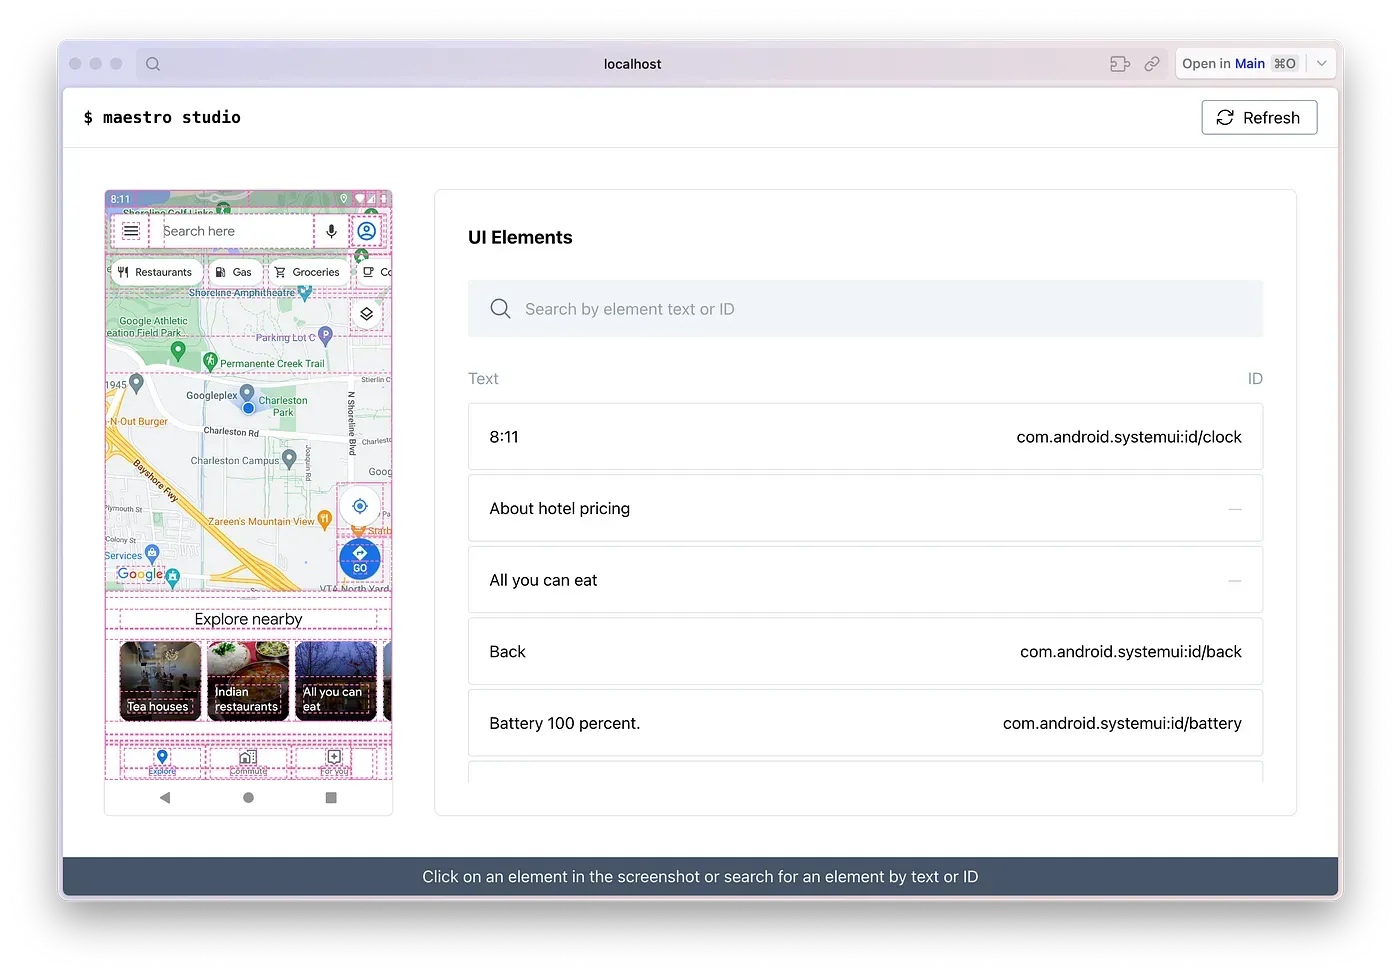
Visually Select a UI Element
Click on the device screenshot to select a UI element. You can also search for an element by text or id.

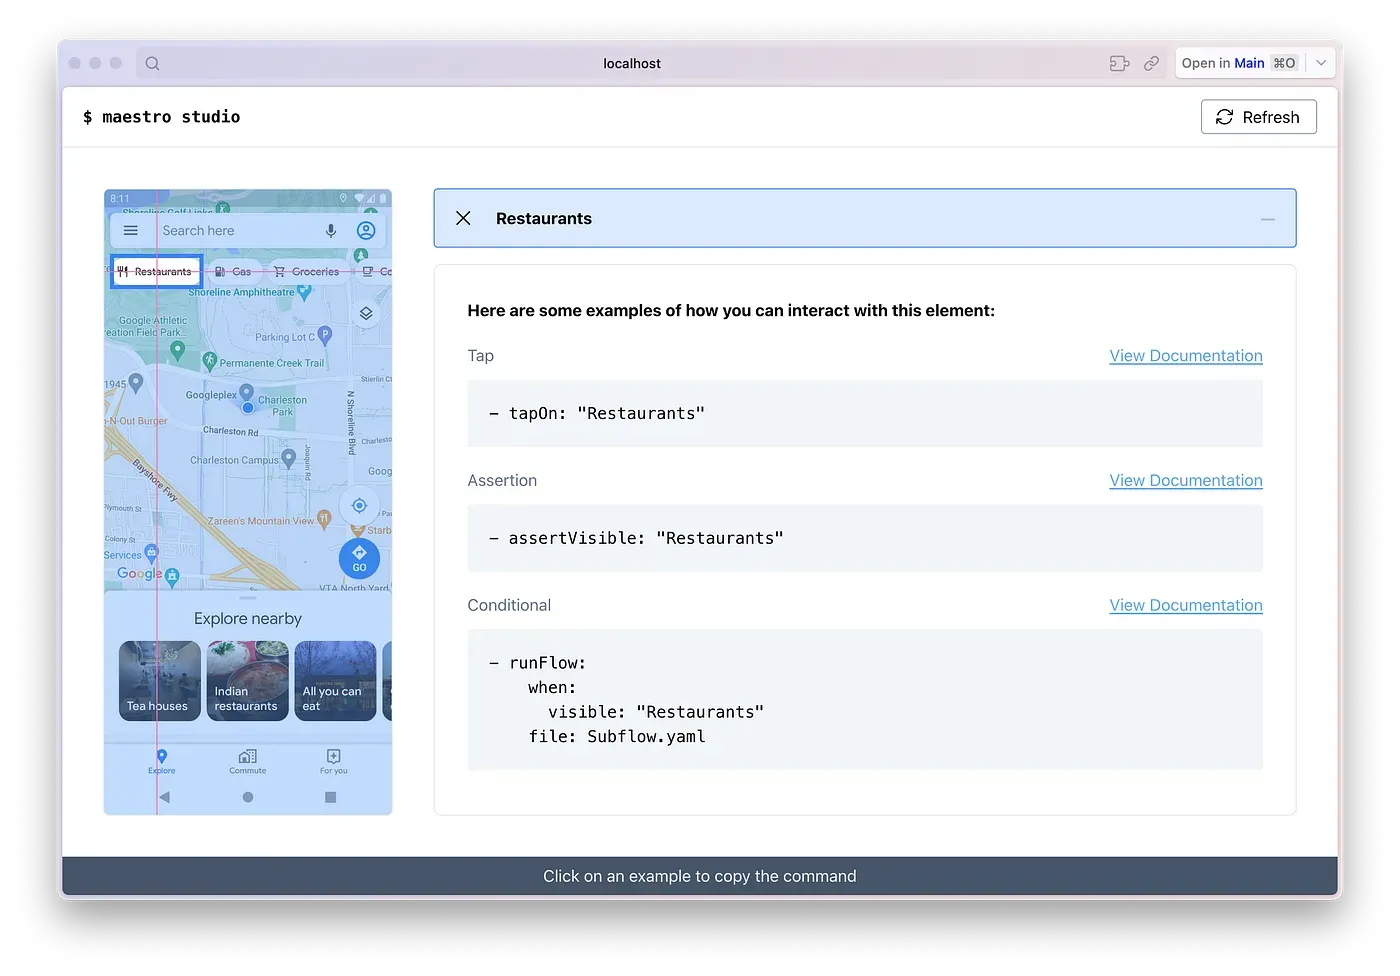
Automatically Generated Examples
Maestro Studio automatically generates examples of how you can interact the selected element. Click on an example to copy the command, then paste it right into your Flow file!
Can Maestro Studio just write my Flow for me?
You read our minds! The north star is enabling the generation of a full Flow simply by clicking through your application 🤯.
Make sure to follow us on Twitter and join us on Slack to be the first to hear about any updates!
What’s next for Maestro?
We see Maestro, Maestro Cloud, and now Maestro Studio as the foundation for the next generation of mobile automation tooling. We’re going full speed ahead on our mission to fundamentally improve the tooling and experience of test authorship, maintenance, and execution. Thank you for being on this journey with us.
Learn more at maestro.dev