I spend half my working life helping out in the Maestro community, and the other half in the real world, testing mobile apps. When I’m writing Maestro flows, like anything complex, getting it right first time is something that almost never happens.
Samuel Abada, a Maestro community member, has come up with something to help: an extension for VS Code, called Maestro Workbench. See it on the Microsoft Extensions Marketplace.
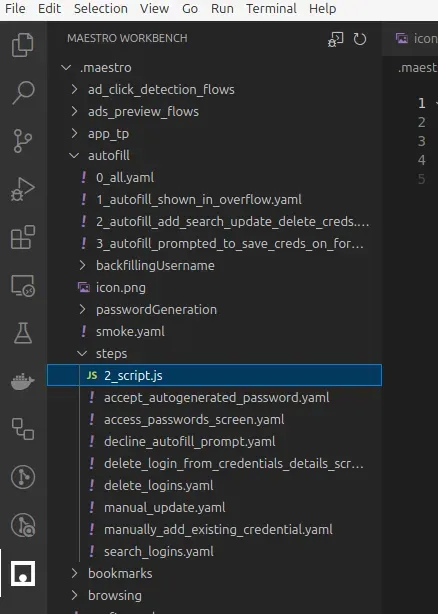
It contains a workbench that shows the tests and their structure, including their dependencies, like scripts and images. Here’s what the workbench looks like viewing DuckDuckGo’s excellent suite of tests:
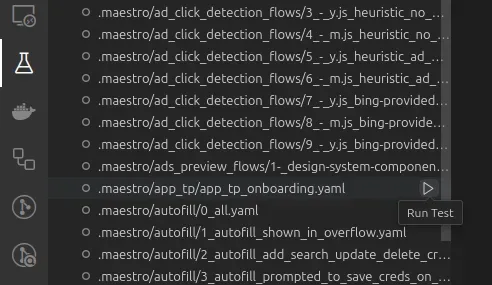
It also exposes the tests to the Testing tab of VS Code, allowing tests to be individually run (assuming a local setup of Maestro and an attached device).
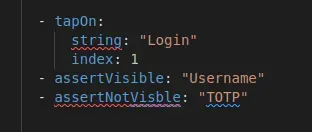
Like many extensions that offer language support, it comes with some useful snippets. But by far my favourite feature is the Maestro Flow schema validation. No more errors because you’ve forgotten a property, or slipped a typo into the name of a command — if that happens, you’ll get the familiar red squiggles to help you fix your problems before you commit to running.
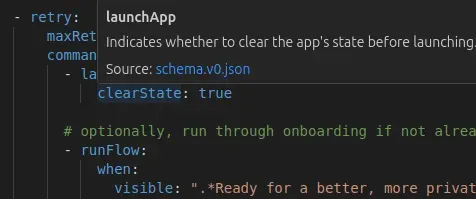
Moreover, for every command, there’s help for commands and examples on hover, as well as for the properties:
Maestro is just a specific subset of YAML, and not everyone keeps their Maestro tests in the same place. If you’re not using the default locations (maestro or .maestro folders), then you can add some config into your user or workspace config to point the extension’s schema at your directory.
    "yaml.schemas": {
        "file:///home/dan/.vscode/extensions/mastersam.maestro-workbench-0.9.0/schema/schema.v0.json": [
            "e2e-tests/**/*.yaml"
        ]
    },
If you want to give it a go yourself, you can search for “Maestro Workbench” inside VS Code, or install it from the Marketplace. It’s entirely open-source, so you can contribute changes, report issues or just build the code yourself — it’s all on GitHub.