Maestro is a robust UI testing framework for Android and iOS applications. In this guide, we’ll walk you through the process of UI testing a Flutter app locally using Maestro, using the Blackhole Music app as our example.
This article provides a step-by-step guide on using Maestro for UI testing in Flutter, emphasizing the importance of configuring Flutter for precise testing with Maestro. Using the Blackhole Music app as an example, it covers setup and configuration. The piece concludes with a practical demonstration through a sample Maestro UI test.
This is a multi-part series. Upcoming parts revolve around UI testing the real-world Blackhole Music Flutter App.
Getting Started
1. Clone the Repository
Start by cloning the Blackhole Music App repository:
git clone https://github.com/thekharche/maestro-flutter-music-app- Navigate to the Directory
After cloning, navigate into the directory:
cd maestro-flutter-music-app3. Installation
Install the required packages:
flutter pub getRunning the Flutter Application in VS Code
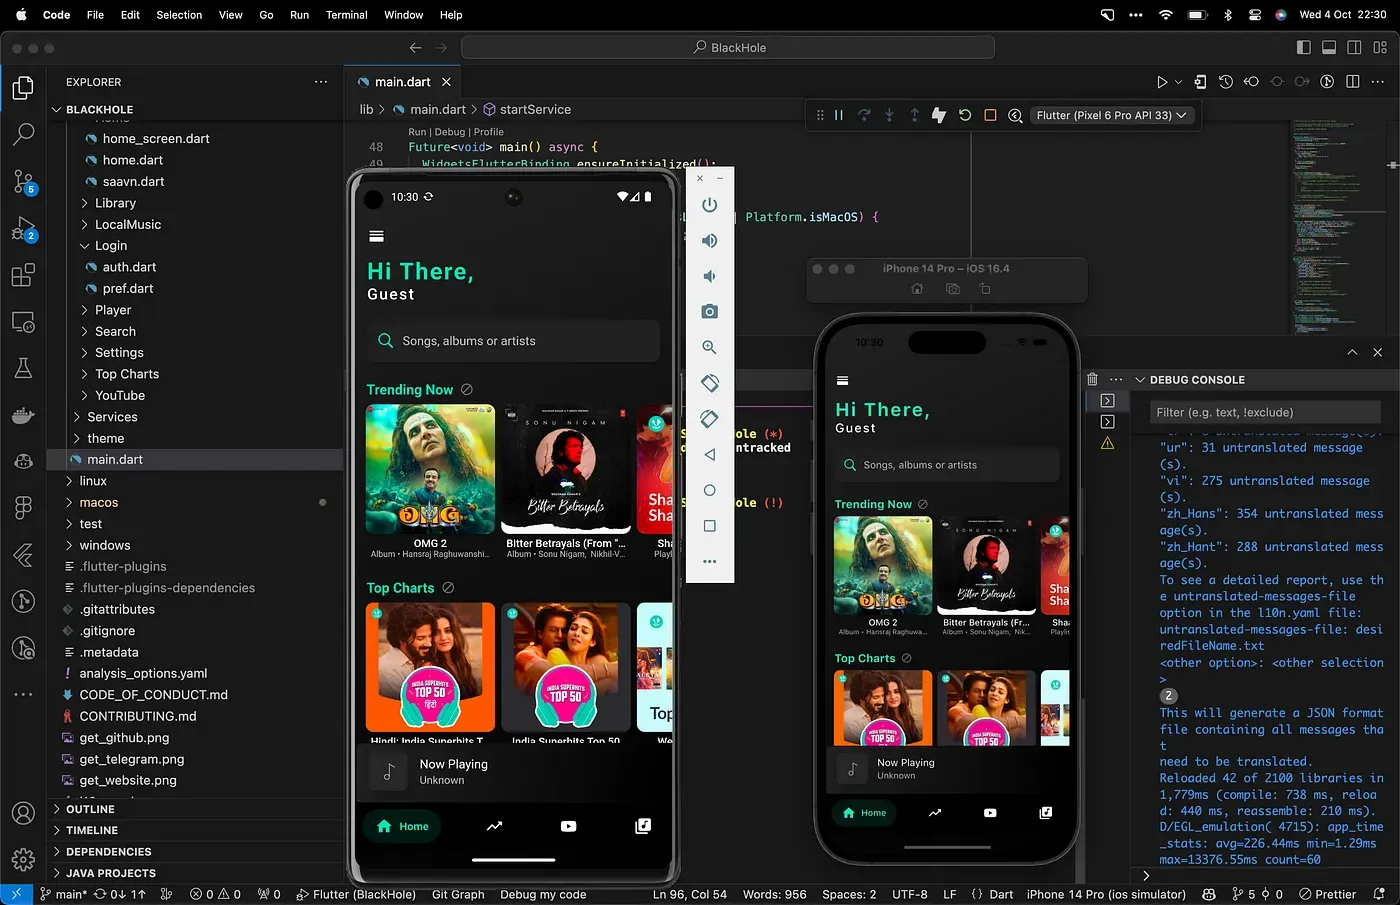
After getting the code ready, the next step is to run your Flutter application to validate its functionality. Here’s a streamlined guide on how to achieve this using Visual Studio Code:
- Opening the Project
- Launch Visual Studio Code.
- Navigate to
File->Open, then select and open your Flutter project directory.
2. Starting the Emulator/Simulator
- Within VS Code, go to the View menu -> Command Palette (or press
Ctrl+Shift+Pon Windows/Linux,Cmd+Shift+Pon macOS). - Type
Flutter: Launch Emulatorand select it from the list. Choose an Android or iOS device from the list.
3. Running the Application
- Ensure your Flutter project is open and navigate to the
main.dartfile. - On the right top, you can see options to run the Flutter app with the play button as well as select emulator.
- You can also press
F5to run the app. This will also enable debugging, allowing you to set breakpoints and inspect variables. UseCtrl + F5to run without debugging. - Alternatively, navigate to the Run menu at the top and select Start Debugging or Run without Debugging.
4. Interacting with the Running Application
- The app will launch in the chosen emulator or connected device.
- Any code changes can be instantly reflected in the running app by clicking on a Flutter hot reload button.
Starting Up Maestro Studio
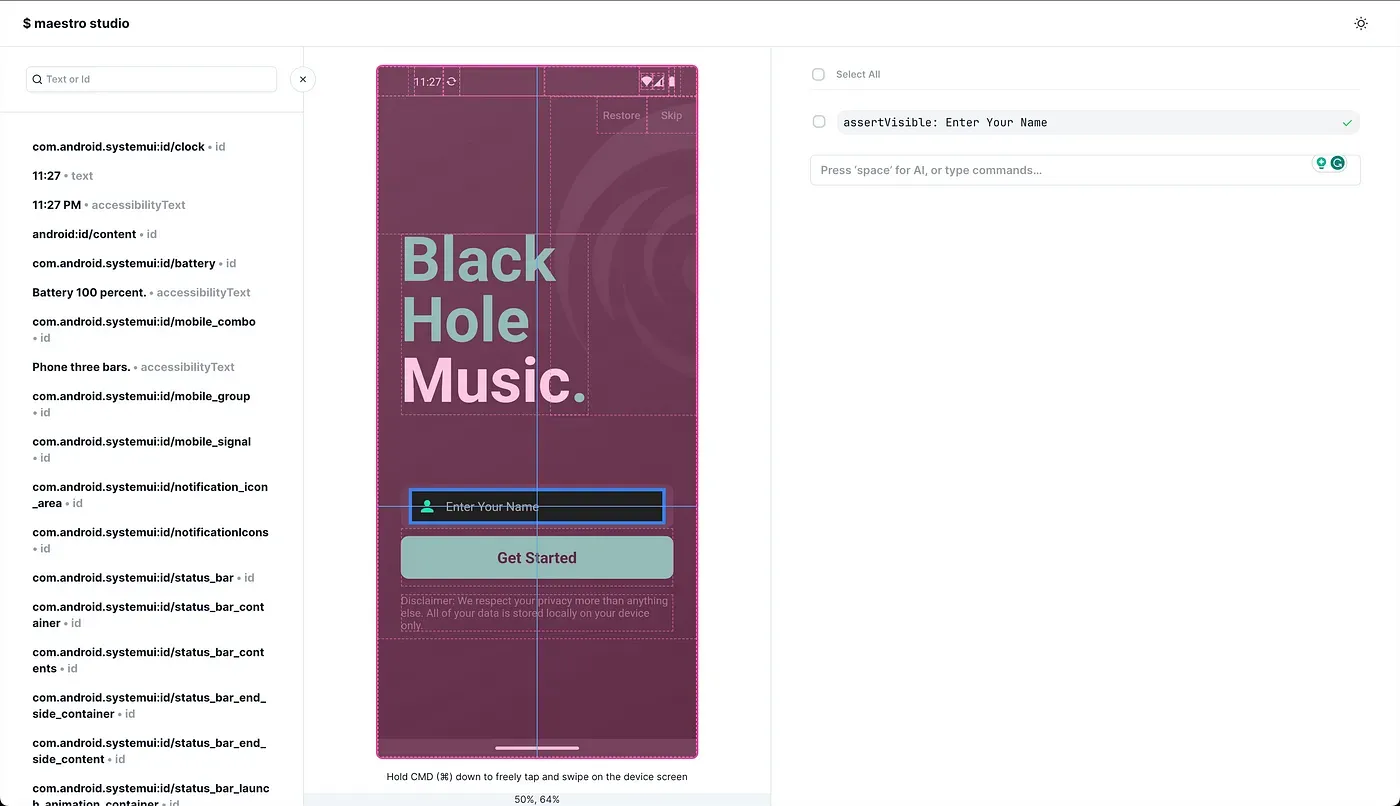
Run the command maestro studio in your terminal, which will launch Maestro Studio in your web browser. The GUI allows for UI testing, visually and interactively.
Maestro Studio serves as a personal assistant designed to streamline the process of writing Maestro Flows. With its intuitive interface, users can effortlessly identify and interact with UI elements in their apps, use AI to auto-generate test commands, search for all the elements and many more niceties. The platform offers features such as visual selection of UI components
Configuring Flutter for effective Maestro UI testing
Note: While this section introduces Semantics and explicitChildNodes, their practical usage in UI testing will be extensively covered in Part 2 of this blog series.
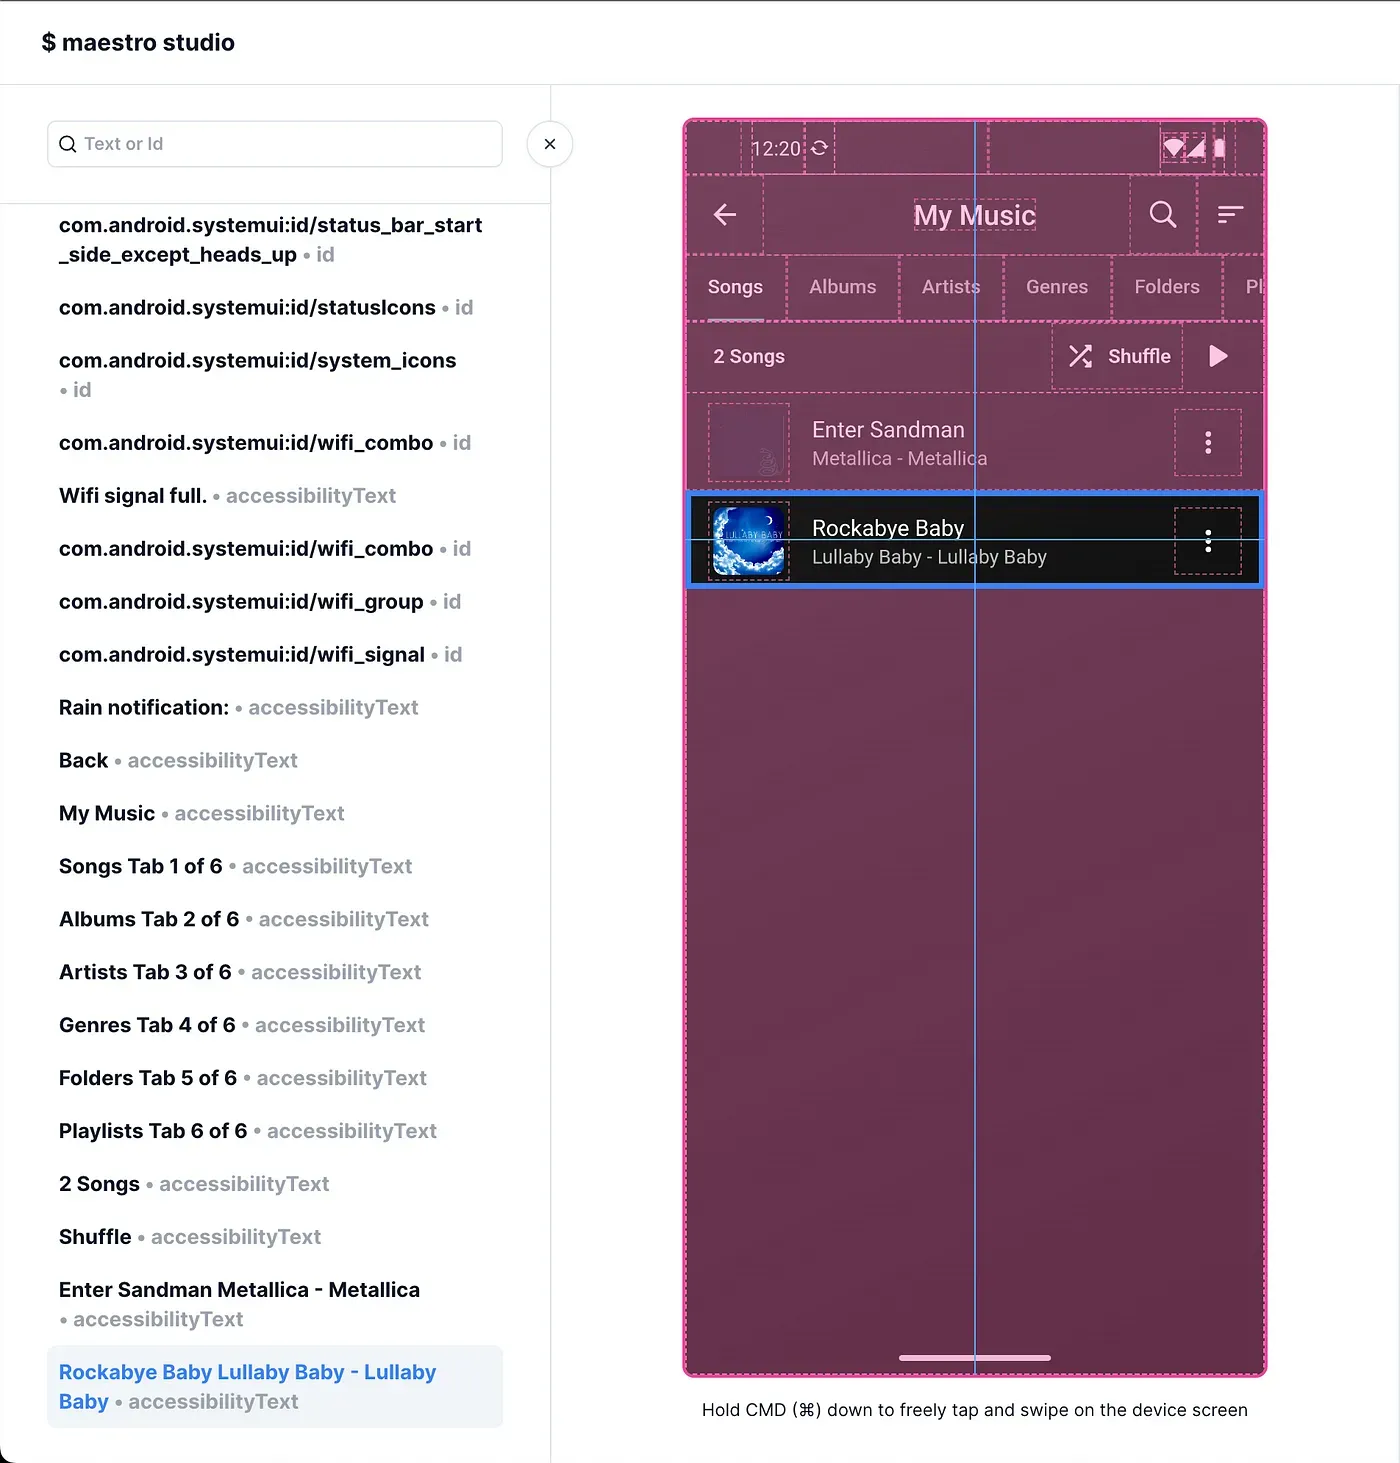
In a scenario where your Flutter app features a list of songs, each with a title and subtitle, employing Semantics and explicitChildNodes becomes crucial for UI testing with Maestro Studio. This setup helps in accurately identifying and interacting with specific text elements during testing, ensuring that the title and subtitle for each song are correctly displayed and accessible. By wrapping each Text widget with a Semantics widget and setting explicitChildNodes to true, you create a clear semantic boundary that Maestro Studio can recognize and interact with, making your UI tests more precise and reliable.
Notice below, the title and subtitle is not explicitly identifiable. Follow the blue box.
Original Code:
title: Text(
  widget.songs[index].title.trim() != ''
      ? widget.songs[index].title
      : widget.songs[index].displayNameWOExt,
  overflow: TextOverflow.ellipsis,
),
subtitle: Text(
  '${widget.songs[index].artist?.replaceAll('<unknown>', 'Unknown') ?? AppLocalizations.of(context)!.unknown} - ${widget.songs[index].album?.replaceAll('<unknown>', 'Unknown') ?? AppLocalizations.of(context)!.unknown}',
  overflow: TextOverflow.ellipsis,
),
Adding semantics to your Flutter app and setting explicitChildNodes: true can enhance accessibility and allow for more effective UI testing. Here’s a step-by-step guide to help you achieve that.
Adding Semantics
The Semantics widget in Flutter is used to annotate widgets with a description of their meaning, which is essential for accessibility purposes. When you wrap a widget with Semantics, you can provide a meaningful label to describe the widget.
Configuring explicitChildNodes for Precise UI Testing
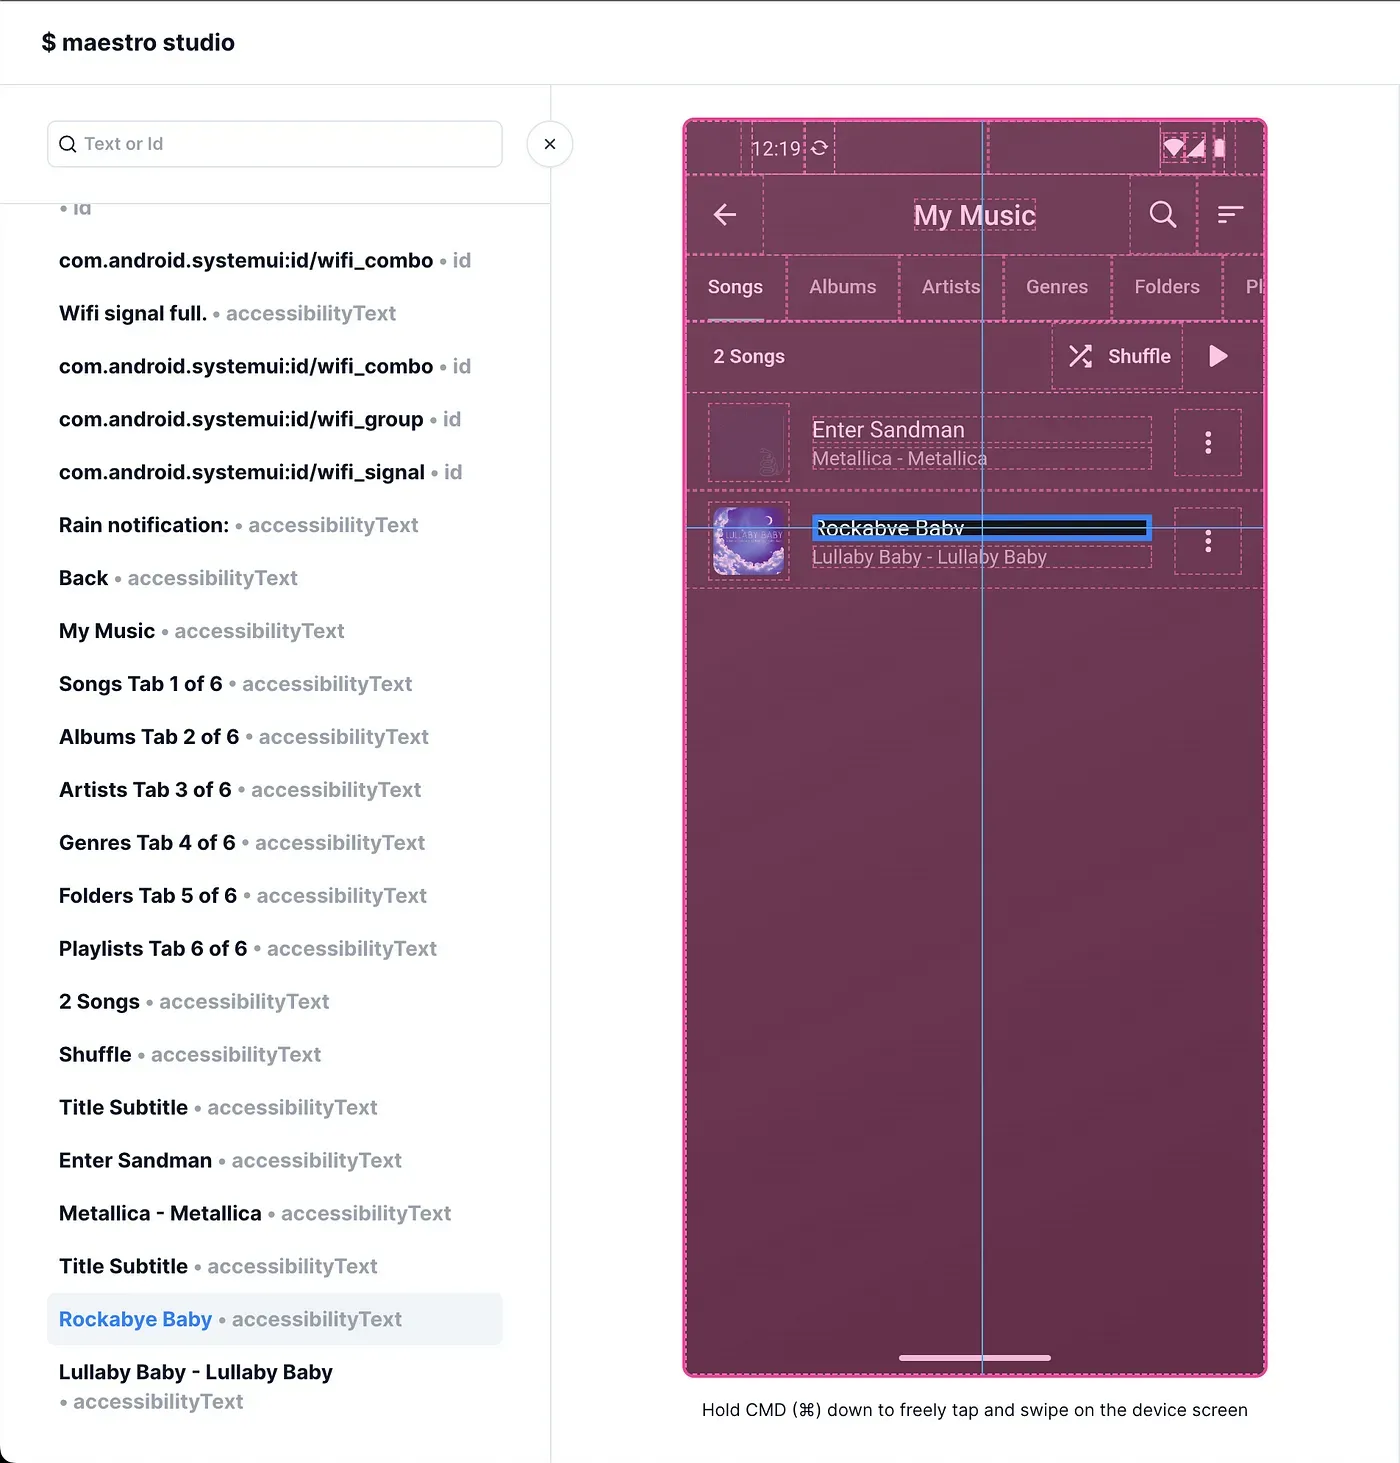
The explicitChildNodes property when set to true, directs Flutter to treat each child of the Semantics widget as a separate entity in the semantic tree, instead of merging them into one node. This is beneficial for UI testing as it allows for more precise interaction and verification of individual widgets within a complex widget tree.
Note the blue box.
When both a semanticsLabel and a text label are present, the semanticsLabel is given priority.
Code After Configuration:
 title: Semantics( // ADDED
  explicitChildNodes: true, // ADDED
  child: Text(
    widget.songs[index].title.trim() != ''
        ? widget.songs[index].title
        : widget.songs[index].displayNameWOExt,
    overflow: TextOverflow.ellipsis,
    semanticsLabel: "${widget.songs[index].title}", // ADDED
  ),
),
subtitle: Semantics( // ADDED
  explicitChildNodes: true, // ADDED
  child: Text(
    '${widget.songs[index].artist?.replaceAll('<unknown>', 'Unknown') ?? AppLocalizations.of(context)!.unknown} - ${widget.songs[index].album?.replaceAll('<unknown>', 'Unknown') ?? AppLocalizations.of(context)!.unknown}',
    overflow: TextOverflow.ellipsis,
  ),
),
Sample Maestro UI Test
To ensure our setup is functioning correctly, let’s create a basic Maestro Flow.
- Setting up the Test
Create a flow.yaml file in the .maestro directory at the root of your project. Add the following content:
appId: com.shadow.blackhole
---
- launchApp:
    clearState: true
- assertVisible: "Skip"
2. Run the Test
Go to your terminal and execute:
maestro test .maestro/flow.yaml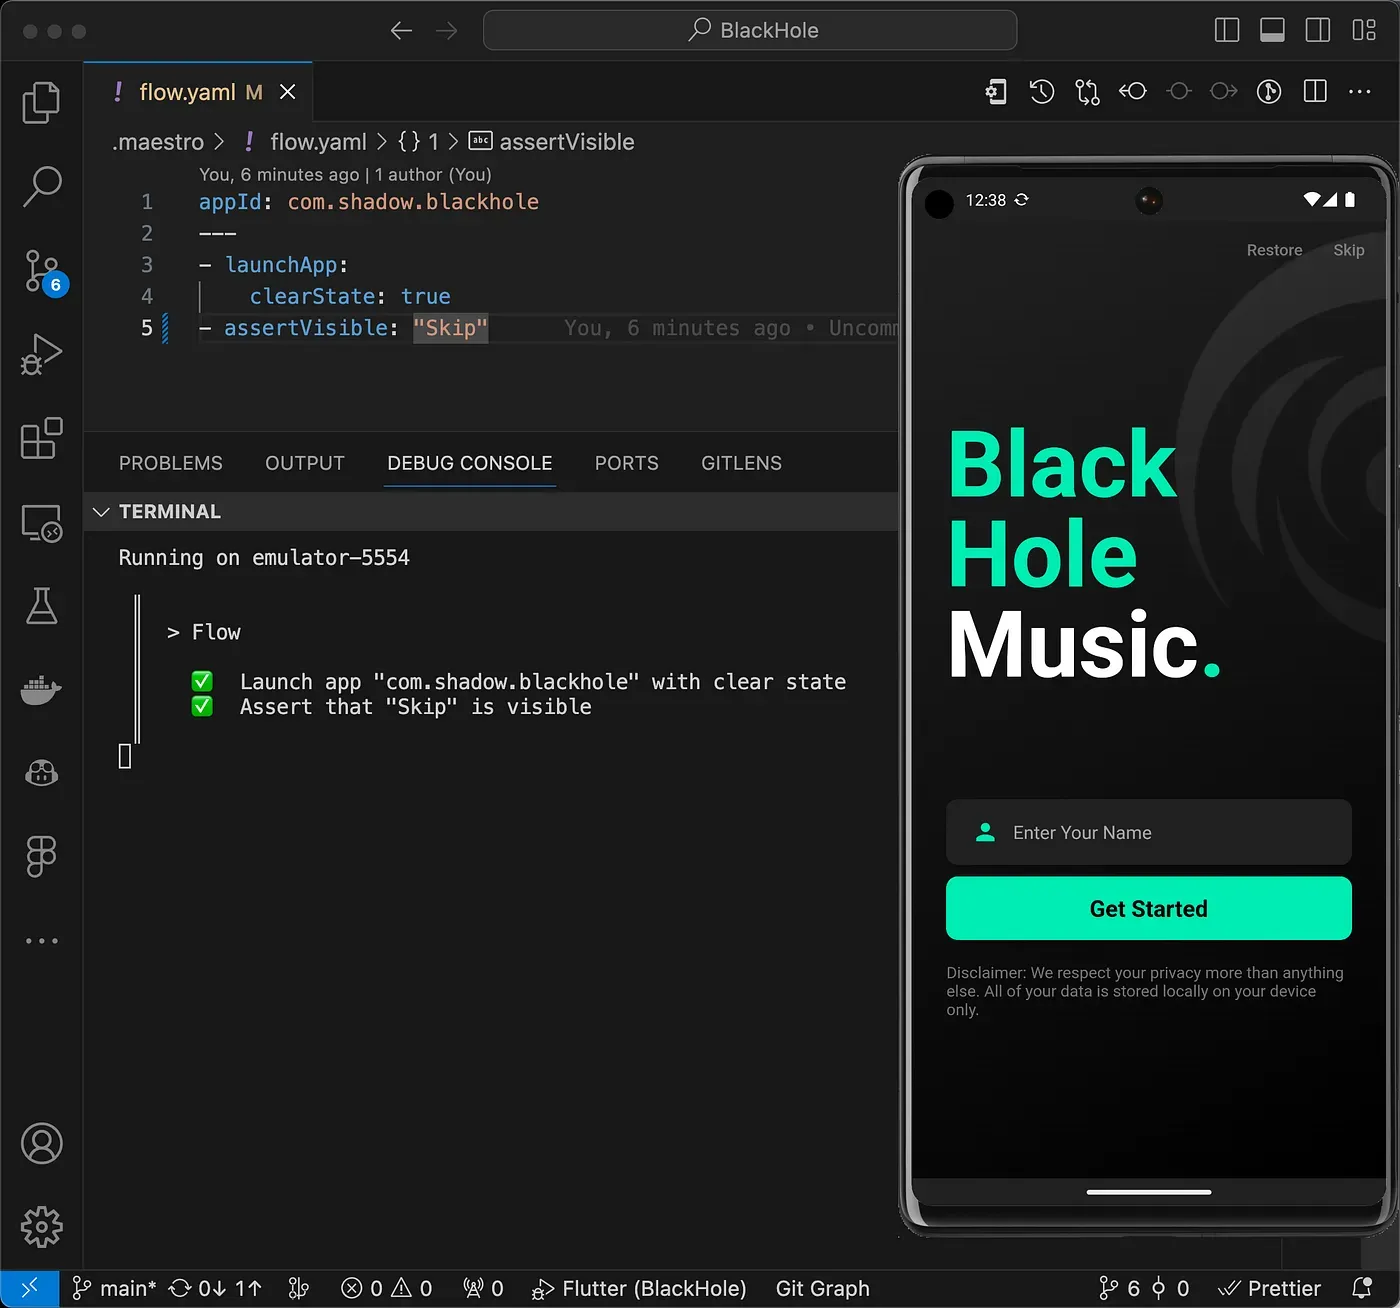
Stay Tuned
The next part of the series will cover end-to-end UI testing of a Music App made in Flutter!
References
Maestro and Flutter:
Blackhole Music App Source Code:
Maestro Studio:
🎹