Maestro Cloud is compatible with all CI systems including CircleCI.
The following guide will help you setup Maestro Cloud in CircleCI to easily:
- Upload your builds and flows to Maestro Cloud
- Get the flow results (pass/fail)
Prerequisites
Create a Maestro Cloud account
This doesn’t cost anything up front and you’ll have $10 of free credit each month to play around with the platform.
If you haven’t already, start by creating a Maestro Cloud account:
Create a Maestro Cloud Account
Get your API key
Once you create your account, you’ll be able to access your api key.
- Log in to Maestro Cloud Console, click on your username in bottom left corner and click on View API Key
- Copy your API Key.
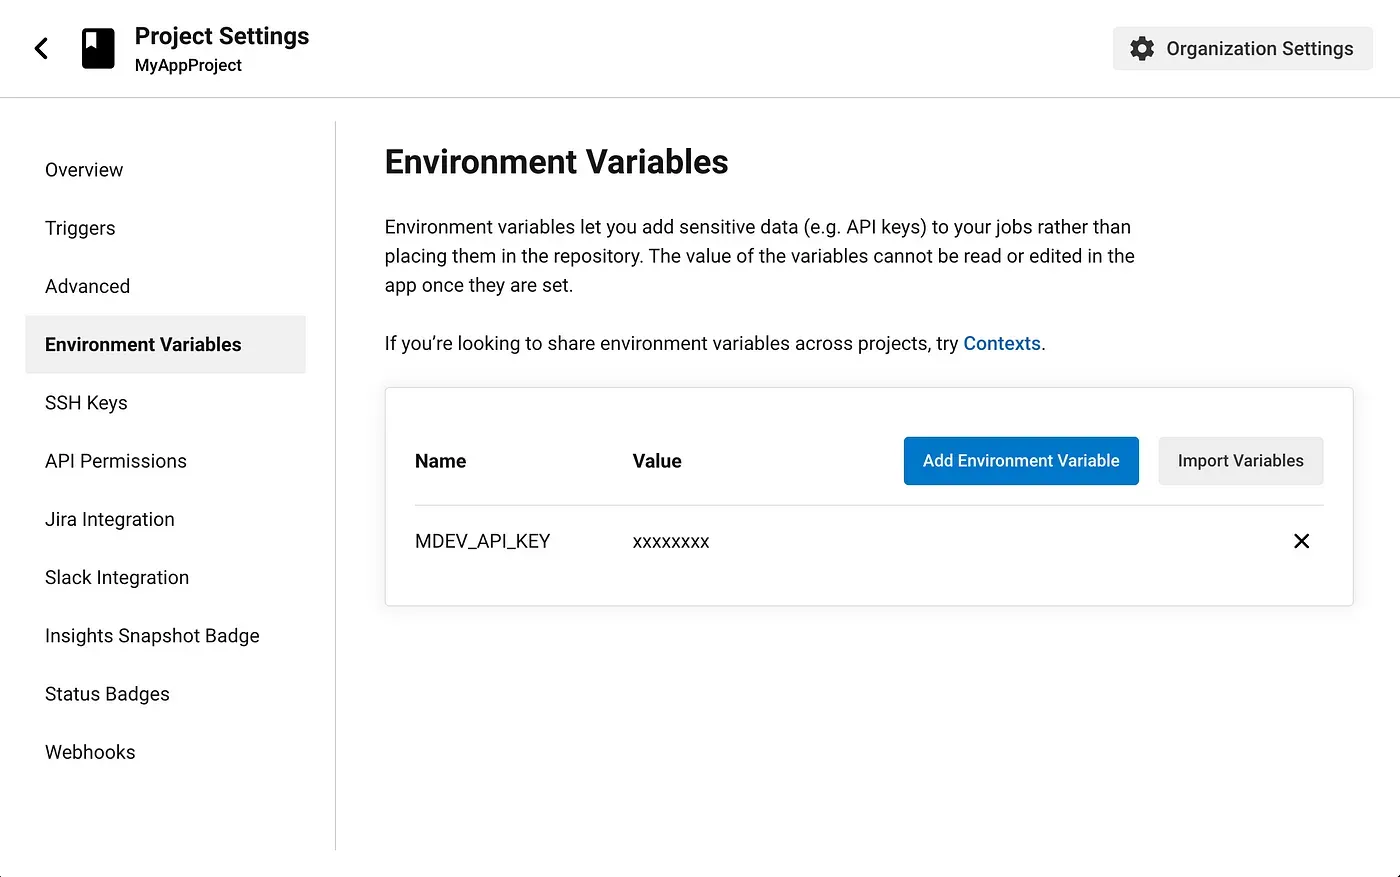
Save API key in your repository
In order to use the Maestro Cloud Pipe, you’ll need to add the API key as a secret ENV in your Project Settings
- Go to your Project -> Project Settings -> Environment Variables
- Save your API Key
Commit your Maestro Flows to your repository
Create a .maestro/ directory at the root of your repository and commit your Flows there:
<root>
├── .maestro/
│   ├── Login.yaml
│   ├── Add to Cart.yaml
│   └── Search.yaml
It’s common to have some Flow files that are only meant to be executed as part of another Flow via the runFlow command. These “subflows” can be nested under a subdirectory to prevent them from running as a top-level Flow.
It’s common to have some Flow files that are only meant to be executed as part of another Flow via the runFlow command. These “subflows” can be nested under a subdirectory to prevent them from running as a top-level Flow.
<root>
├── .maestro/
│   ├── subflows/
│   │   └── MySubflow.yaml
│   ├── Login.yaml
│   ├── Add to Cart.yaml
│   └── Search.yaml
Add Maestro Cloud Upload Job
Once everything is setup you can integrate maestro by adding another job in your .circleci/config.yml
aestro-upload:
    docker:
      - image: cimg/openjdk:19.0.1
    steps:
      - attach_workspace:
          at: .
      - run:
          name: Download and run maestro
          command: |
            curl -Ls "https://get.maestro.mobile.dev" | bash
            export PATH="$PATH":"$HOME/.maestro/bin"
            maestro cloud \
            --apiKey $MDEV_API_KEY \
            path_to_my_app .maestro
Note: Maestro needs access to your flows and app binary, so make sure to either use persist_to_workspace or download the assets when running the upload job.
Configure
You can configure the upload parameters by modifying the maestro cloud command. For example:
maestro cloud \
--apiKey $MDEV_API_KEY \
--name "Custom upload name" \
--async \
-e EMAIL="some@email.com"
-e PASSWORD="some-password"
/tmp/app.apk /tmp/flows
You can find all available options by running the Maestro CLI command locally
> maestro cloudUse specific version
To use a specific Maestro version simply update the curl command in your job
export MAESTRO_VERSION={version}; curl -Ls "https://get.maestro.mobile.dev" | bashExample: Android
The following config.yml will:
- Build an android app
- Save the workspace and output apk
- Upload your flows and apk to Maestro Cloud
version: 2.1
orbs:
  android: circleci/android@2.1.2
jobs:
  build-android:
    executor:
      name: android/android-docker
      tag: 2022.08.1
    steps:
      - checkout
      - android/restore-gradle-cache
      - run:
          name: Assemble debug build
          command: |
            ./gradlew :app:assembleDebug
      - persist_to_workspace:
          root: .
          paths:
            - .
  maestro-upload:
    docker:
      - image: cimg/openjdk:19.0.1
    steps:
      - attach_workspace:
          at: .
      - run:
          name: Upload to Maestro Cloud
          command: |
            curl -Ls "https://get.maestro.mobile.dev" | bash
            export PATH="$PATH":"$HOME/.maestro/bin"
            maestro cloud \
            --apiKey $MDEV_API_KEY \
            app/build/outputs/apk/debug/app-debug.apk .maestro
workflows:
  build-and-upload:
    jobs:
      - build-android
      - maestro-upload:
          requires:
            - build-android
Example: iOS
The following config.yml will:
- Build an iOS app
- Save the workspace and output
your_ios_app.app - Upload your flows and
your_ios_app.appbinary to Maestro Cloud
version: 2.1
jobs:
build-ios:
macos:
xcode: 13.3.1
environment:
XCODE_VERSION: "Xcode-13.3.1"
steps:
- checkout
- run:
name: Switch xcode
command: sudo xcode-select --switch /Applications/$XCODE_VERSION.app
- run:
name: Build iOS app
command: |
XCODE_PATH=$(xcode-select -p)
SIMULATOR_SDKS_AVAILABLE=$(find "$XCODE_PATH/Platforms/iPhoneSimulator.platform/Developer/SDKs/" -type l -maxdepth 1)
SIMULATOR_SDK_PATH=$(echo "$SIMULATOR_SDKS_AVAILABLE" | head -n1)
SIMULATOR_SDK=$(basename -s .sdk -a "$SIMULATOR_SDK_PATH" | awk '{print tolower($0)}')
mkdir build
xcodebuild build \
-sdk "$SIMULATOR_SDK" \
-destination 'platform=iOS Simulator' \
CONFIGURATION_BUILD_DIR=build
- persist_to_workspace:
root: .
paths:
- .
maestro-upload:
docker:
- image: cimg/openjdk:19.0.1
steps:
- attach_workspace:
at: .
- run:
name: Download and run maestro
command: |
curl -Ls "https://get.maestro.mobile.dev" | bash
export PATH="$PATH":"$HOME/.maestro/bin"
maestro cloud \
--apiKey $MDEV_API_KEY \
build/MyApp.app .maestro
workflows:
build-and-upload:
jobs:
- build-ios
- maestro-upload:
requires:
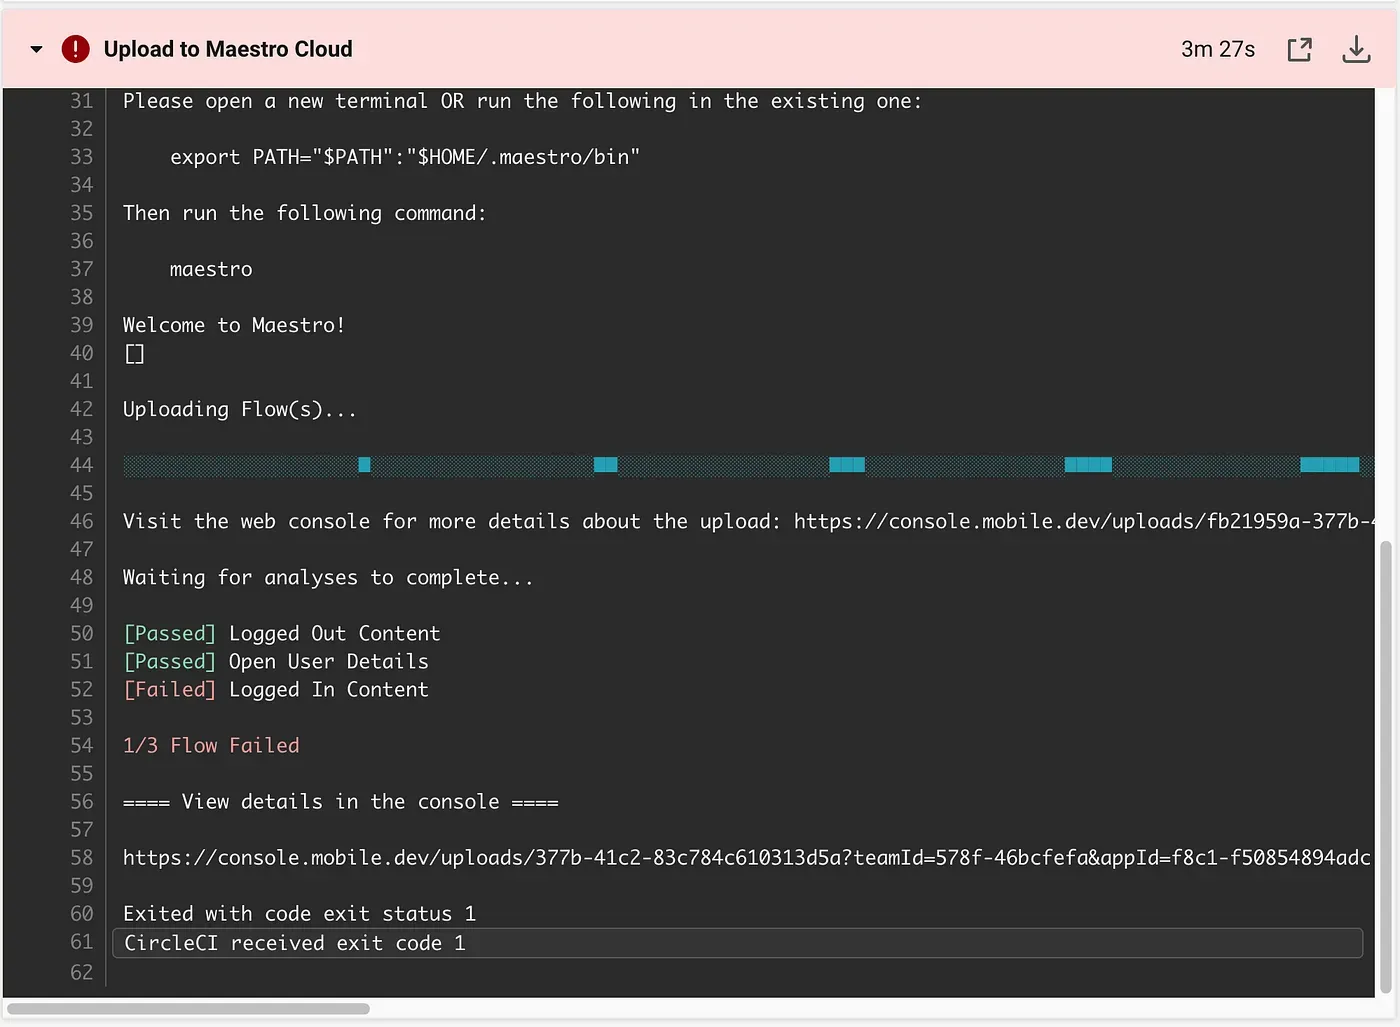
- build-iosThat’s it!
If everything was setup correctly, you should be seeing results in your workflow jobs