This blog will provide a brief introduction to setting up Maestro UI tests for an iOS application using Bitrise CI/CD and Maestro Cloud. We will walk through creating a sample project, setting up Bitrise, Maestro Cloud and integrating them.
✢ Setup iOS UI tests on Bitrise with Maestro Cloud
— maestro.dev (@maestro__dev) May 9, 2023
How to guide → https://t.co/9yANonjsiG
Integrating Maestro with @bitrise streamlines the process of UI testing an iOS app in CI/CD. pic.twitter.com/DE0J40MsAY
Table of Contents
- Creating iOS App
- Setting up Bitrise
- Setting up Maestro Cloud
- Integrating Maestro with Bitrise
Creating iOS App
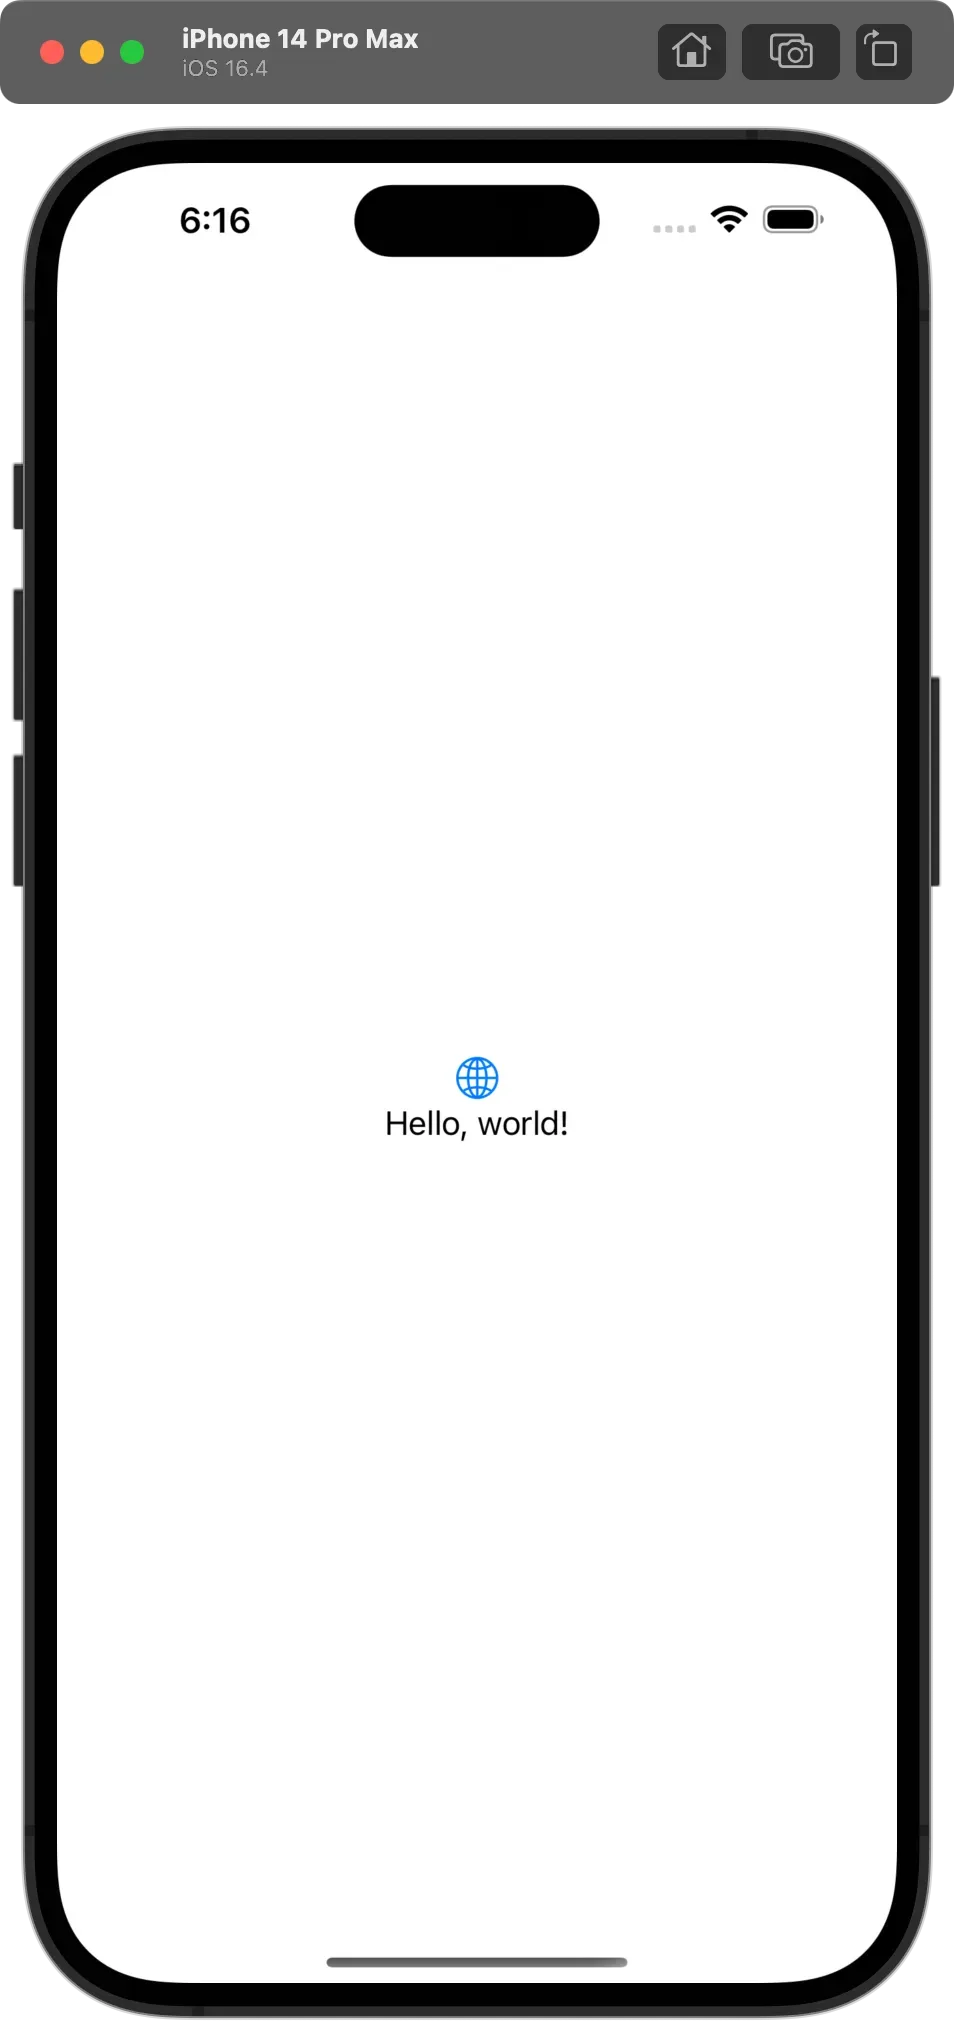
For demo purposes, we will create a Hello World iOS app with SwiftUI. Maestro has support for both UIKit and SwiftUI. Learn more.
1. Open Xcode and create a new project by following these steps: File -> New -> Project -> iOS App -> SwiftUI Interface -> Create

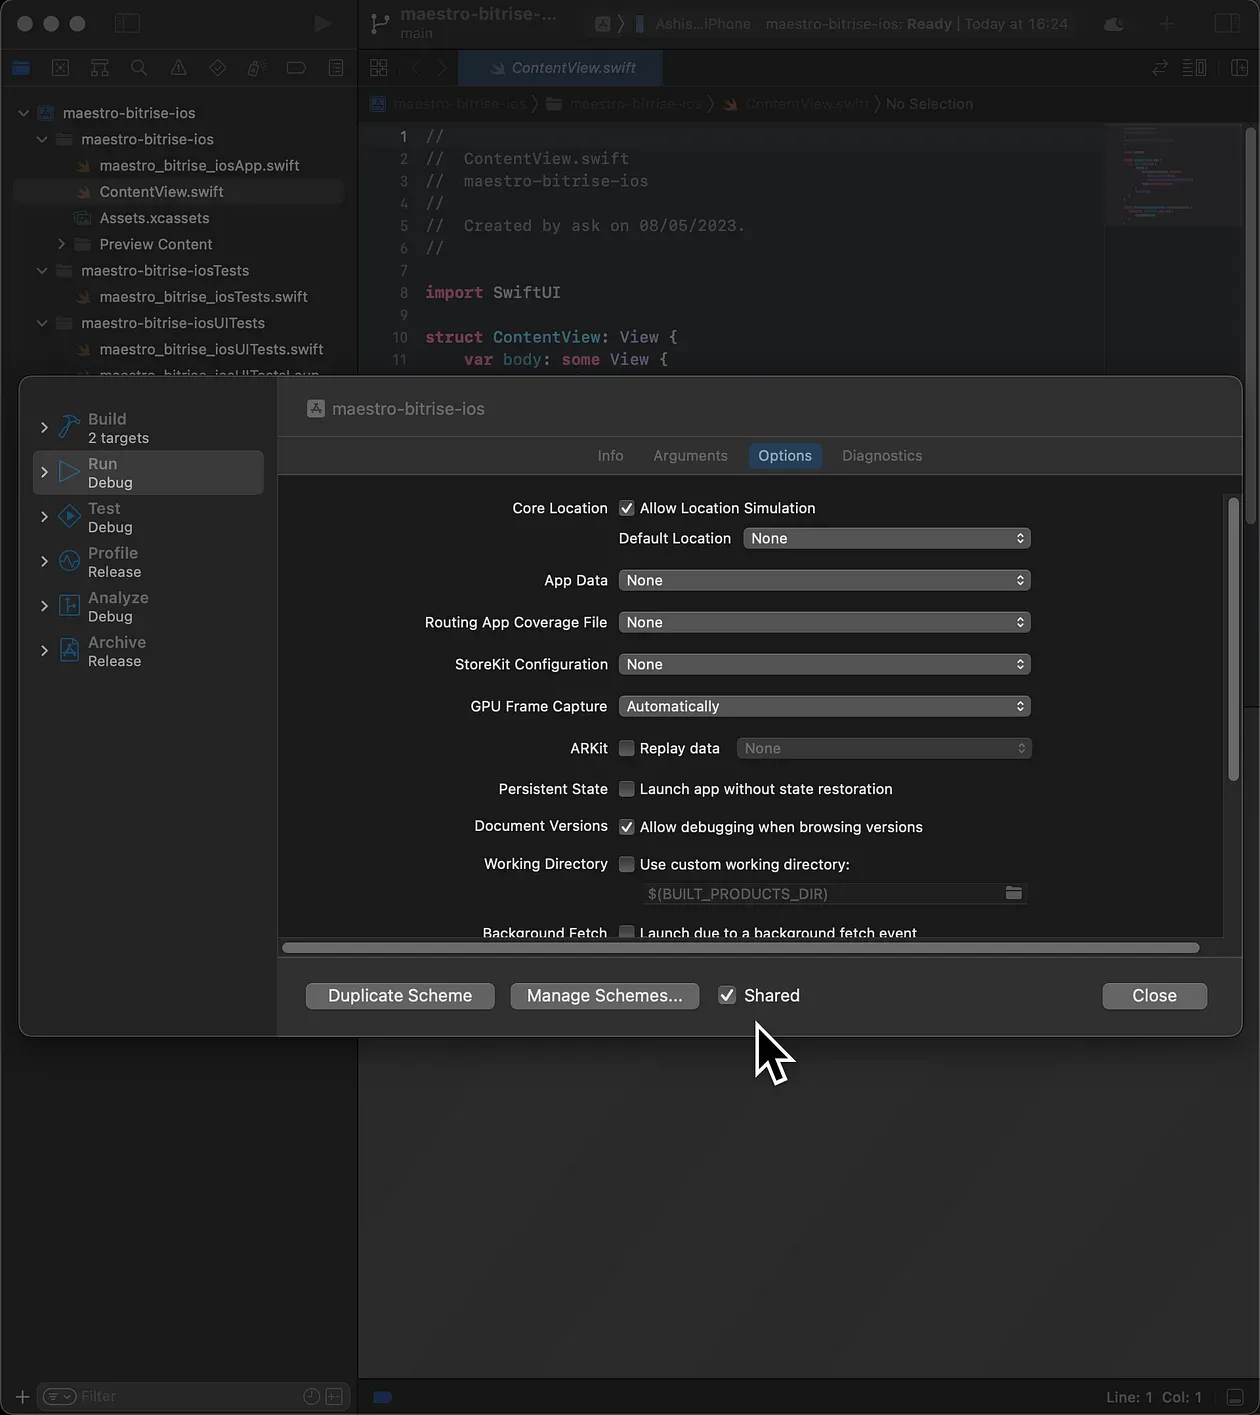
2. Go to Edit Scheme and make sure your scheme is shared.
3. Upload your new Xcode iOS app project to GitHub.
Flows will be executed on iOS simulators in Maestro Cloud running iOS version 15.5 with the device model set as iPhone 11. Please check your Minimum Deployment Target in Xcode and set it accordingly.
Setting up Bitrise
1. Go to Bitrise and add the GitHub repo of your iOS app.
2. Ensure your scheme is detected.
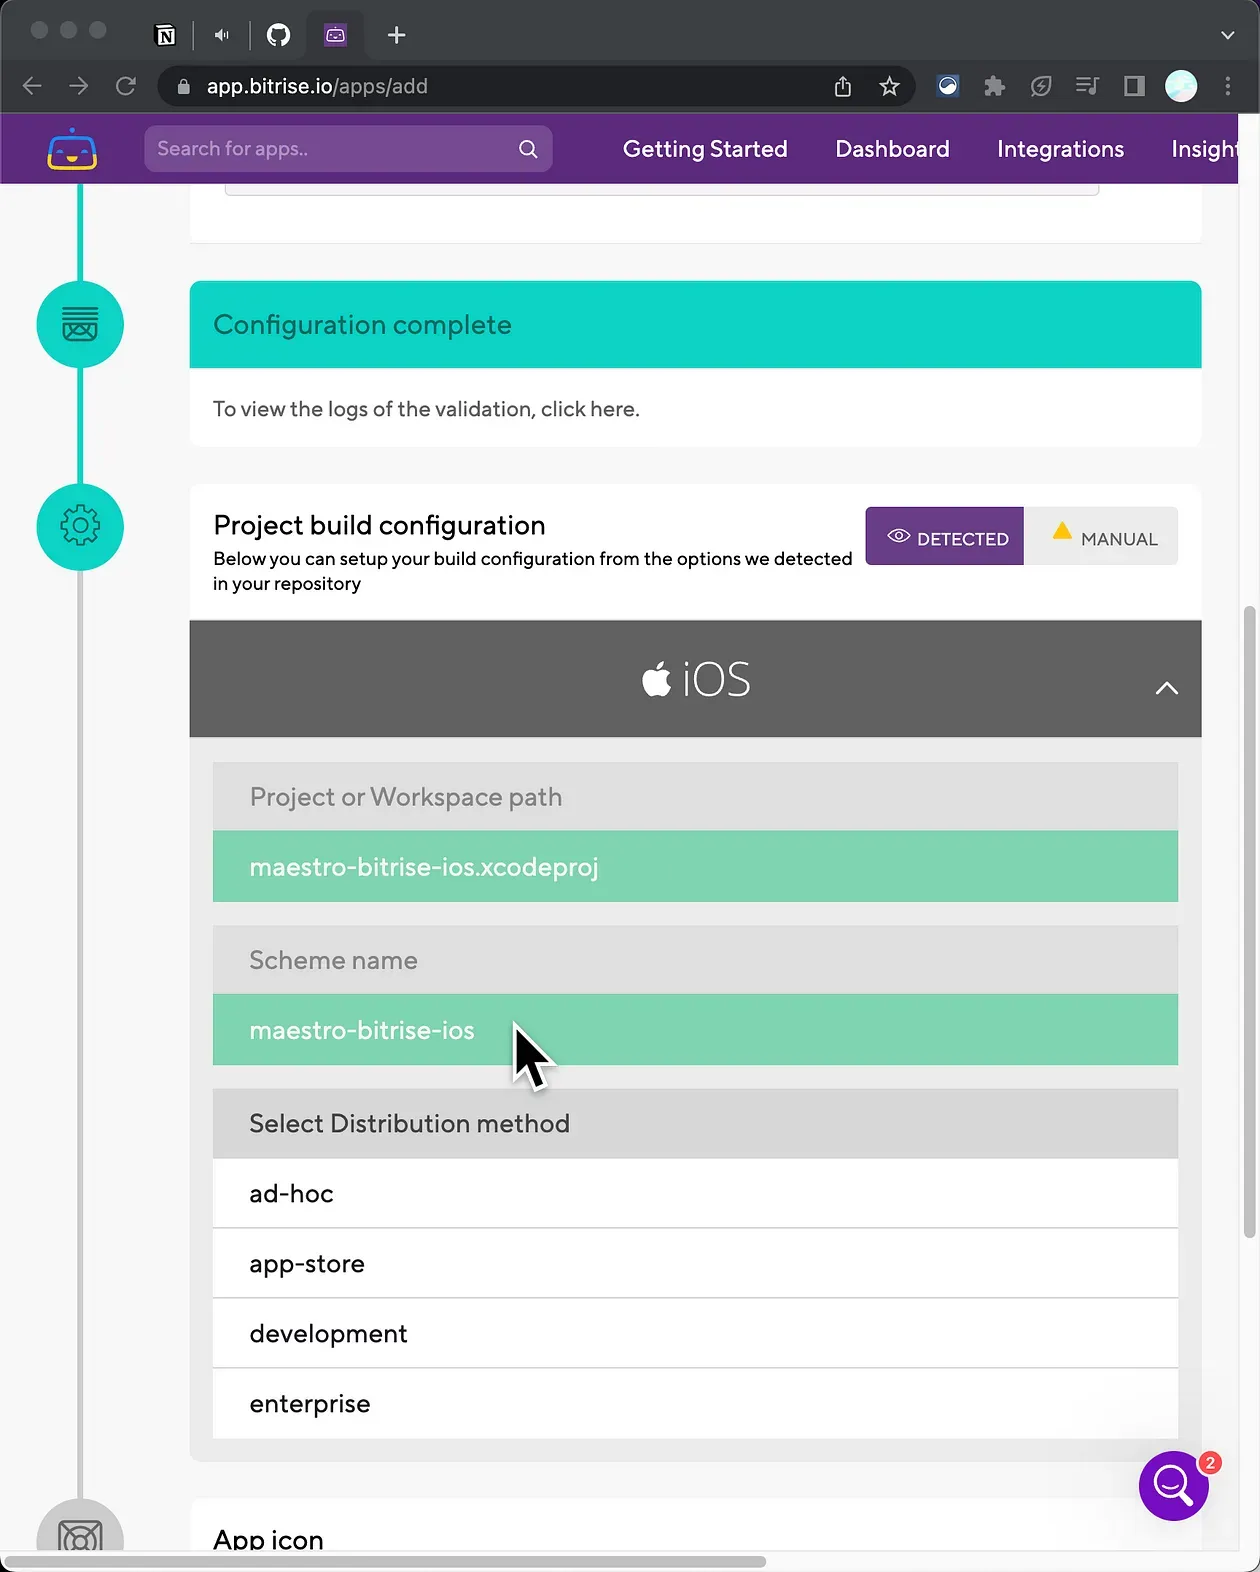
3. Select development as the distribution method.
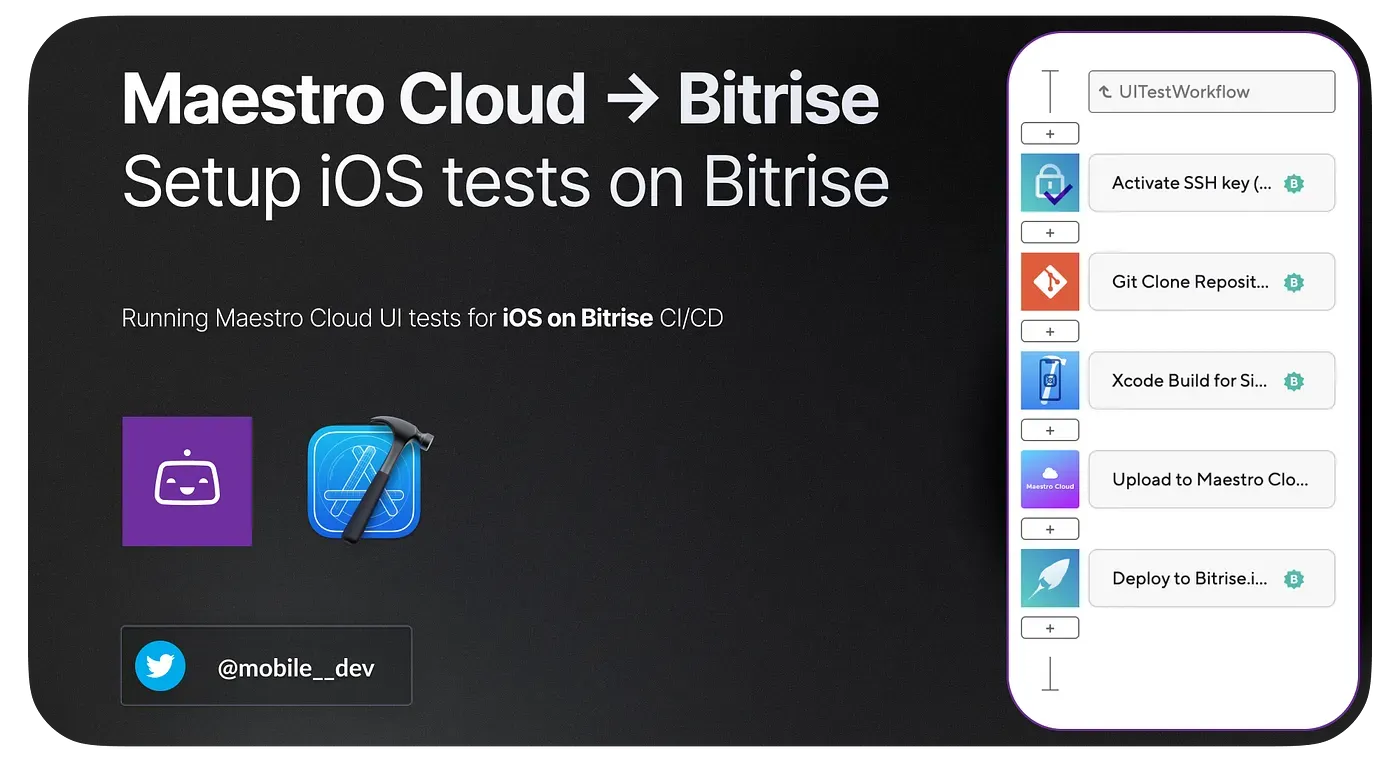
4. Go to Edit Workflow → bitrise.yml section and paste the following code
bitrise.yml file:
---
format_version: '11'
default_step_lib_source: https://github.com/bitrise-io/bitrise-steplib.git
project_type: ios
workflows:
  UITestWorkflow:
    description: |
      The workflow executes the tests. The *retry_on_failure* test repetition mode is enabled.

      Next steps:
      - Check out [Getting started with iOS apps](https://devcenter.bitrise.io/en/getting-started/getting-started-with-ios-apps.html).
    steps:
    - activate-ssh-key@4: {}
    - git-clone@8: {}
    - xcode-build-for-simulator@0:
        inputs:
        - simulator_device: iPhone 14
meta:
  bitrise.io:
    stack: osx-xcode-14.3.x-ventura
    machine_type_id: g2-m1.4core
app:
  envs:
  - opts:
      is_expand: false
    BITRISE_PROJECT_PATH: maestro-bitrise-ios.xcodeproj
  - opts:
      is_expand: false
    BITRISE_SCHEME: maestro-bitrise-ios
  - opts:
      is_expand: false
    BITRISE_DISTRIBUTION_METHOD: development
  - opts:
      is_expand: false
    PROJECT_LOCATION: "."
trigger_map:
- push_branch: main
  workflow: UITestWorkflow
This bitrise.yml file is the main configuration file that defines the workflow to execute when certain triggers are met, such as a push to the main branch. xcode-build-for-simulator: This step builds the iOS app.
Setting up Maestro Cloud
To set up the Maestro Cloud with your Bitrise project, follow these steps:
1. Visit the Maestro Cloud Console and log in.
2. Once logged in, navigate to the Quick Start section. To integrate Maestro Cloud with Bitrise, follow the instructions in the Integrate into CI section.
3. Copy the API key of your Maestro Cloud account. You will need this later for Bitrise integration.
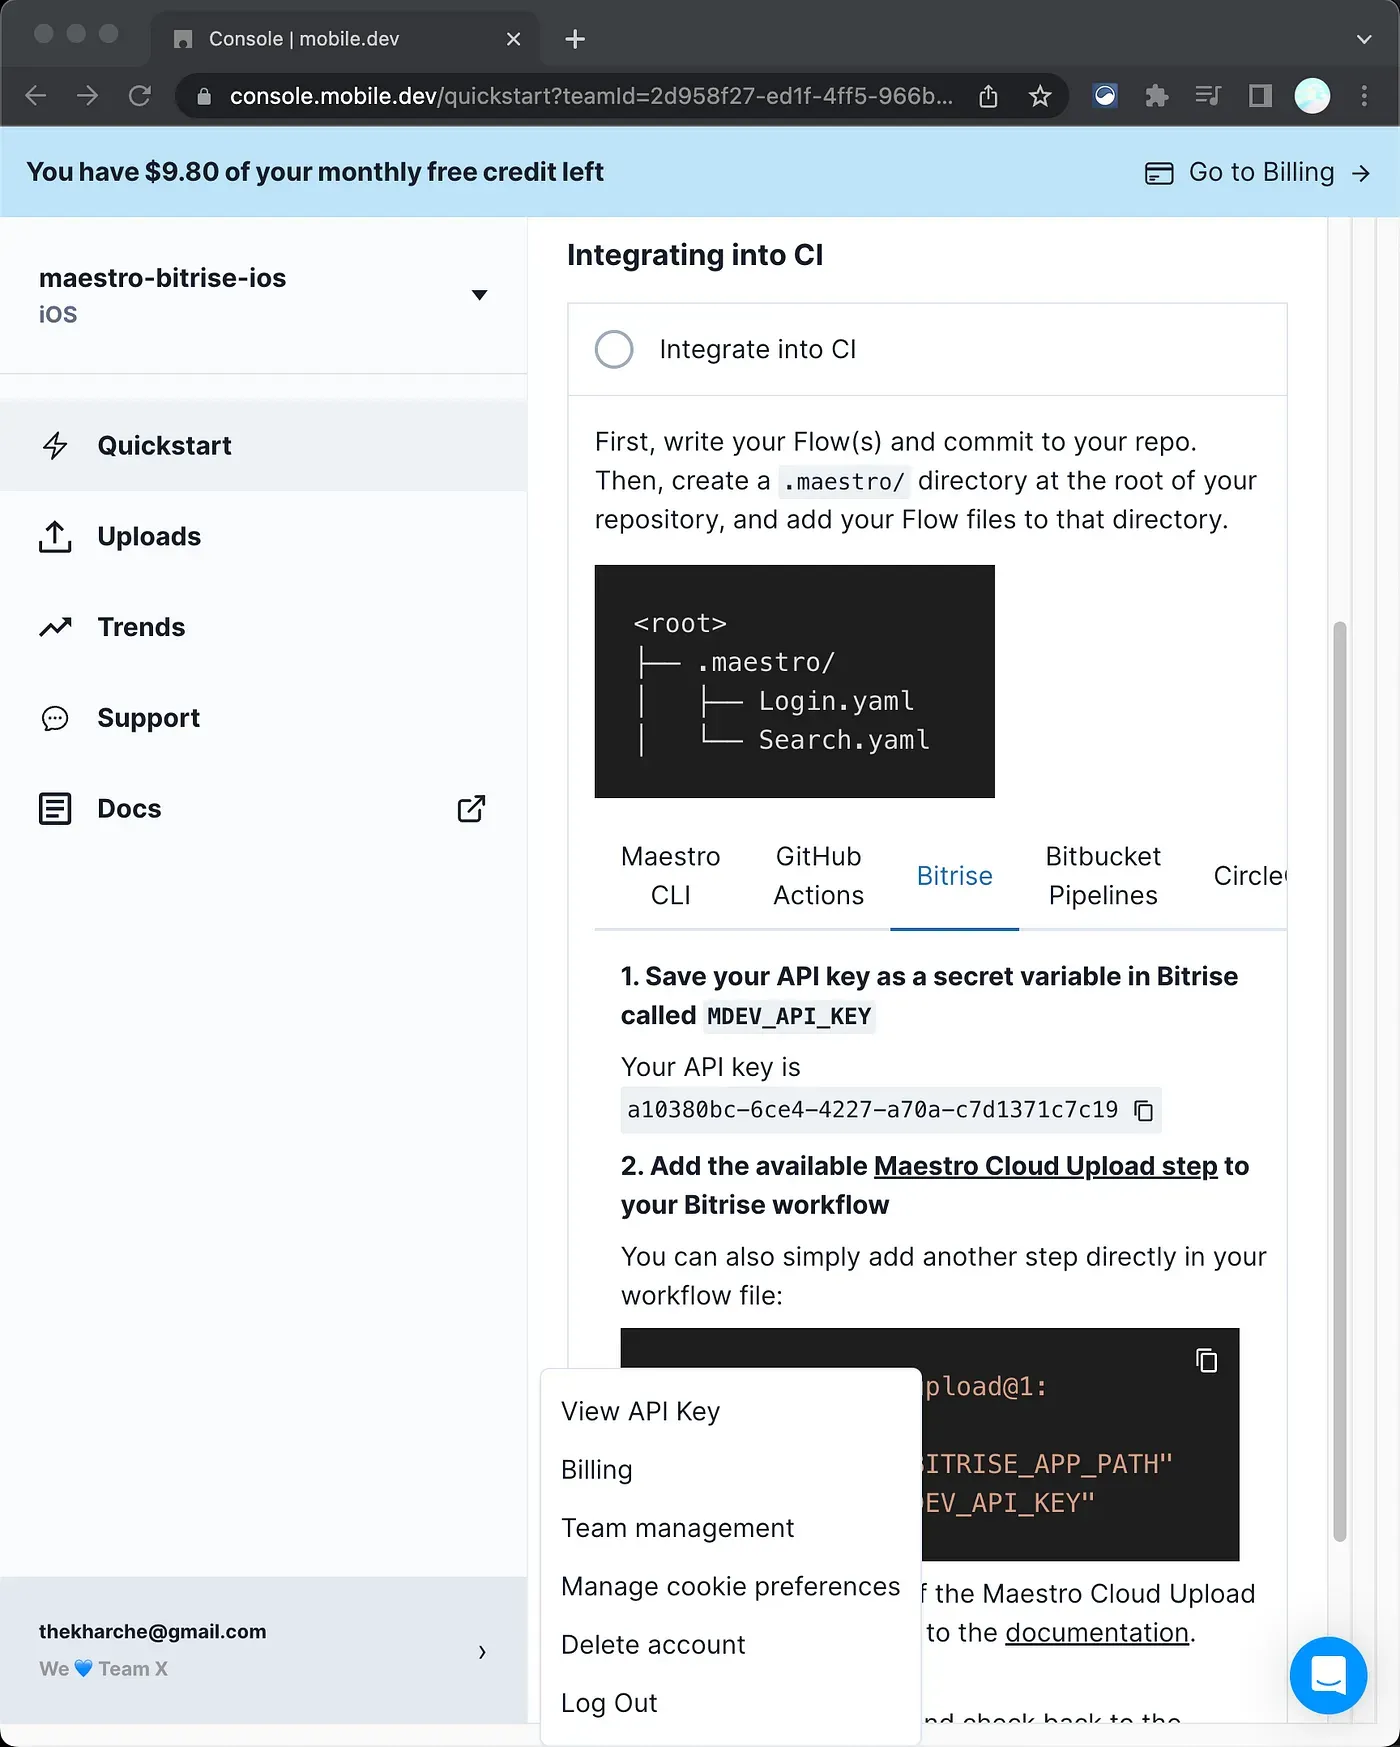
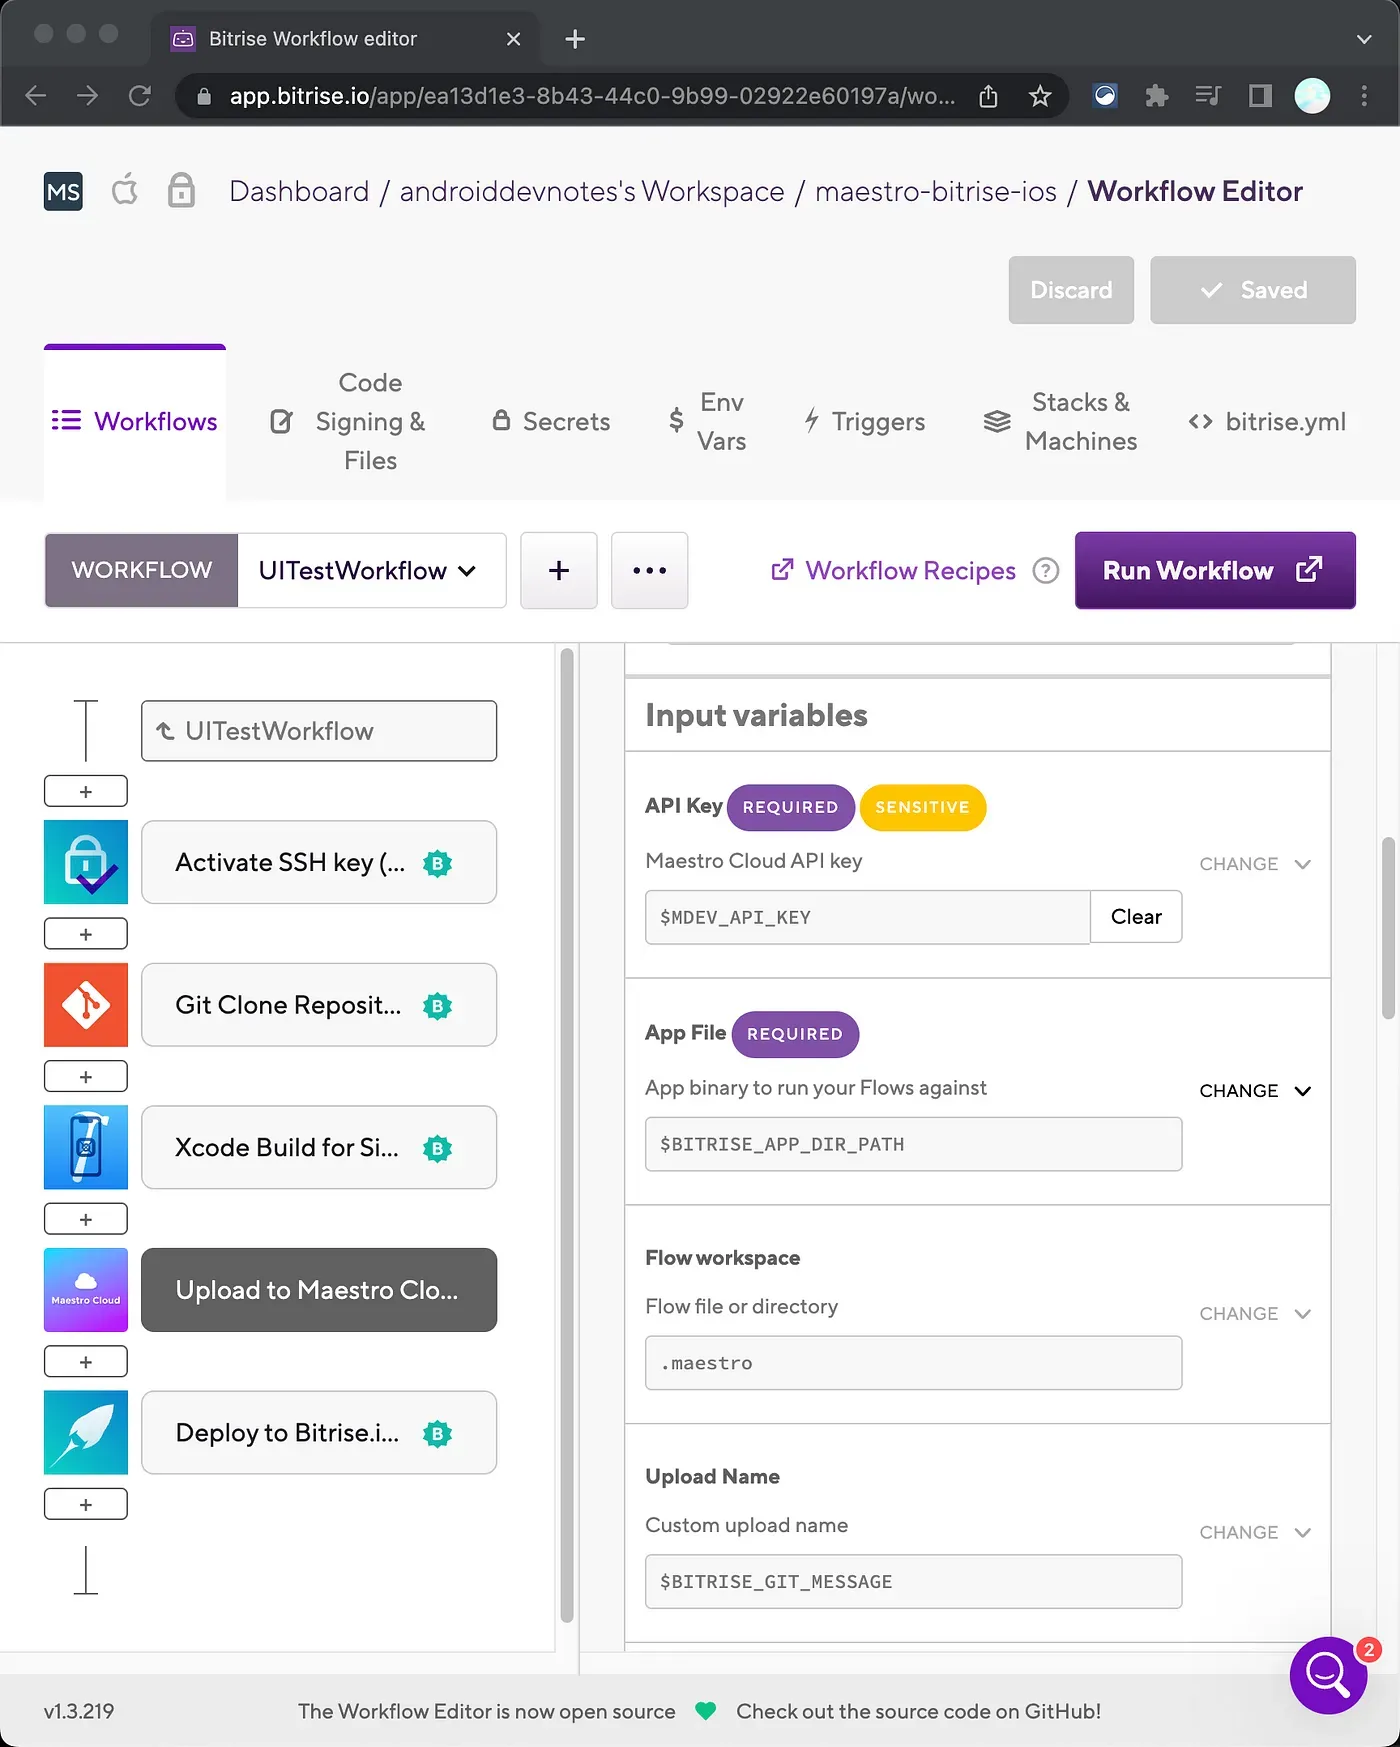
4. Go to your Bitrise project’s Workflow Editor and add the Maestro Cloud API key as a secret environment variable.
5. In the Bitrise project’s workflow, add the Maestro Upload to Cloud step, and provide the following required values:
- Maestro Cloud API Key: Use the secret environment variable you created in step 4
- iOS app directory path: This path is generated from the Xcode build for simulator step
Integrating Maestro with Bitrise
1. Go back to your Xcode project, and create a directory named .maestro, and create a new file flow.yaml inside it.
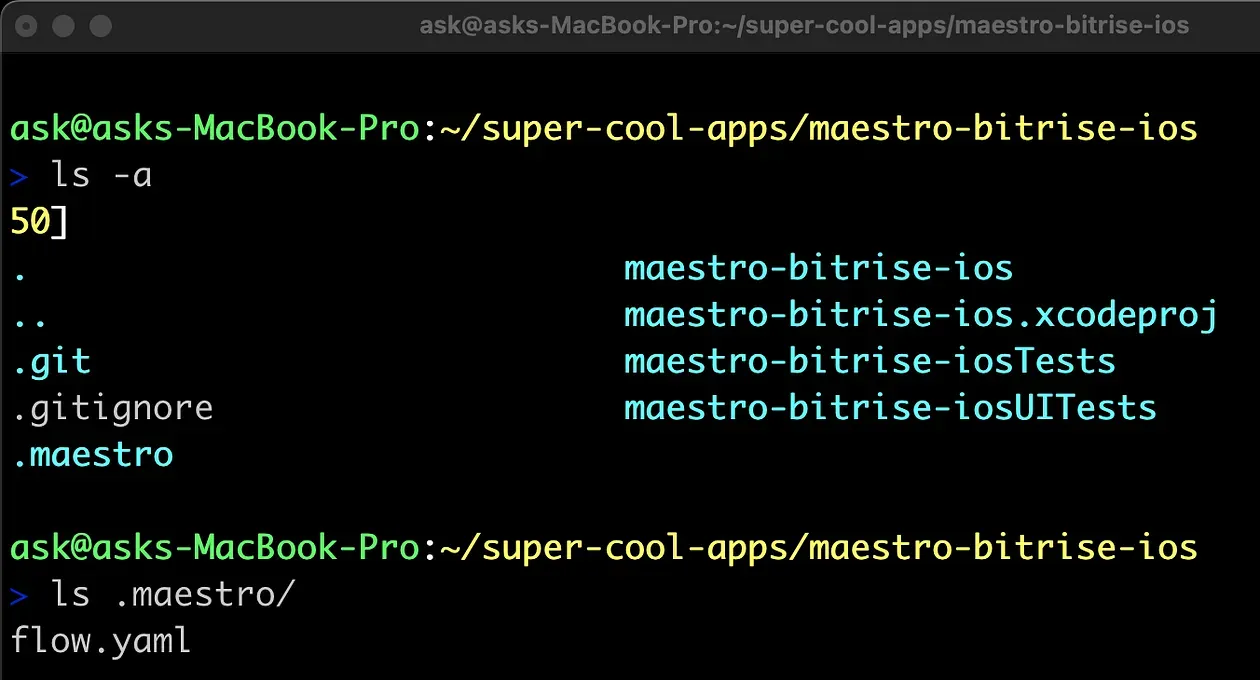
2. In flow.yaml, paste the following sample test:
appId: example.maestro-bitrise-ios
---
- launchApp # launches the app
- assertVisible:
    text: ".*Hello.*"
- assertVisible:
    text: ".*World.*"
3. Commit and push the changes to your GitHub repository. This will trigger a build on Bitrise. In our bitrise.yml file, we have a setup to trigger builds on every push to main branch.
4. To manually trigger a build, click on the Start/schedule build button on your Bitrise project page.
5. Observe the build process on Bitrise, paying particular attention to the logs to see what each step is executing.
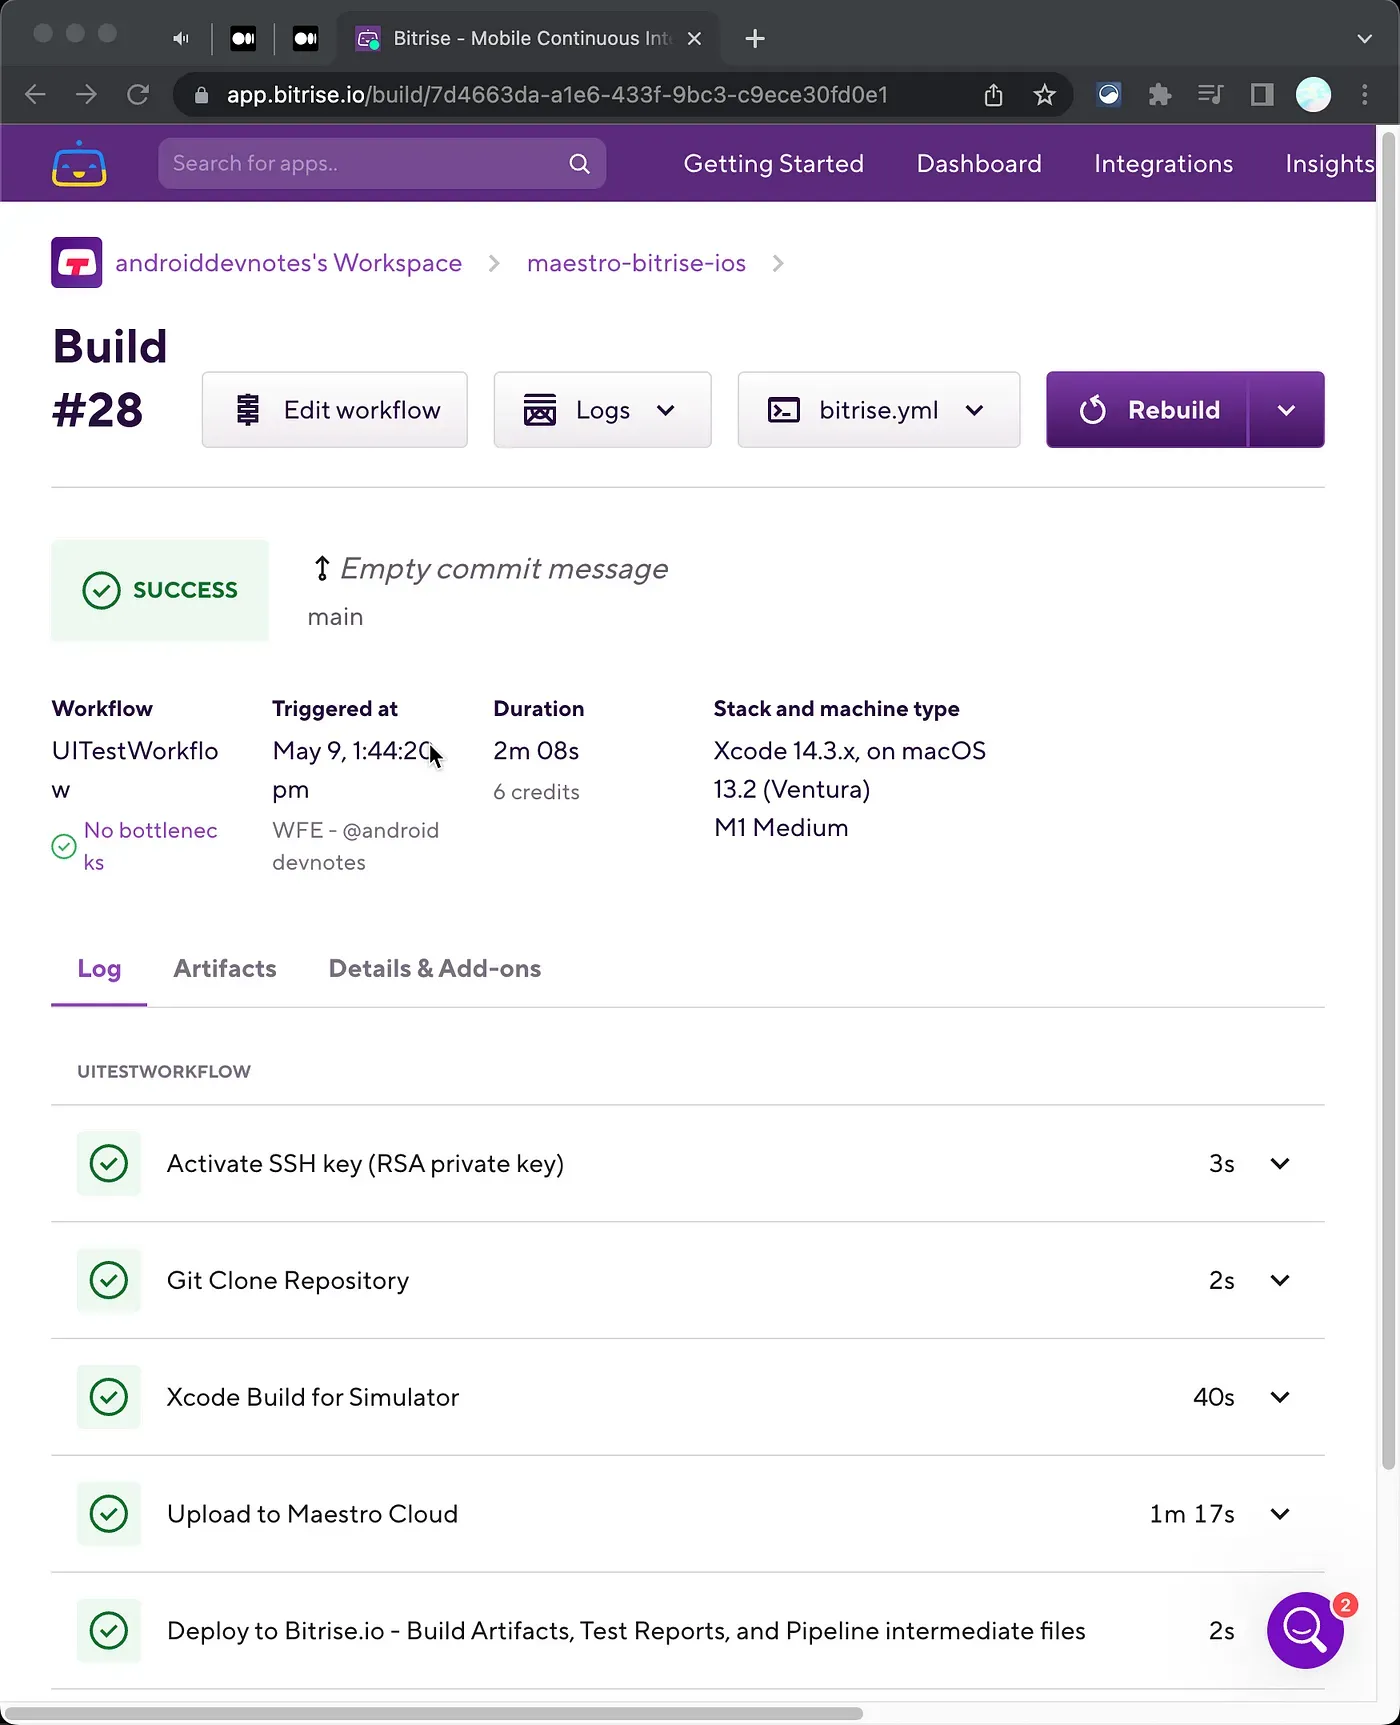
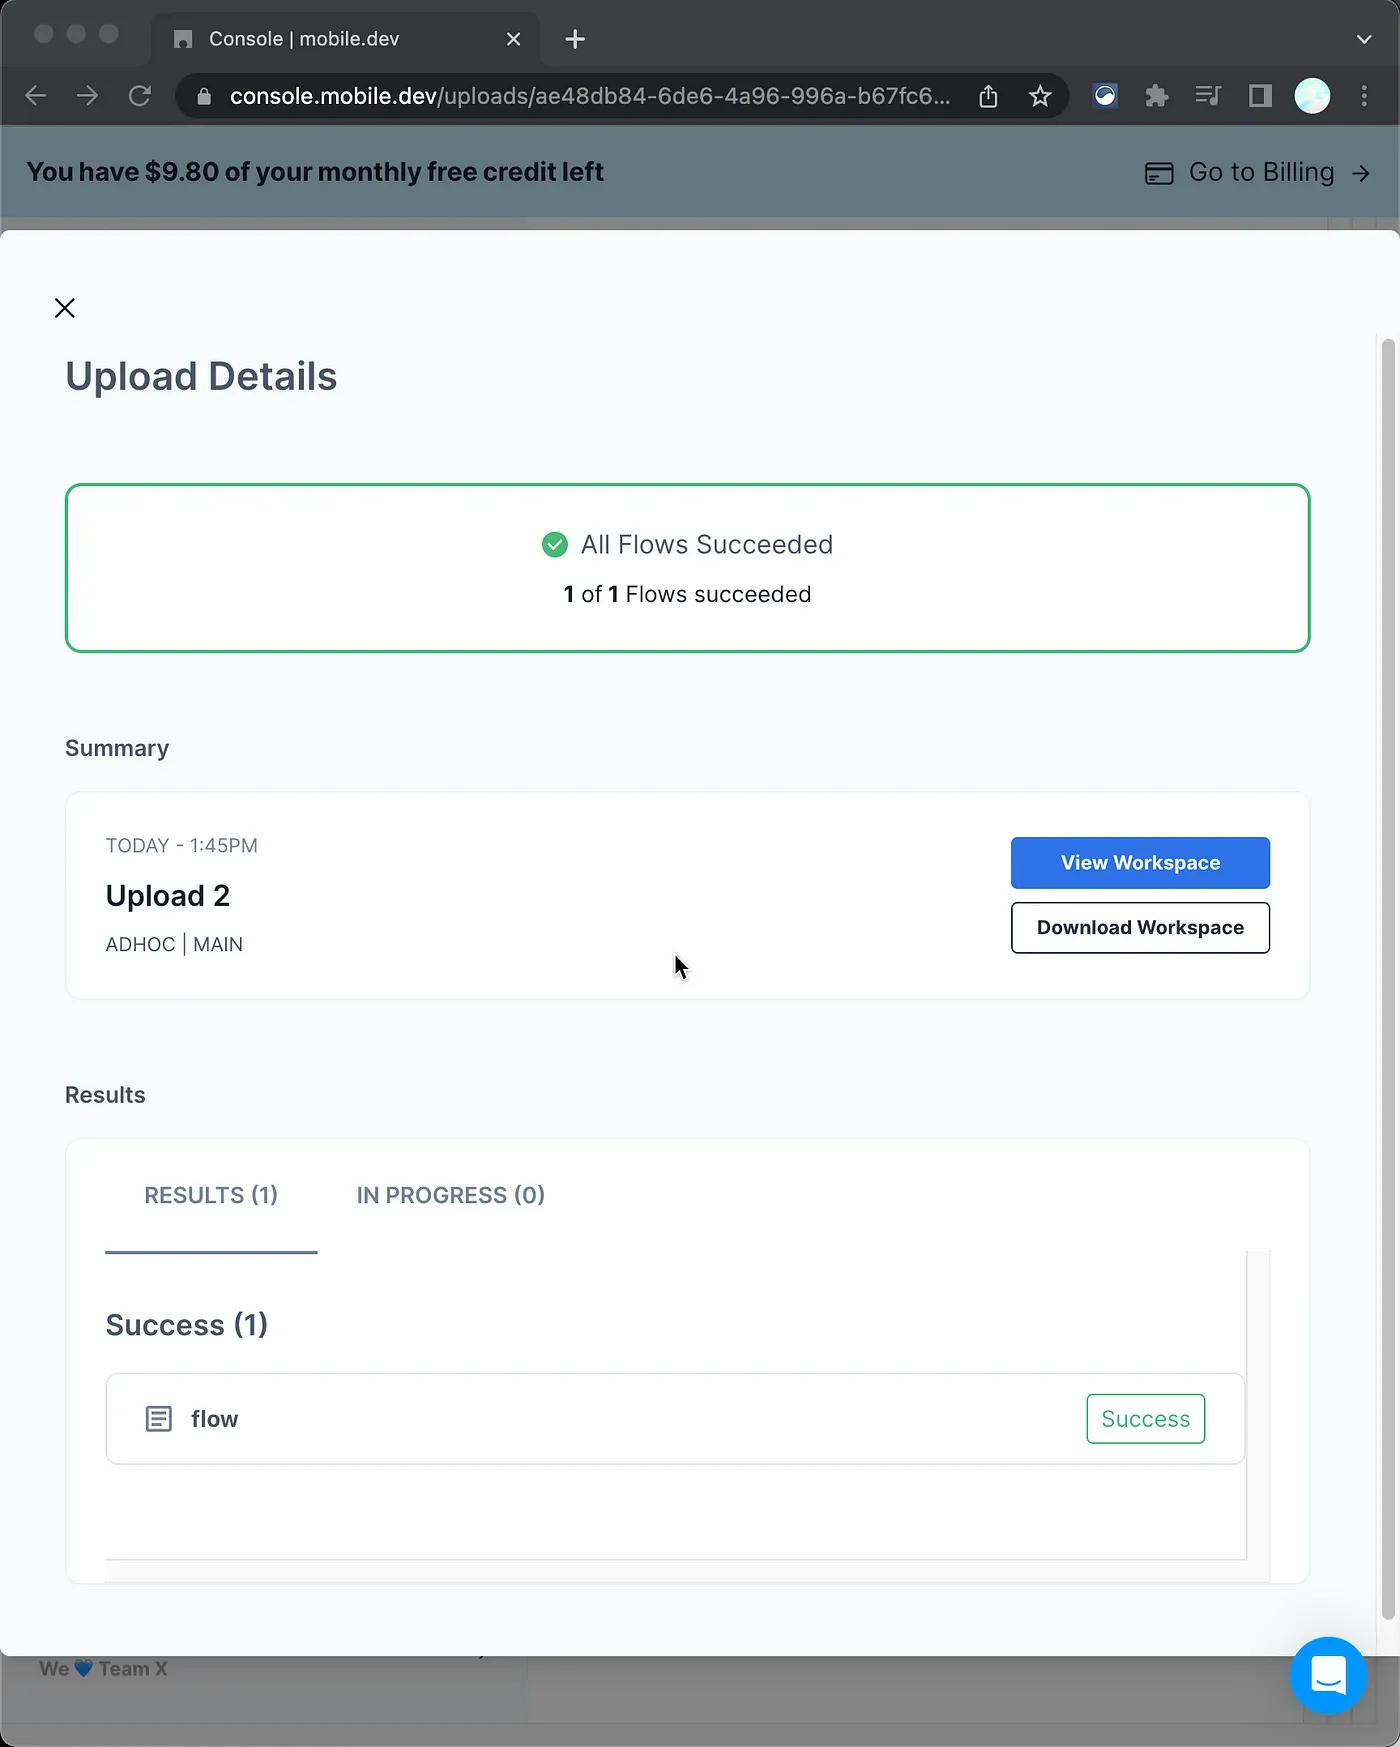
6. After the build process is completed on Bitrise, your Flows will be sent to Maestro Cloud. To observe the Flows, head over to the Maestro Cloud Console.
7. On the Maestro Cloud Console, you’ll be able to see your Flows running. You can monitor the progress and status of each Flow.
8. Maestro Cloud provides additional features such as:
- Screen recordings of the Flows, which help in visually understanding the execution of each step.
- Notifications on Flow completion, sent through your preferred communication channels like email or Slack. Learn more.
- And many more features to help you better manage and monitor your test Flows.
Conclusion
Integrating Maestro Cloud with Bitrise streamlines the process of UI testing, making it an integral part of the continuous integration and deployment pipeline.
Head over to Maestro Cloud to see more integrations and features!
References
Bitrise CI/CD:
Maestro Cloud:
Maestro UI Testing Framework: