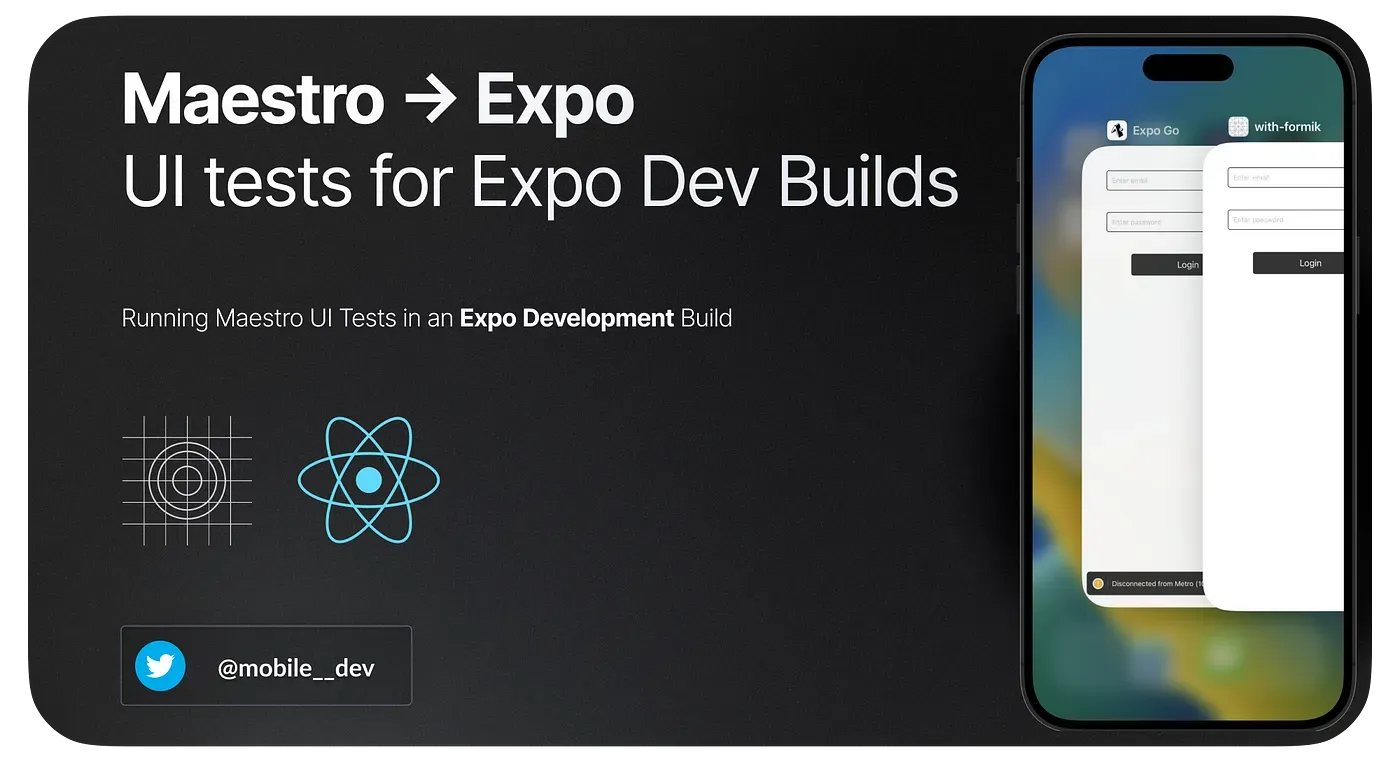
Maestro is a powerful UI testing framework for mobile applications on Android and iOS platforms. In this blog, we will explore the process of setting up a React Native Expo app, building the app for the iOS simulator, installing the app, and finally, writing and running Maestro UI tests.
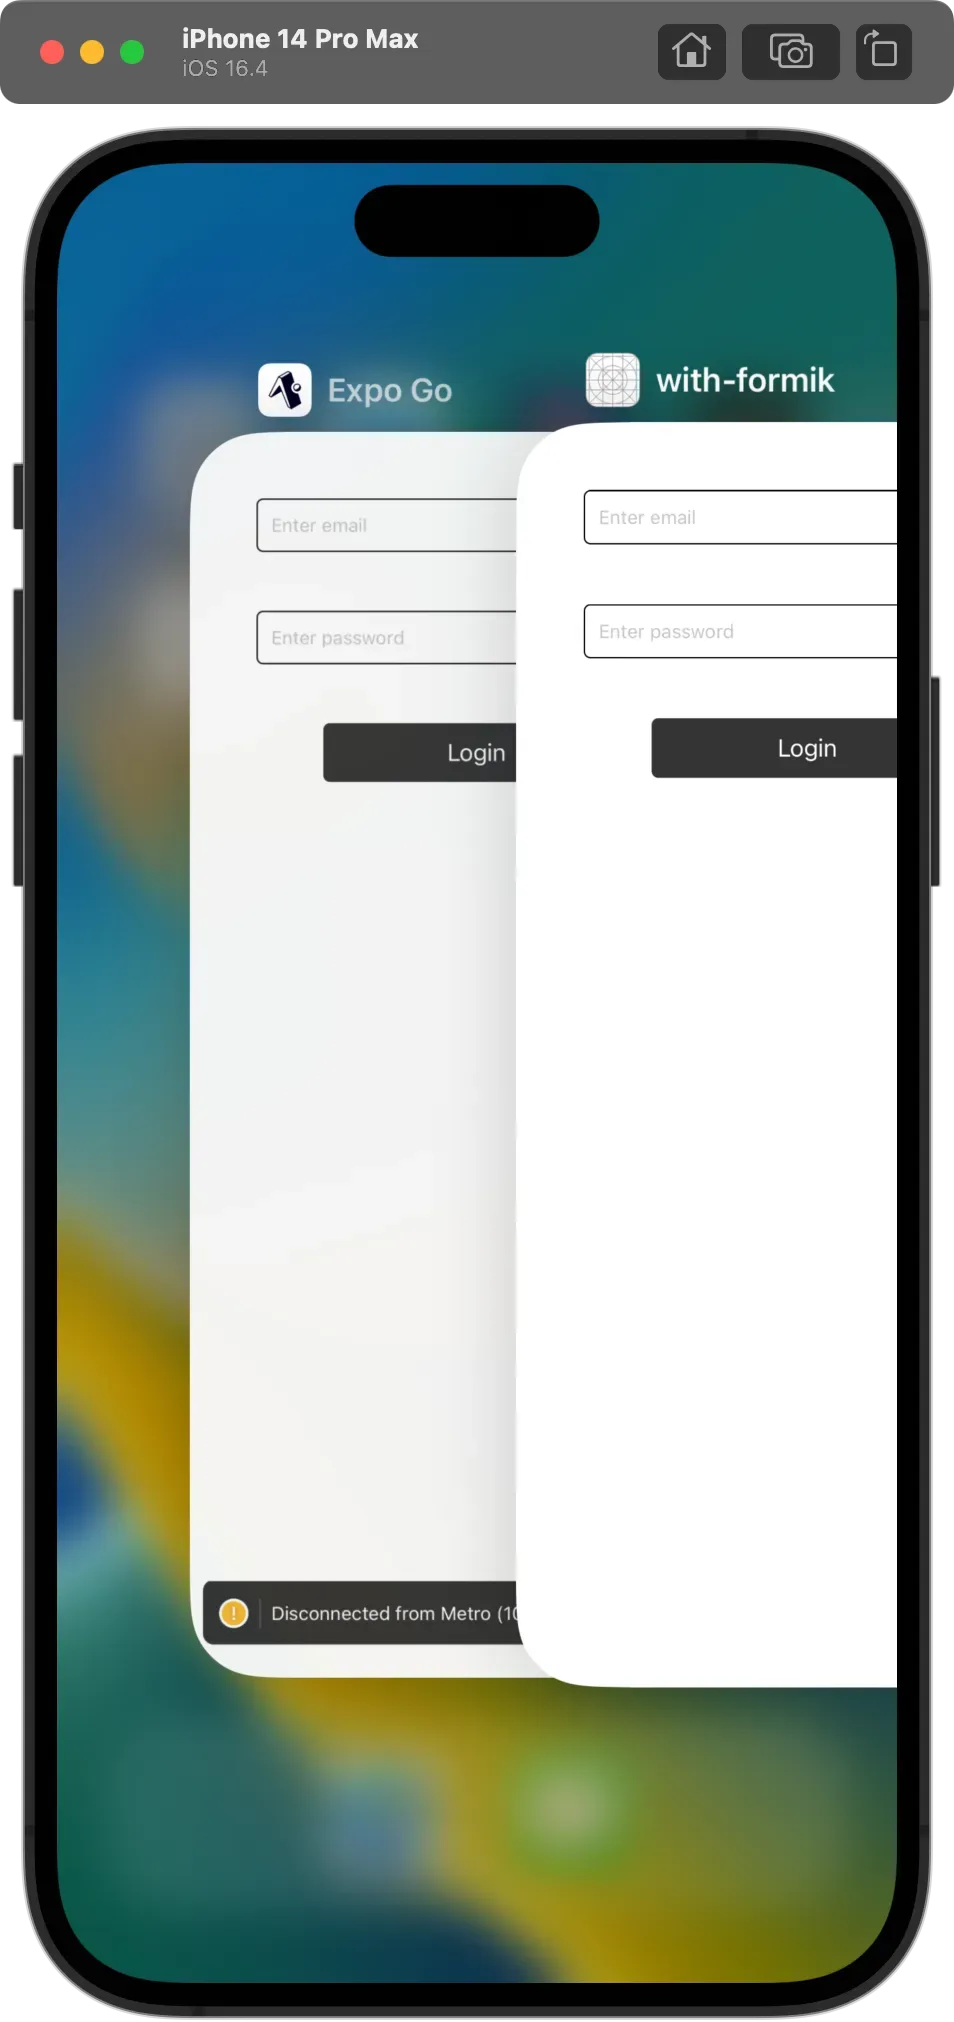
We switch from using Expo Go to develop to a development build. Think of a development build as your own version of the Expo Go client. This allows seamless integration of Expo with Maestro. We still take advantage of live reload, hot reloading, element inspector, and all the other development build benefits that allow teams to iterate quickly!
In this step-by-step guide, we’ll walk you through the process of creating a development build of your app on an iOS simulator, entirely independent of Expo Go. By following this tutorial, you’ll not only benefit from Maestro UI testing but also retain the hot reload, debug capabilities and other features that come with Expo development.
Table of Contents
- Creating a Sample Expo React Native App
- Building the Expo App
- Configuring the Build Process
- Installing the App on the Simulator
- Setting up Maestro UI Testing
- Running Maestro UI Tests
Creating a Sample Expo React Native App
To create our sample React Native app, follow the steps below:
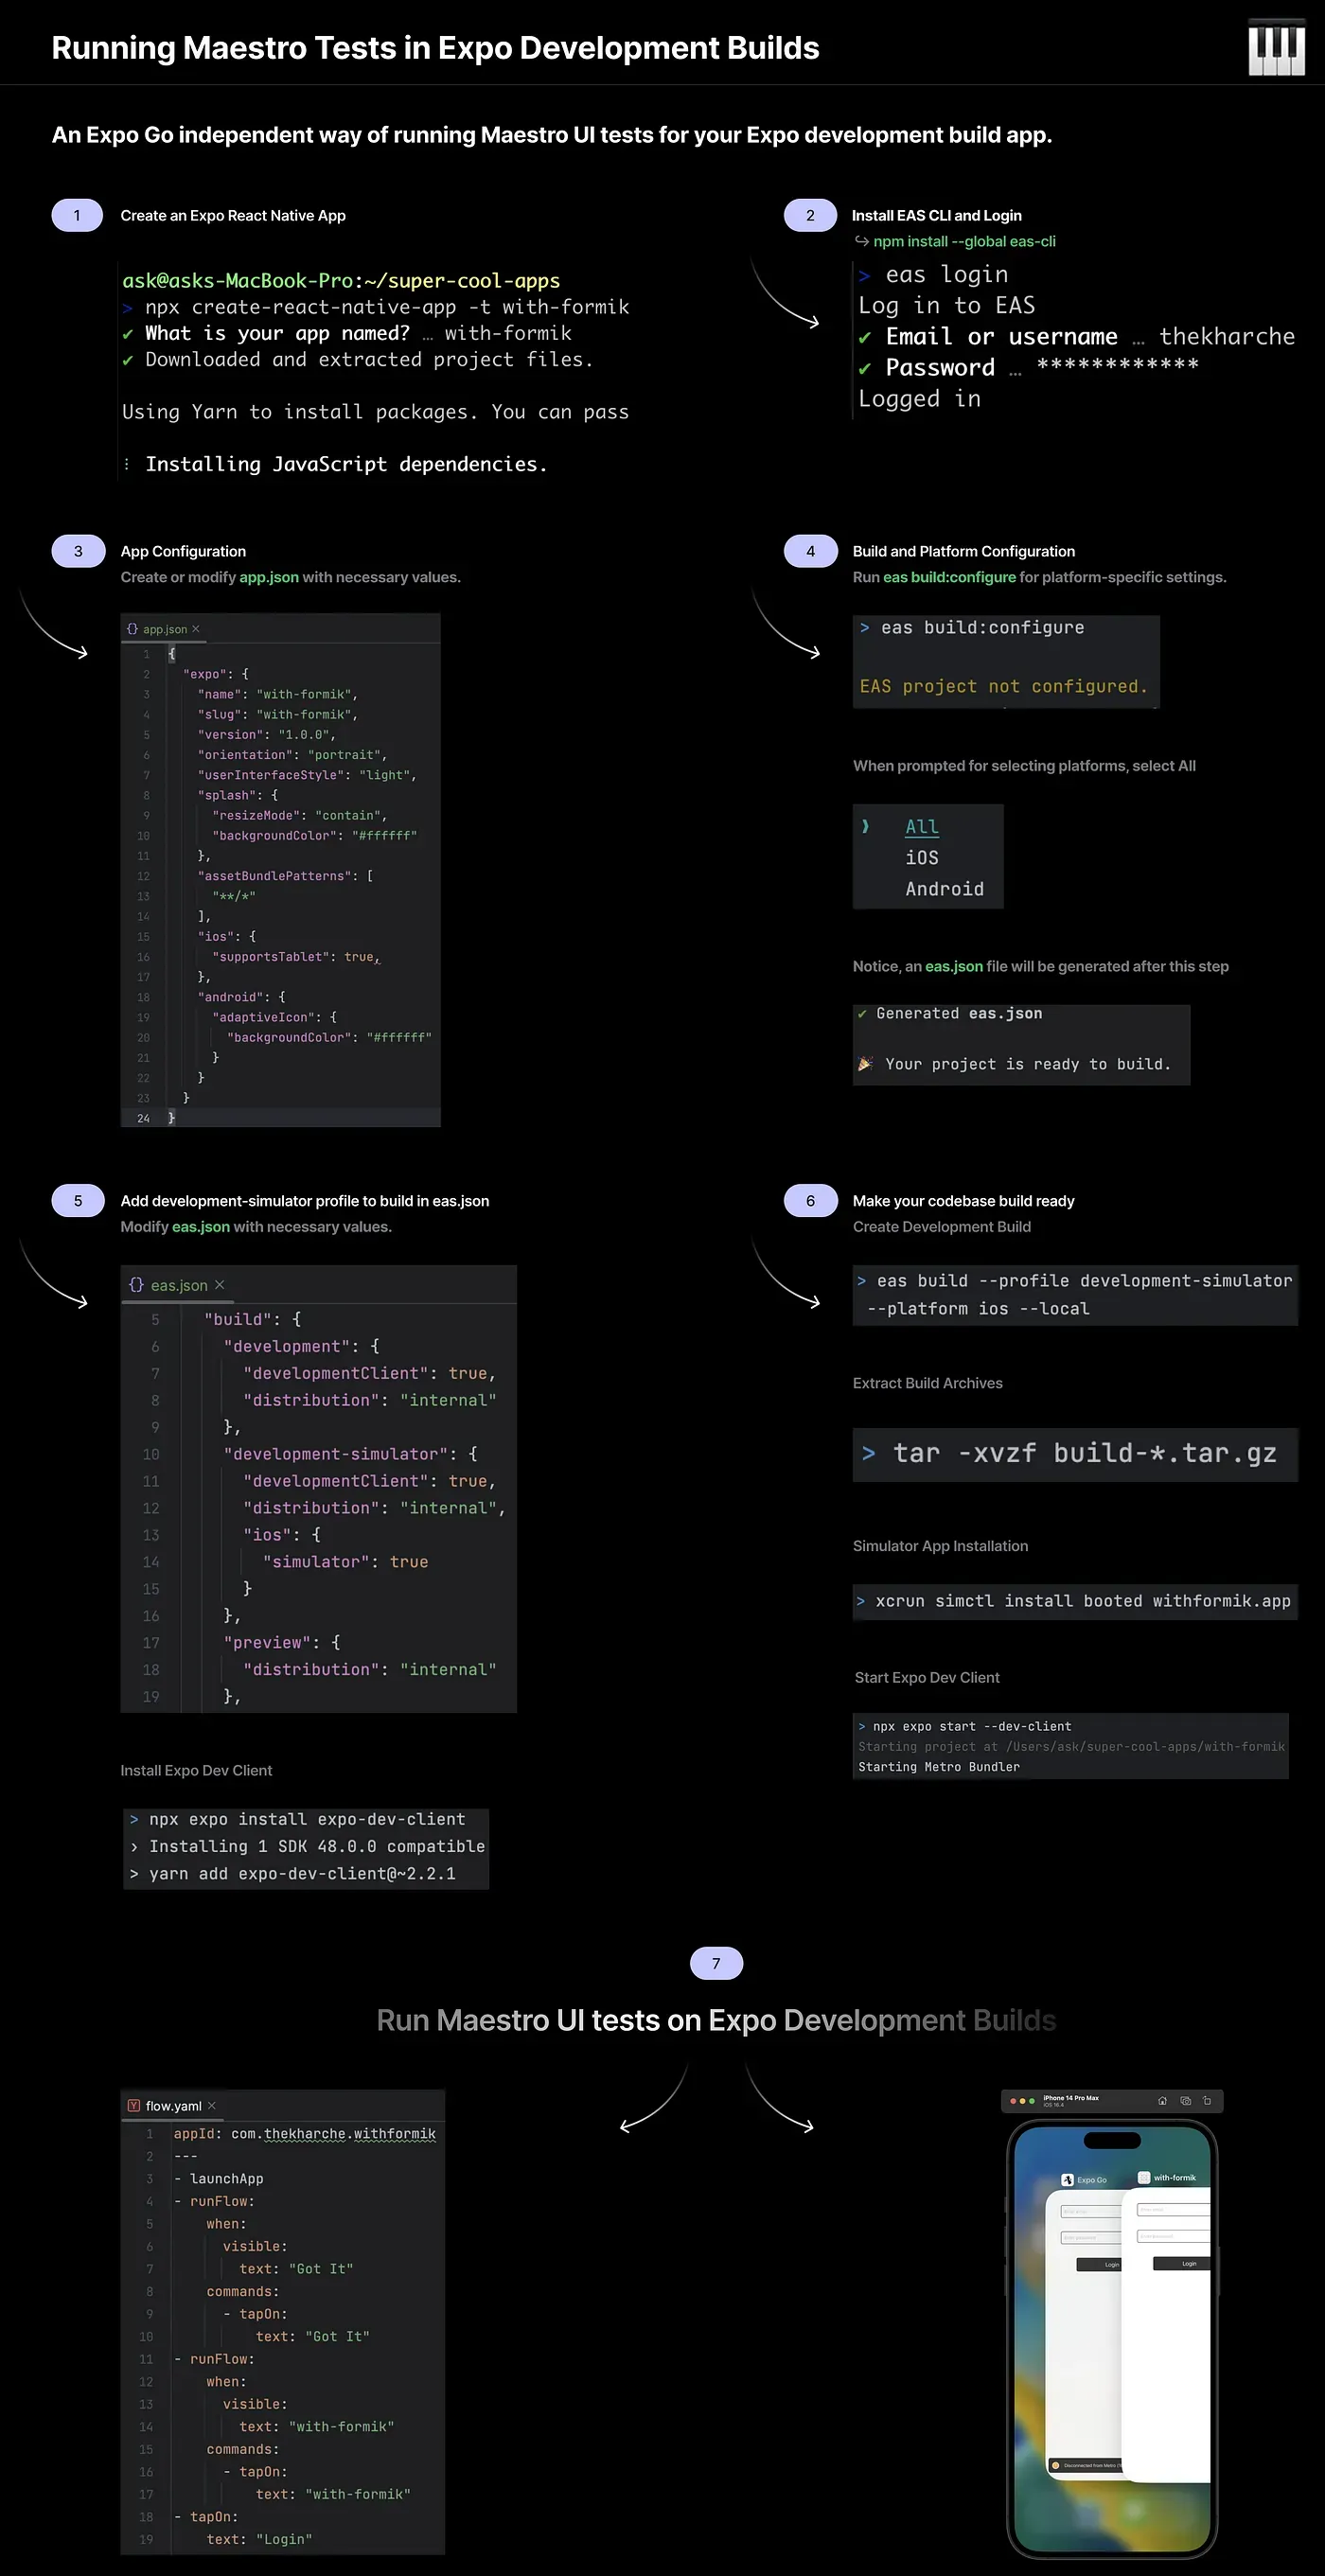
1. Install React Native Expo app: npx create-react-native-app -t with-formik
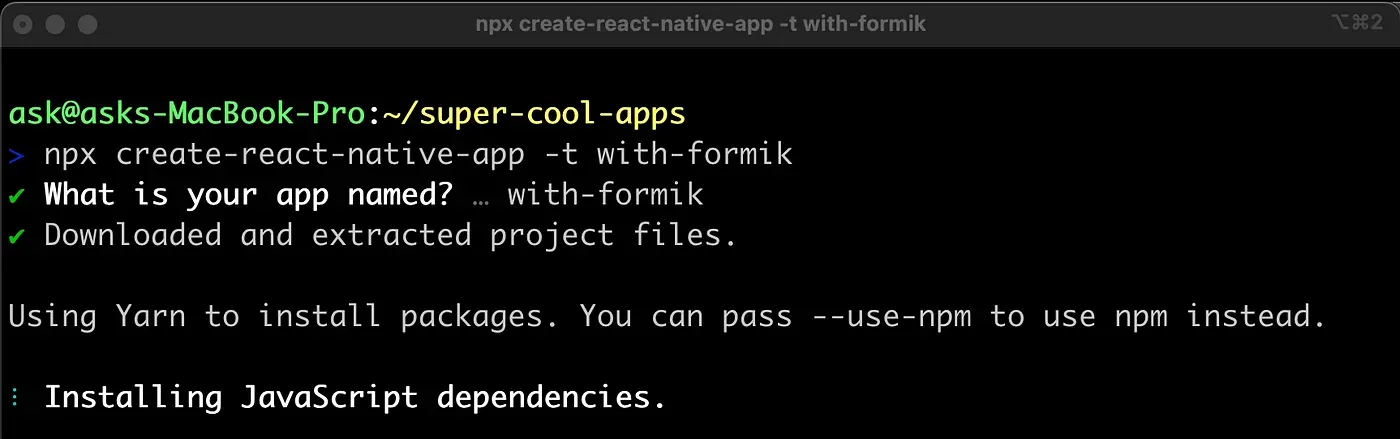
2. Navigate into the project directory: cd with-formik
3. List the files: ls
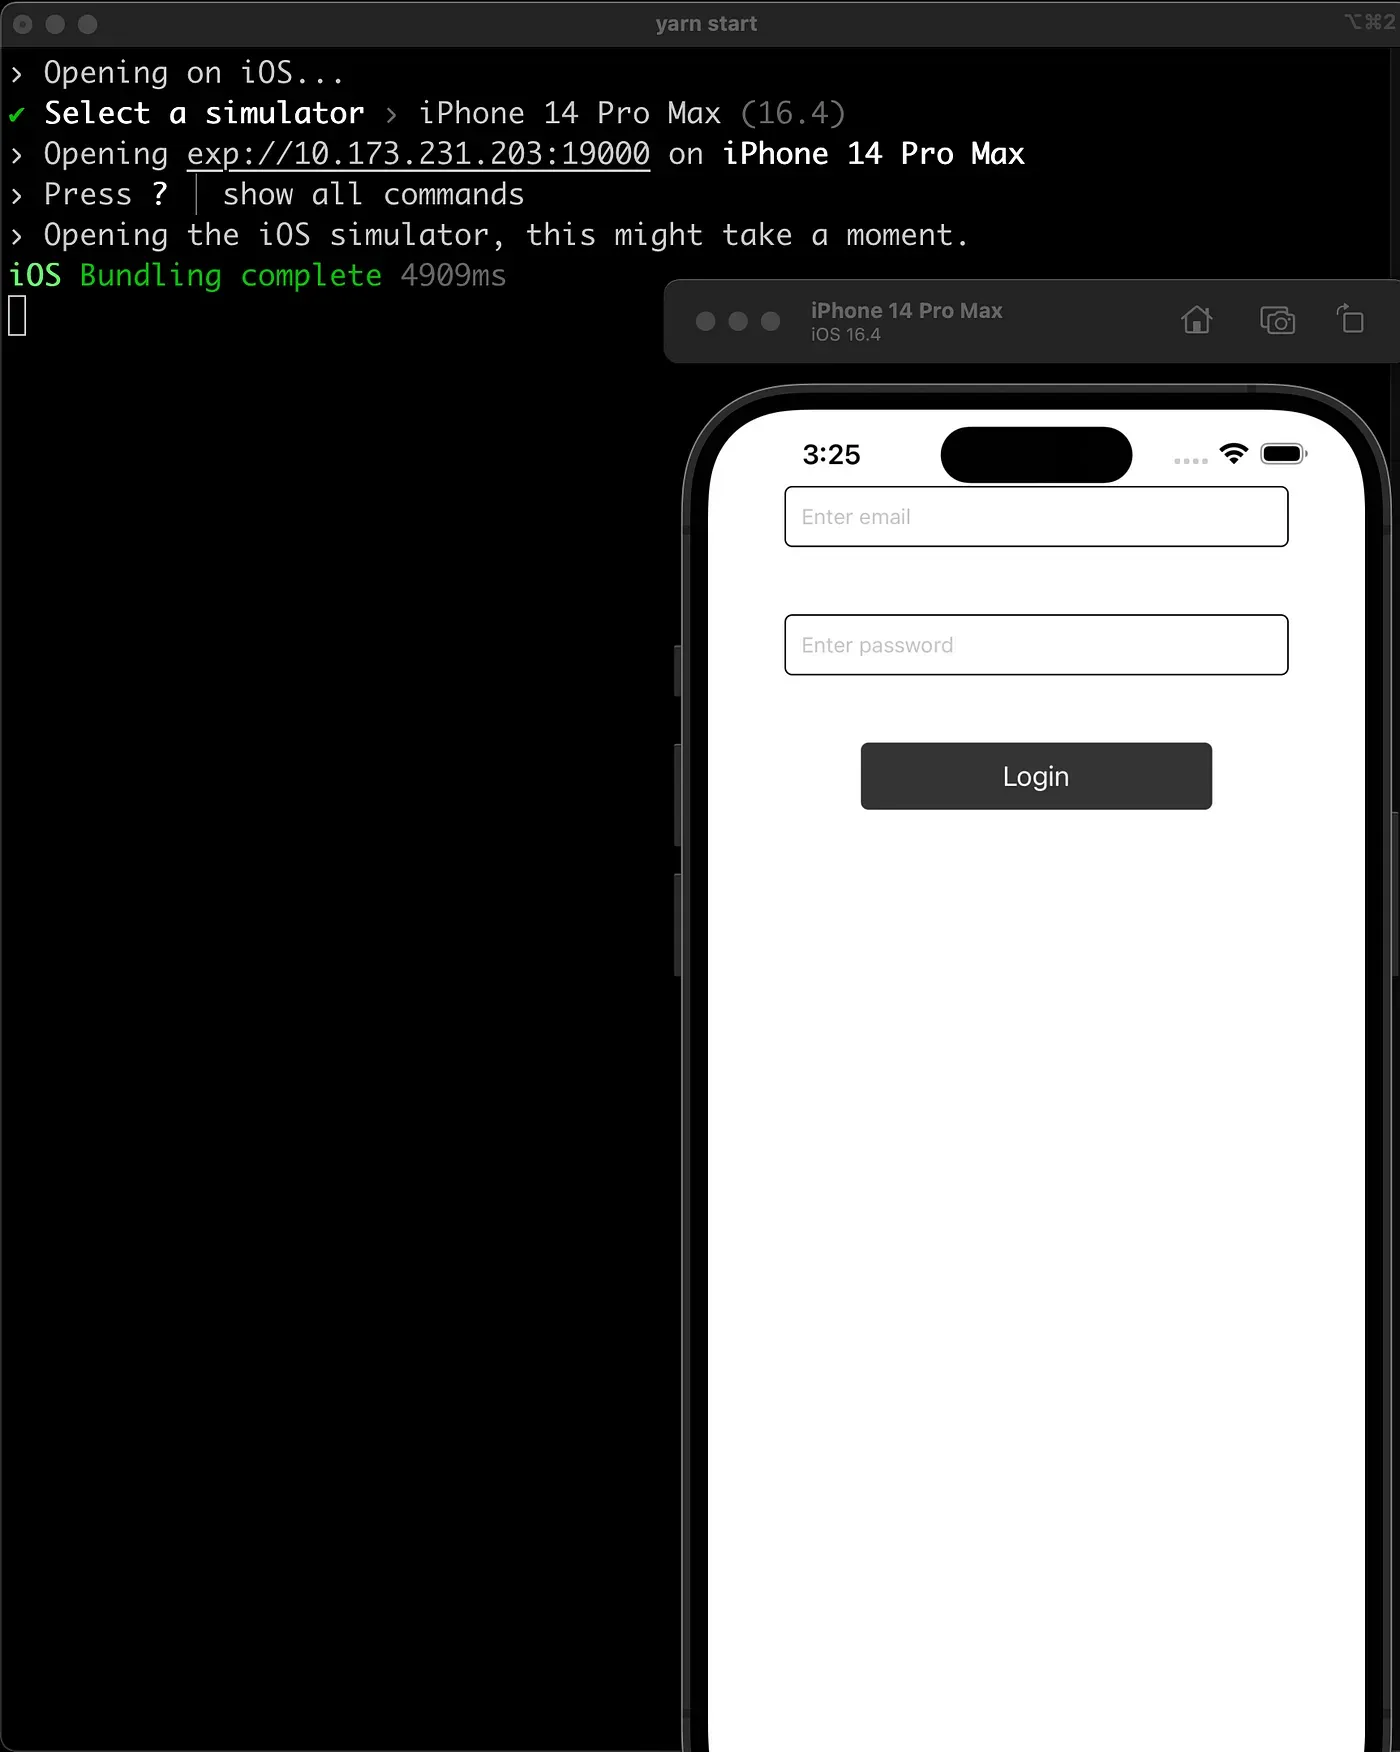
4. Start the app: yarn start
Press shift + i to see the app on your desired iOS simulator device, or shift + a for Android.
We’re verifying that our sample app runs smoothly before making any additional modifications!
Building the Expo App
To build an Expo development build that works with the Maestro UI testing framework, follow these steps:
1. Install Expo CLI: npm install --global eas-cli
2. Log in to your Expo account: eas login
3. Create a app.json file or modify the existing one with the sample configuration below:
app.json file before build configuration:
{
"expo": {
"name": "with-formik",
"slug": "with-formik",
"version": "1.0.0",
"orientation": "portrait",
"userInterfaceStyle": "light",
"splash": {
"resizeMode": "contain",
"backgroundColor": "#ffffff"
},
"assetBundlePatterns": [
"**/*"
],
"ios": {
"supportsTablet": true,
},
"android": {
"adaptiveIcon": {
"backgroundColor": "#ffffff"
}
}
}
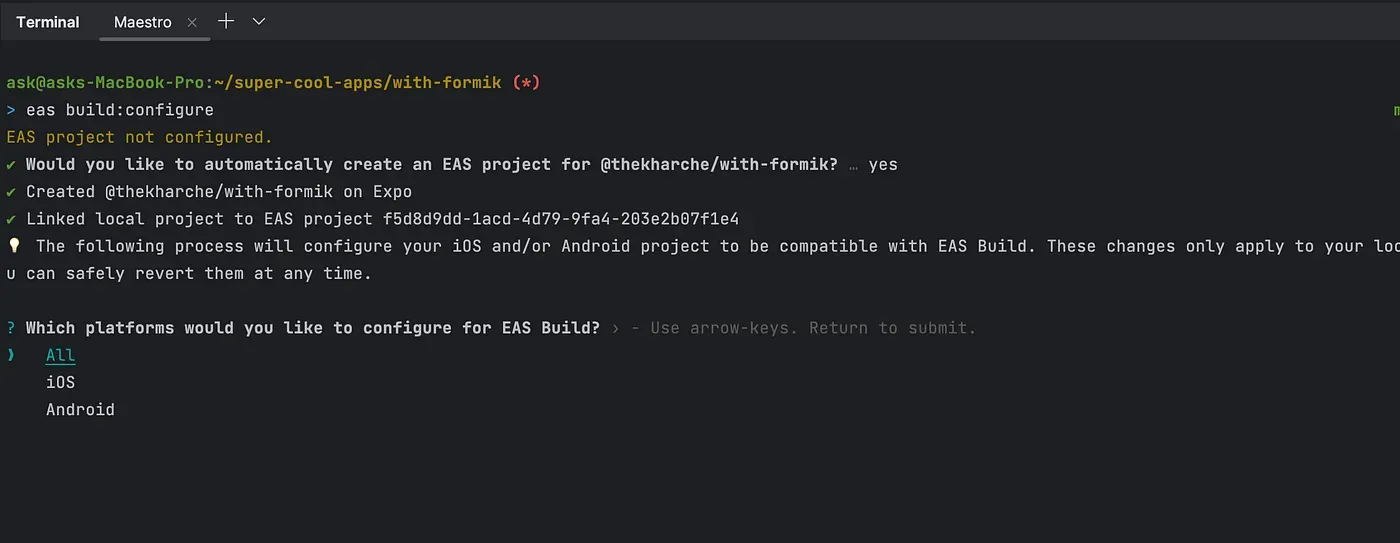
}4. Configure the builds: eas build:configure (This generates eas.json, and the project ID is added to app.jsonin extra section)
app.json file after build configuration:
{
  "expo": {
    "name": "with-formik",
    "slug": "with-formik",
    "version": "1.0.0",
    "orientation": "portrait",
    "userInterfaceStyle": "light",
    "splash": {
      "resizeMode": "contain",
      "backgroundColor": "#ffffff"
    },
    "assetBundlePatterns": [
      "**/*"
    ],
    "ios": {
      "supportsTablet": true,
    },
    "android": {
      "adaptiveIcon": {
        "backgroundColor": "#ffffff"
      }
    },
    "extra": {
      "eas": {
        "projectId": "f5d8d9dd-1acd-4d79-9fa4-203e2b07f1e4"
      }
    }
  }
}
Configuring the Build Process
1. To run a development build on the iOS simulator, add a development-simulator build profile in eas.json and set the ios.simulator value to true:
eas.json file:
{
  "cli": {
    "version": ">= 3.10.2"
  },
  "build": {
    "development": {
      "developmentClient": true,
      "distribution": "internal"
    },
    "development-simulator": {
      "developmentClient": true,
      "distribution": "internal",
      "ios": {
        "simulator": true
      }
    },
    "preview": {
      "distribution": "internal"
    },
    "production": {}
  },
  "submit": {
    "production": {}
  }
}
2. Install the Expo Dev Client: npx expo install expo-dev-client
3. Build the app for the iOS simulator locally: eas build --profile development-simulator --platform ios --local
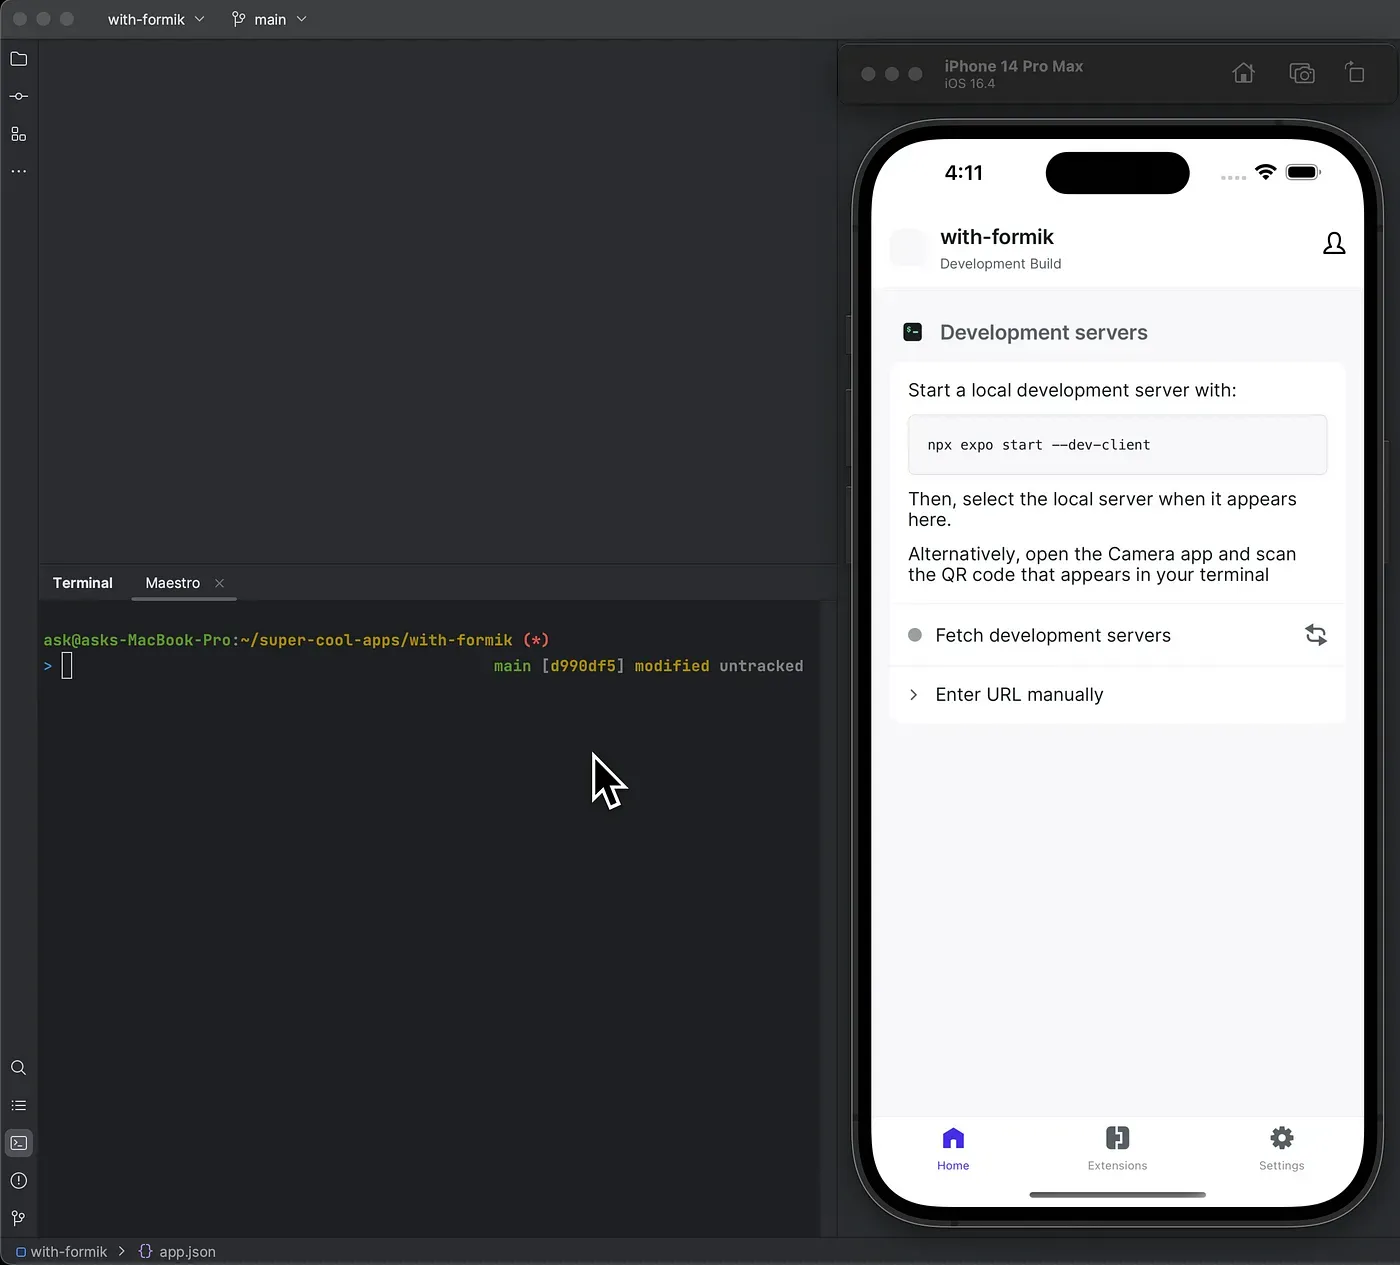
4. Start Expo Dev Client: npx expo start --dev-client
Once the build is generated, the build artifacts will be available in a *.tar.gz file.
Installing the App on the Simulator
Follow the steps below to install the app onto the iOS simulator:
1. Extract the build artifacts: tar -xvzf build-*.tar.gz
2. Install the app on the simulator: xcrun simctl install booted withformik.app
Setting up Maestro UI Testing
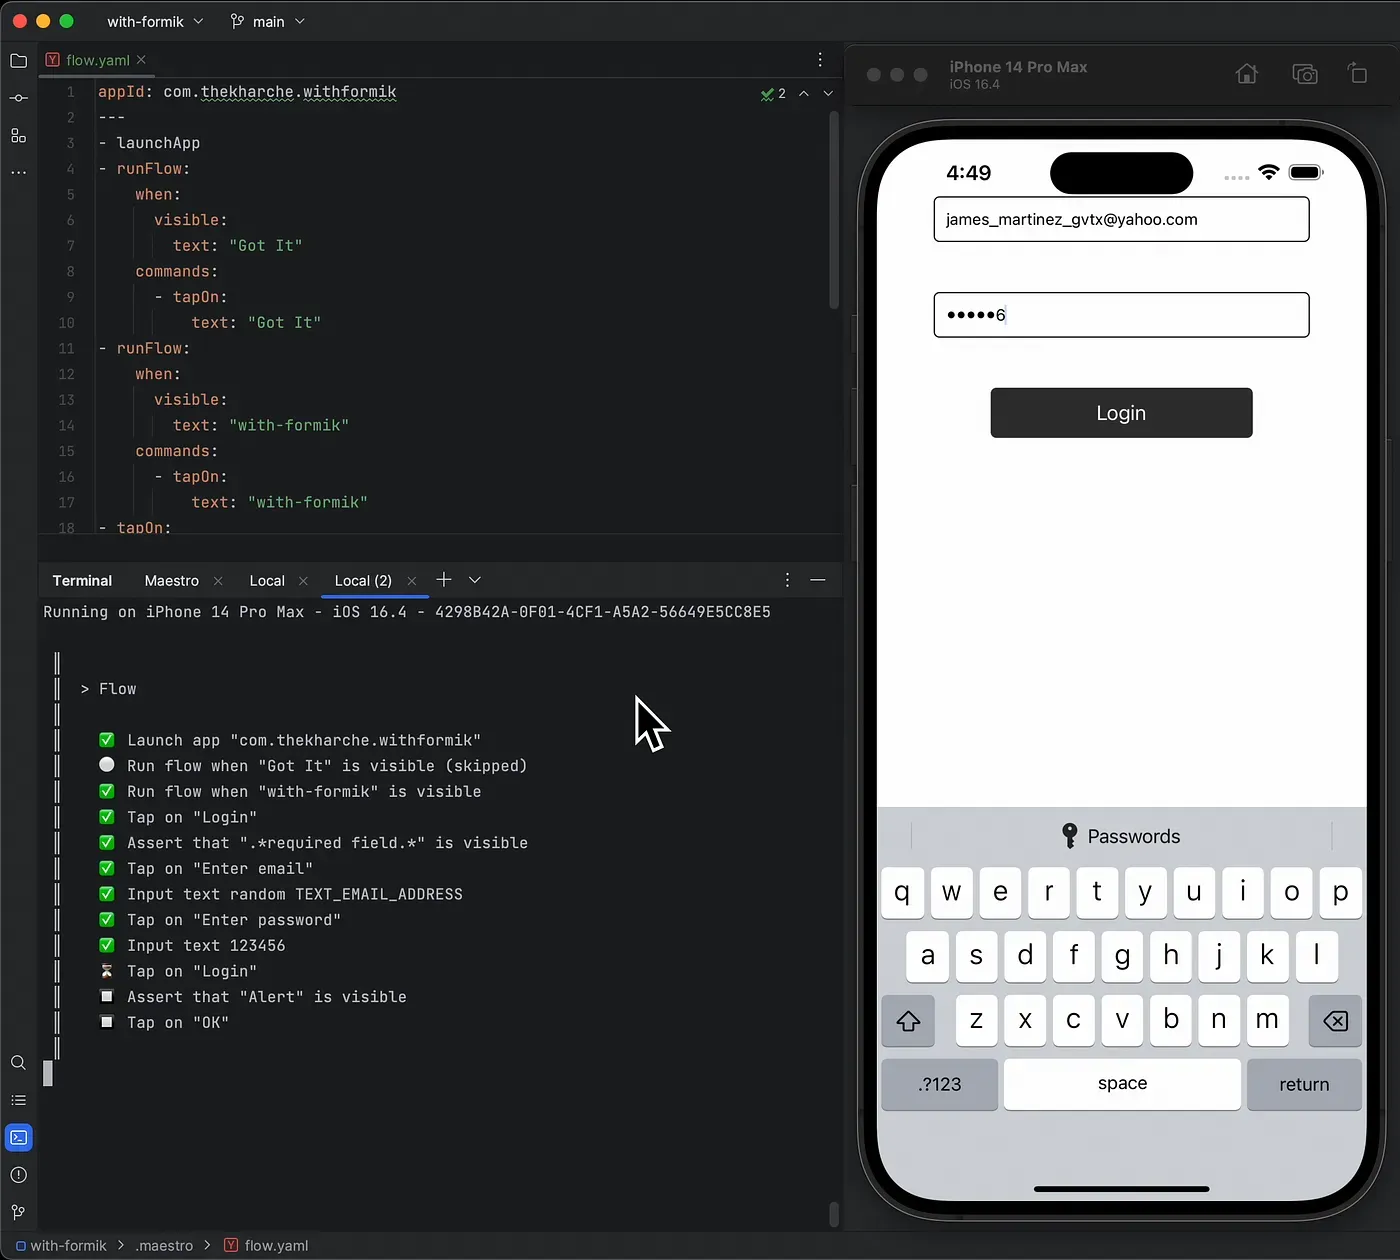
To set up Maestro UI testing, create a .maestro directory in the project root and create a sample flow.yaml file with the following content:
flow.yaml file:
appId: com.thekharche.withformik
---
- launchApp
- runFlow:
    when:
      visible:
        text: "Got It"
    commands:
      - tapOn:
          text: "Got It"
- runFlow:
    when:
      visible:
        text: "with-formik"
    commands:
      - tapOn:
          text: "with-formik"
- tapOn:
    text: "Login"
- assertVisible:
    text: ".*required field.*"
- tapOn: "Enter email"
- inputRandomEmail
- tapOn: "Enter password"
- inputText: ${PASSWORD}
- tapOn:
    text: "Login"
- assertVisible:
    text: "Alert"
- tapOn:
    text: "OK"
Running Maestro UI Tests
To run the Maestro UI tests, simply execute the command: maestro test -e PASSWORD=123456 .maestro/flow.yaml
Cheat Sheet
Conclusion
And that’s it! You now have a React Native Expo app set up with Maestro UI testing. Follow these steps to ensure a smooth integration between your app and the Maestro testing framework, and benefit from the productivity that comes with JavaScript-driven development.
In summary, this blog walks you through the process of setting up a React Native Expo app for Maestro UI testing, independent of Expo Go. It covers creating a sample app, building and configuring the app, preparing simulator environment, and setting up and running Maestro UI tests!
References
Source Code:
Expo Development Builds:
Expo Build Configuration:
Build for iOS Simulators:
🎹