In our last post, part 1, we talked about Maestro, a go-to UI testing tool for Expo React Native apps. In Part 2, we talked about End-to-End UI testing of the app. This time, we’re stepping up with Maestro Cloud, giving us more flexibility and features. To make this shift smooth, we’re using GitHub Actions, a handy CI/CD tool that’s great for automating tasks.
For those who want a quick start, you can jump right in by cloning our repo. Our GitHub repository has you covered. All the setup code and necessary configurations are readily available there. Instead of navigating through the entire blog, you can simply clone the repo and get started.
GitHub repository:
But if you’re here for the details, let’s dive in!
Why Maestro Cloud?
Maestro Cloud streamlines our UI testing in several ways:
1. Efficiency: No need for manual simulator or emulator setups. Just upload the app and Flows, and it’s good to go.
2. Robust Features:
- Managed iOS and Android testing environments.
- Parallel test runs for faster feedback.
- Comprehensive logs, screen recordings, and outputs for detailed insights.
3. Seamless CI Integration: Easily integrates with popular platforms like GitHub Actions, Bitrise, CircleCI, Jenkins, Azure Pipelines, TravisCI, GitLab CI/CD, Bitbucket Pipelines, etc.
4. Versatility: Supports iOS, Android, React Native, and Flutter, ensuring broad testing coverage.
5. Security: With SOC 2 compliance, our data’s security and privacy are top-notch.
Automating with GitHub Actions
File: .github/workflows/eas-build.yaml
GitHub Actions provides automation for CI/CD. Here’s our setup:
name: EAS Builds

on:
  push:
    branches: [main]

jobs:
  eas-build:
    name: Maestro Cloud tests for Expo EAS
    timeout-minutes: 15
    runs-on: ubuntu-latest

    steps:
      - name: Setup Repository
        uses: actions/checkout@v3

      - name: Setup Node.js
        uses: actions/setup-node@v3
        with:
          node-version: 18.x
          cache: "npm"

      - name: Setup EAS
        uses: expo/expo-github-action@v8
        with:
          eas-version: latest
          token: ${{ secrets.EXPO_TOKEN }}

      - name: Install Dependencies
        run: npm install

      - name: Build Request for Android
        run: eas build --platform android --non-interactive --no-wait --profile internal-apk
        shell: bash

      - name: Build Request for iOS
        run: eas build --platform ios --non-interactive --no-wait --profile internal-simulator
        shell: bash
This workflow, named “EAS Builds”, triggers on every push to the main branch and runs our Maestro Cloud tests.
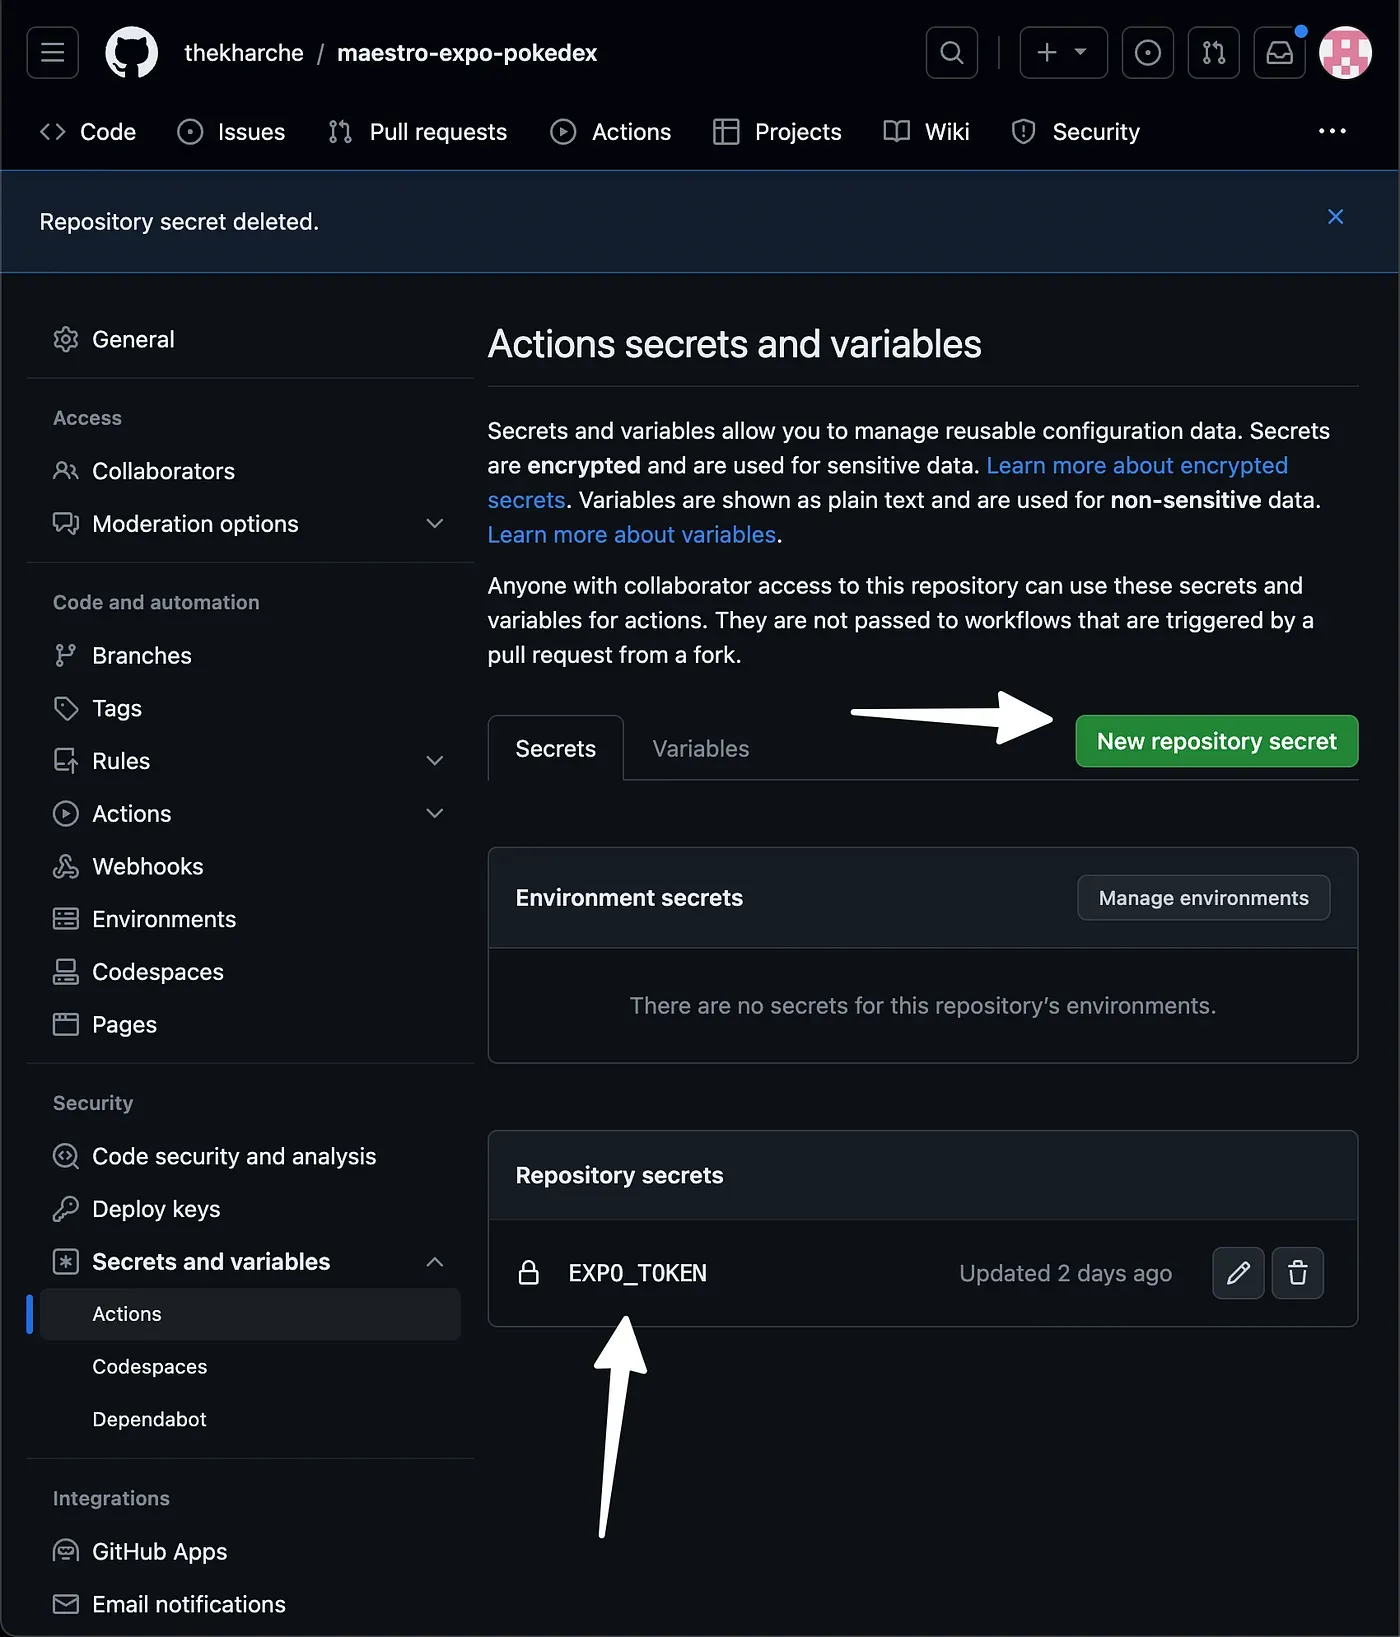
Setup Expo Token
If you don’t already have an EXPO_TOKEN , create one from your account settings at https://expo.dev/:
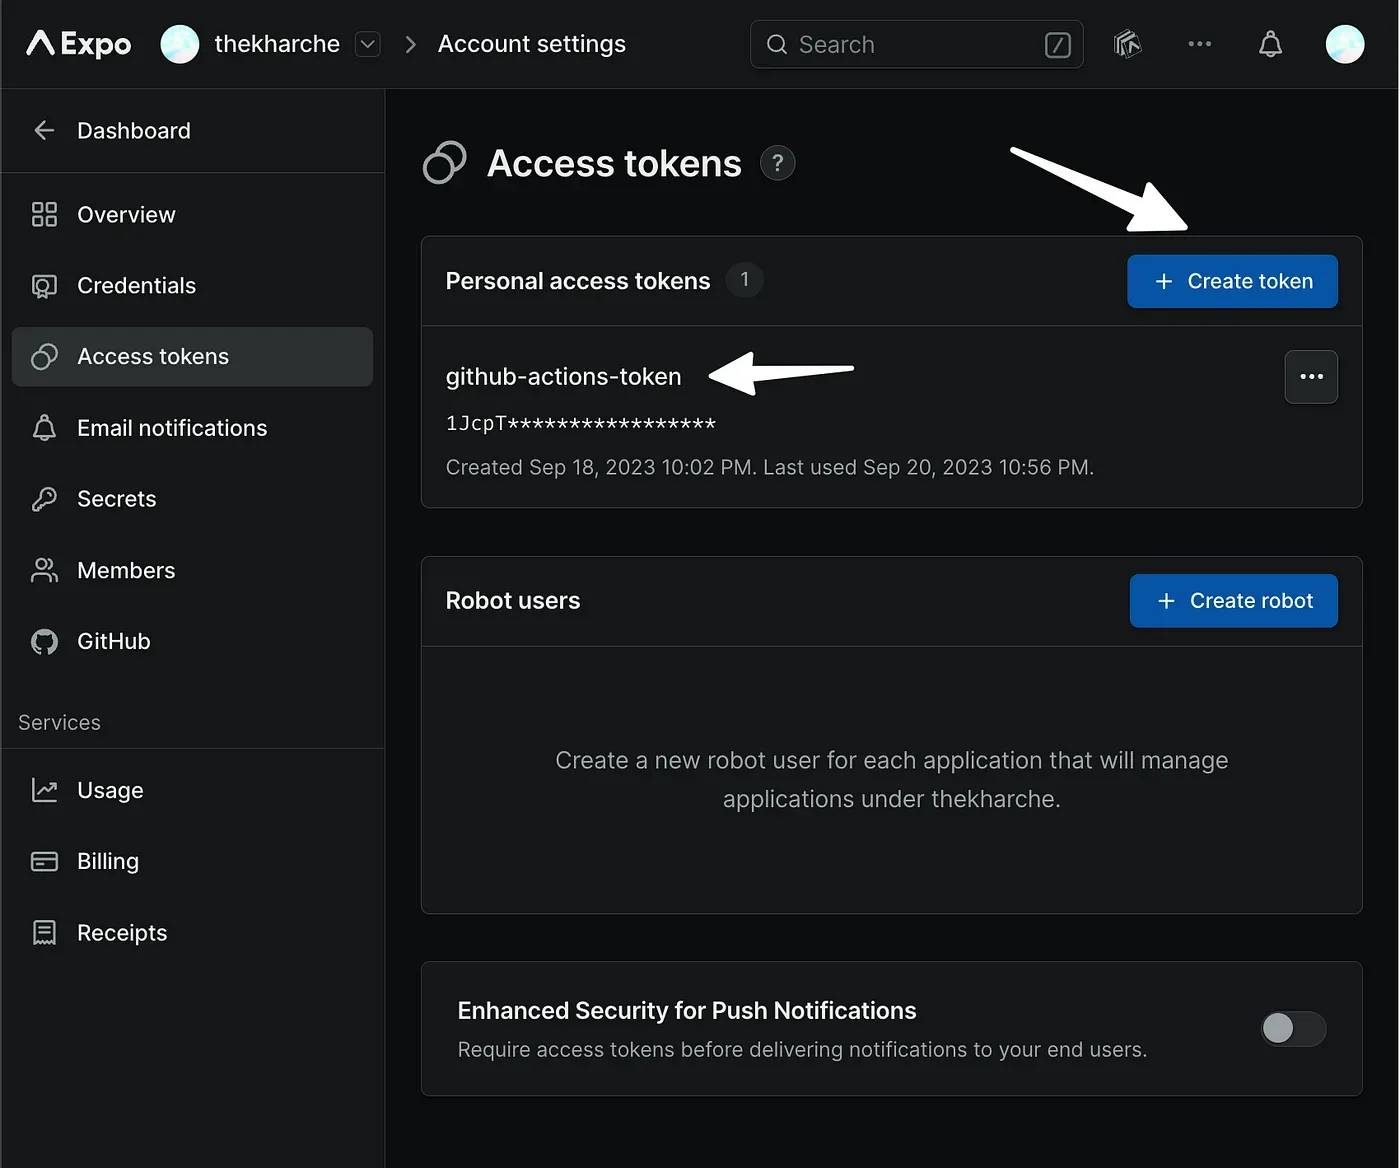
Remember to add the EXPO_TOKEN secret for GitHub Actions in GitHub repository settings:
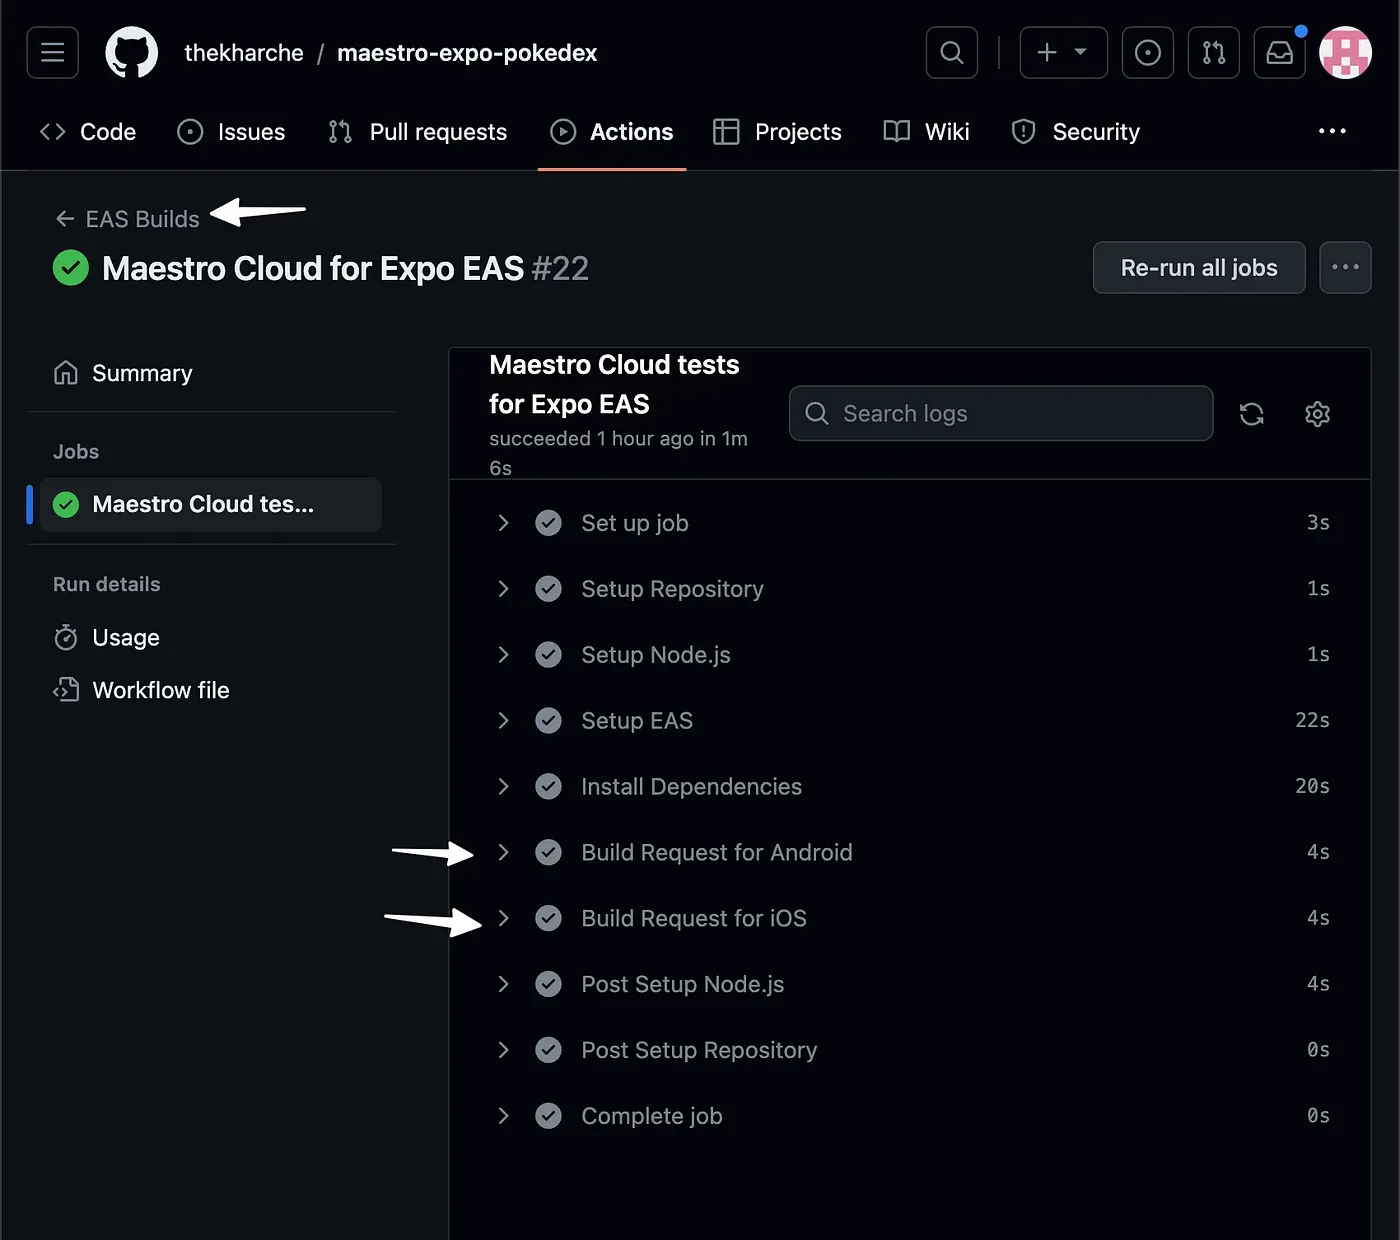
Build Request for Android:
This step initiates an Android build using EAS. It runs in a non-interactive mode (no user input required), doesn’t wait for the build to finish (--no-wait), and uses the internal-apk profile for specific build configurations.
Build Request for iOS:
Similarly, this step starts an iOS build using EAS. It’s also non-interactive, doesn’t wait for completion, and uses the internal-simulator profile tailored for iOS builds.
Post-Build Maestro Cloud Integration
File: scripts/eas-build-on-success.sh
After the app builds, we run our UI tests on Maestro Cloud:
#!/usr/bin/env bash

# Check if the environment is local
if [ "$ENV_TYPE" = "local" ]; then
    echo "this is local environment"
    exit 0
fi

# If not local, continue with the provided script
set -eox pipefail

curl -Ls "https://get.maestro.mobile.dev" | bash
export PATH="$PATH":"$HOME/.maestro/bin"

if [ "$EAS_BUILD_PLATFORM" = "ios" ]; then
   APP_EXECUTABLE_PATH=/Users/expo/workingdir/build/ios/build/Build/Products/Release-iphonesimulator/maestroexpopokedex.app
   brew install java
   echo 'export PATH="/opt/homebrew/opt/openjdk/bin:$PATH"' >> ~/.zshrc
   sudo ln -sfn /opt/homebrew/opt/openjdk/libexec/openjdk.jdk /Library/Java/JavaVirtualMachines/openjdk.jdk
   export CPPFLAGS="-I/opt/homebrew/opt/openjdk/include"
   maestro cloud -e APP_ID=com.thekharche.maestroexpopokedex --api-key=$MAESTRO_API_KEY --app-file=$APP_EXECUTABLE_PATH --flows=.maestro/

else
   APP_EXECUTABLE_PATH=/home/expo/workingdir/build/android/app/build/outputs/apk/release/app-release.apk
   maestro cloud -e APP_ID=com.thekharche.maestroexpopokedex --api-key=$MAESTRO_API_KEY --app-file=$APP_EXECUTABLE_PATH --flows=.maestro/
fi
This script checks the environment, sets up Maestro, and runs platform-specific UI tests.
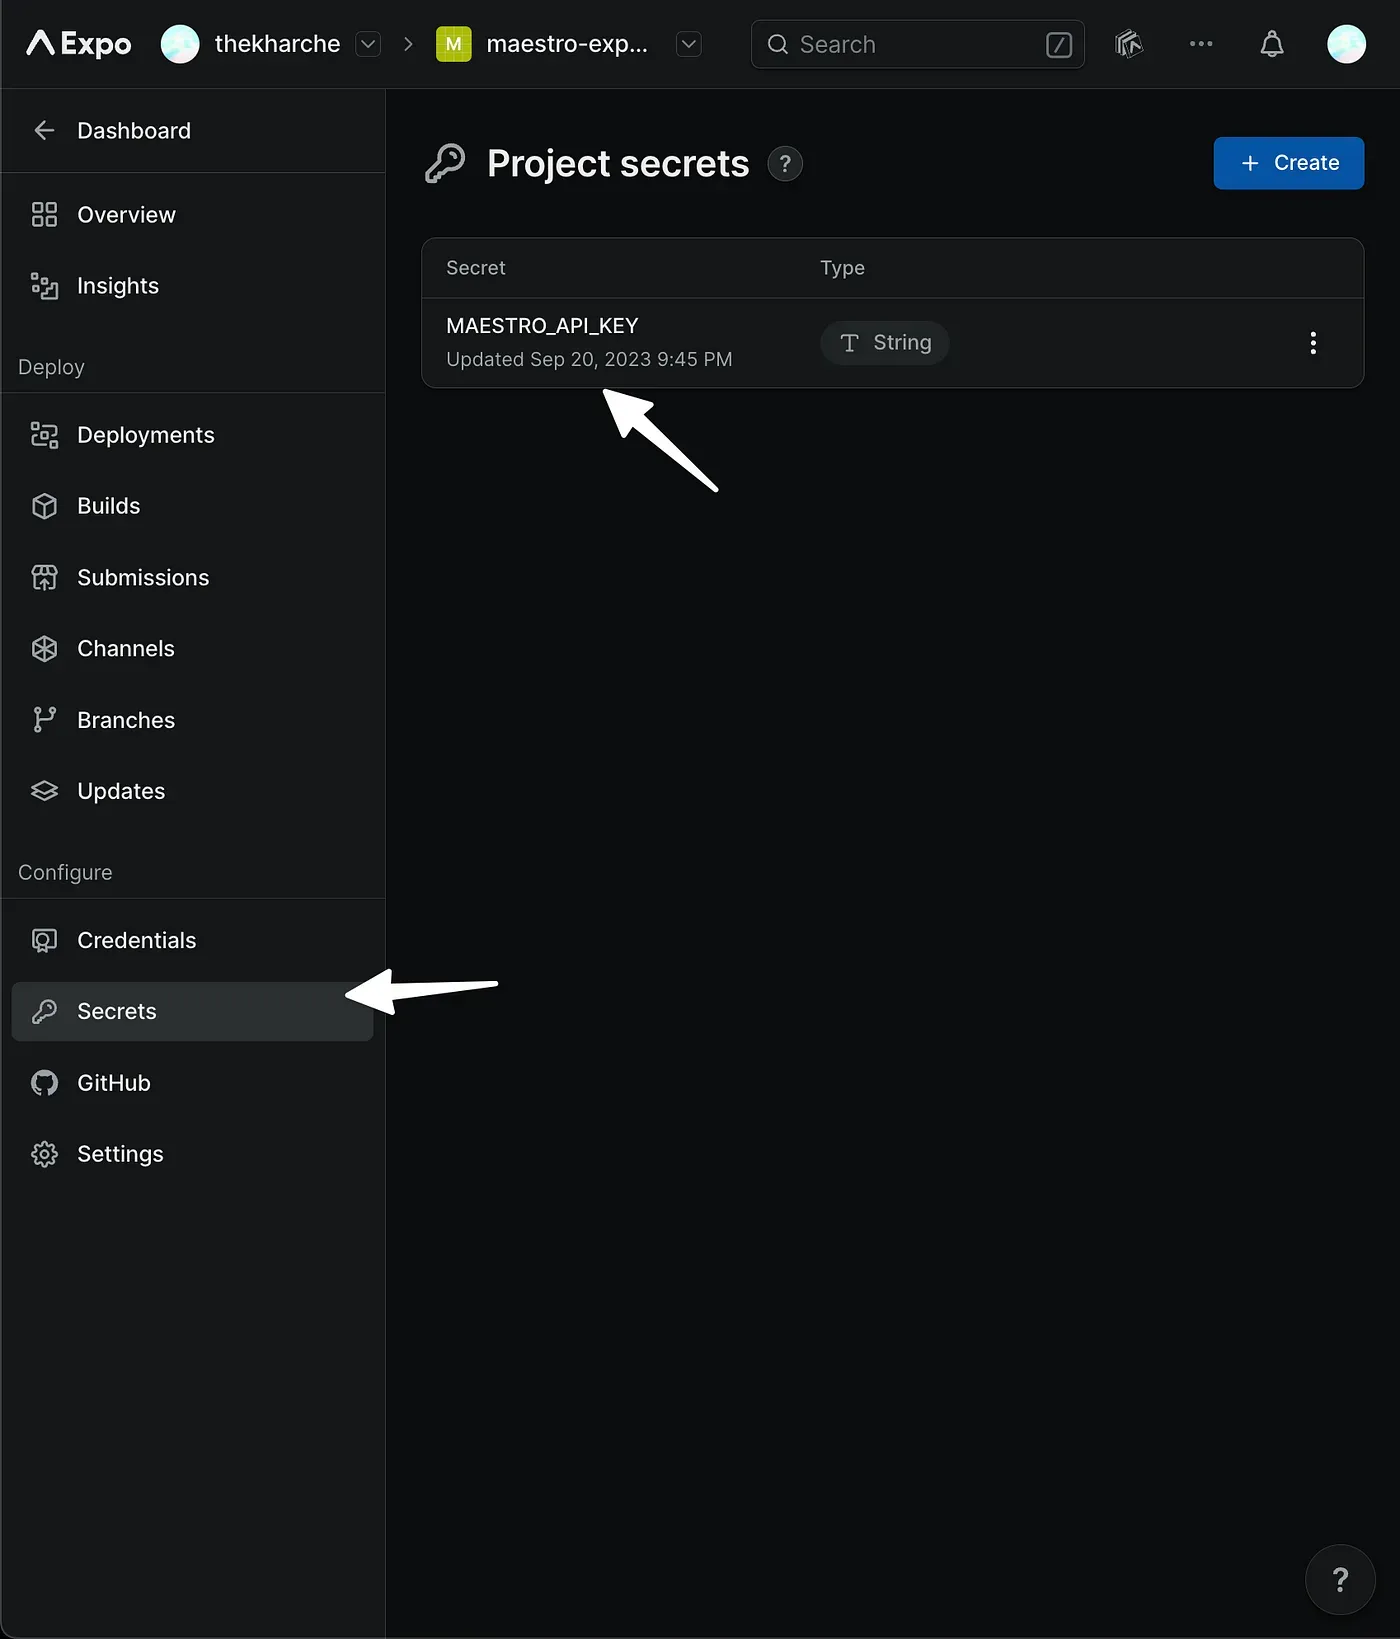
You can find your Maestro API Key here: https://app.maestro.dev/
Remember to set up your MAESTRO_API_KEY in Expo Secrets.
The eas-build-on-success.sh script is crucial for integrating Maestro Cloud into the post-build process. It ensures that once the application is built, it undergoes UI testing using Maestro Cloud. Here’s a breakdown of its key components:
Environment Check:
if [ "$ENV_TYPE" = "local" ]; then
    echo "this is local environment"
    exit 0
fi
The script first checks if the environment is local. If true, it prints “this is local environment” and exits.
Maestro Setup:
curl -Ls "https://get.maestro.mobile.dev" | bash
export PATH="$PATH":"$HOME/.maestro/bin"
This section fetches and installs Maestro. The Maestro binaries are then added to the system’s PATH, ensuring subsequent commands can access Maestro tools without specifying their full paths.
Platform-Specific UI Testing:
Depending on whether the build platform is iOS or Android, different sets of commands are executed:
if [ "$EAS_BUILD_PLATFORM" = "ios" ]; then
  // hidden for brevity
else
  // hidden for brevity
fi
In essence, the eas-build-on-success.sh script serves as a bridge between the build process and Maestro Cloud-based UI testing. It ensures that after a successful build, the app is tested in the cloud environment, leveraging Maestro’s capabilities.
Learn more about EAS Build lifecycle npm hooks
EAS Configuration for Expo
File: eas.json
This file defines various build profiles for both Android and iOS.
{
  "cli": {
    "version": ">= 3.10.2"
  },
  "build": {
    // hidden for brevity
    "development-simulator": {
      "developmentClient": true,
      "distribution": "internal",
      "ios": {
        "simulator": true
      }
    },
    "internal-simulator": {
      "distribution": "internal",
      "ios": {
        "simulator": true
      }
    },
    "development-apk": {
      "developmentClient": true,
      "distribution": "internal",
      "android": {
        "buildType": "apk"
      }
    },
    "internal-apk": {
      "distribution": "internal",
      "android": {
        "buildType": "apk"
      }
    },
    // hidden for brevity
  },
  "submit": {
    "production": {}
  }
}
Local Builds:
- iOS: Uses the
development-simulatorprofile, tailored for local testing on iOS simulators. - Android: Uses the
development-apkprofile, designed for local testing with Android APKs.
Refer to part 1 of the series for local builds use case
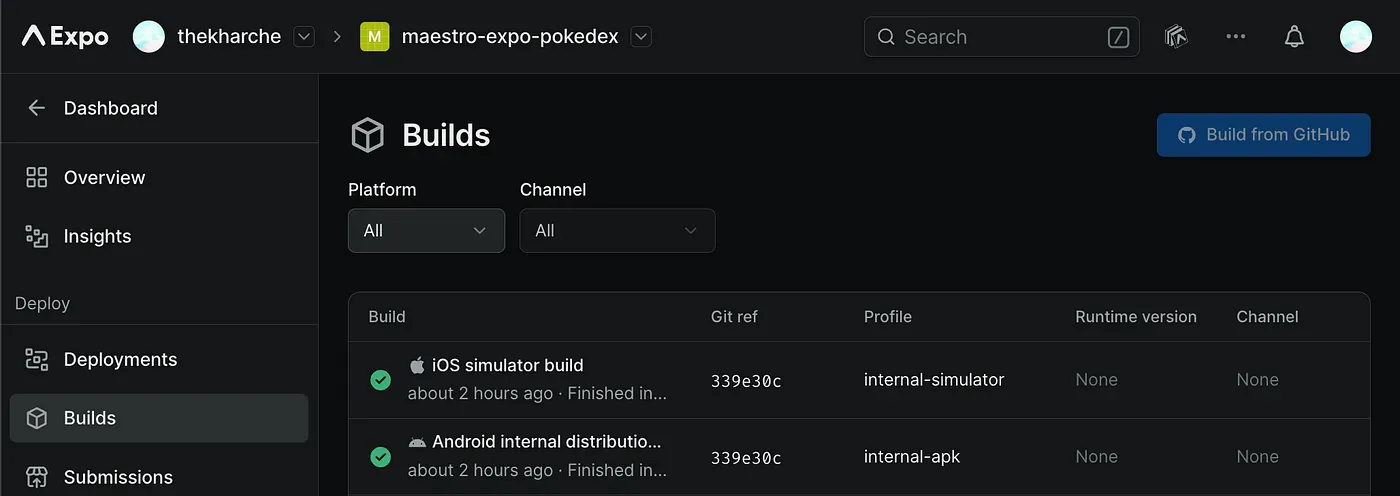
Cloud Builds:
- iOS: Switches to the
internal-simulatorprofile, optimized for cloud-based testing on iOS simulators. - Android: Adopts the
internal-apkprofile, configured for cloud-based testing with Android APKs.
In essence, while local builds employ “development” profiles, cloud builds transition to “internal” profiles to cater to their specific environments.
Package Configuration and Scripts
File: package.json
The backbone of our project:
{
  "name": "mobile",
  "version": "1.0.0",
  "main": "node_modules/expo/AppEntry.js",
  "scripts": {
    "eas-build-on-success": "bash ./scripts/eas-build-on-success.sh",
    // hidden for brevity
  },
  // hidden for brevity
}
The eas-build-on-success script triggers our post-build bash script, ensuring Maestro Cloud integration post-build.
Maestro — Run when Local
File: .maestro/journey/pokemon-lookup.yaml
Here, we’ve introduced an optional flow. If you choose to set the TARGET_ENV variable to ‘local’, Maestro will execute the local-setup.yaml flow.
appId: ${APP_ID}
---
- launchApp:
    clearState: true

- runScript: ../common/init.js

- runFlow:
    when:
      true: ${TARGET_ENV == 'local'}
    file: ../common/local-setup.yaml

# hidden for brevity
This allows you to tailor your testing approach based on the environment if desired.
The local-setup.yaml flow is activated only when TARGET_ENV is set to ‘local’. This means that when tests are executed on Maestro Cloud, this particular flow is bypassed.
For local testing, run:
maestro test -e TARGET_ENV=local -e APP_ID=com.thekharche.maestroexpopokedex .maestro/journey/pokemon-lookup.yamlUsing the above command, the local-setup.yaml flow is included, allowing for a tailored testing experience when running tests locally.
The Maestro — Expo EAS Cloud UI test Workflow
1. Every time a developer pushes code to the repository, the automation process begins. GitHub Actions immediately sets up a dedicated environment, creating a uniform base for all subsequent tasks.
2. Expo EAS takes charge, constructing the application for both Android and iOS platforms.
3. With the builds in place, Maestro Cloud conducts UI tests on the app.

Conclusion
Taking UI testing to the cloud with Maestro and automating with GitHub Actions ensures a robust, scalable, and efficient testing process. This setup gives us confidence in our Expo React Native apps’ consistent and high-quality user experience.
References
Thanks to https://github.com/lingvano/react-native-eas-maestro for inspiration.
Expo Dev:
Maestro Cloud:
Maestro Cloud Console:
Part 1 of Pokedex UI Testing Series with Local Setup:
GitHub Source Code:
EAS Build Lifecyle npm hooks:
🎹