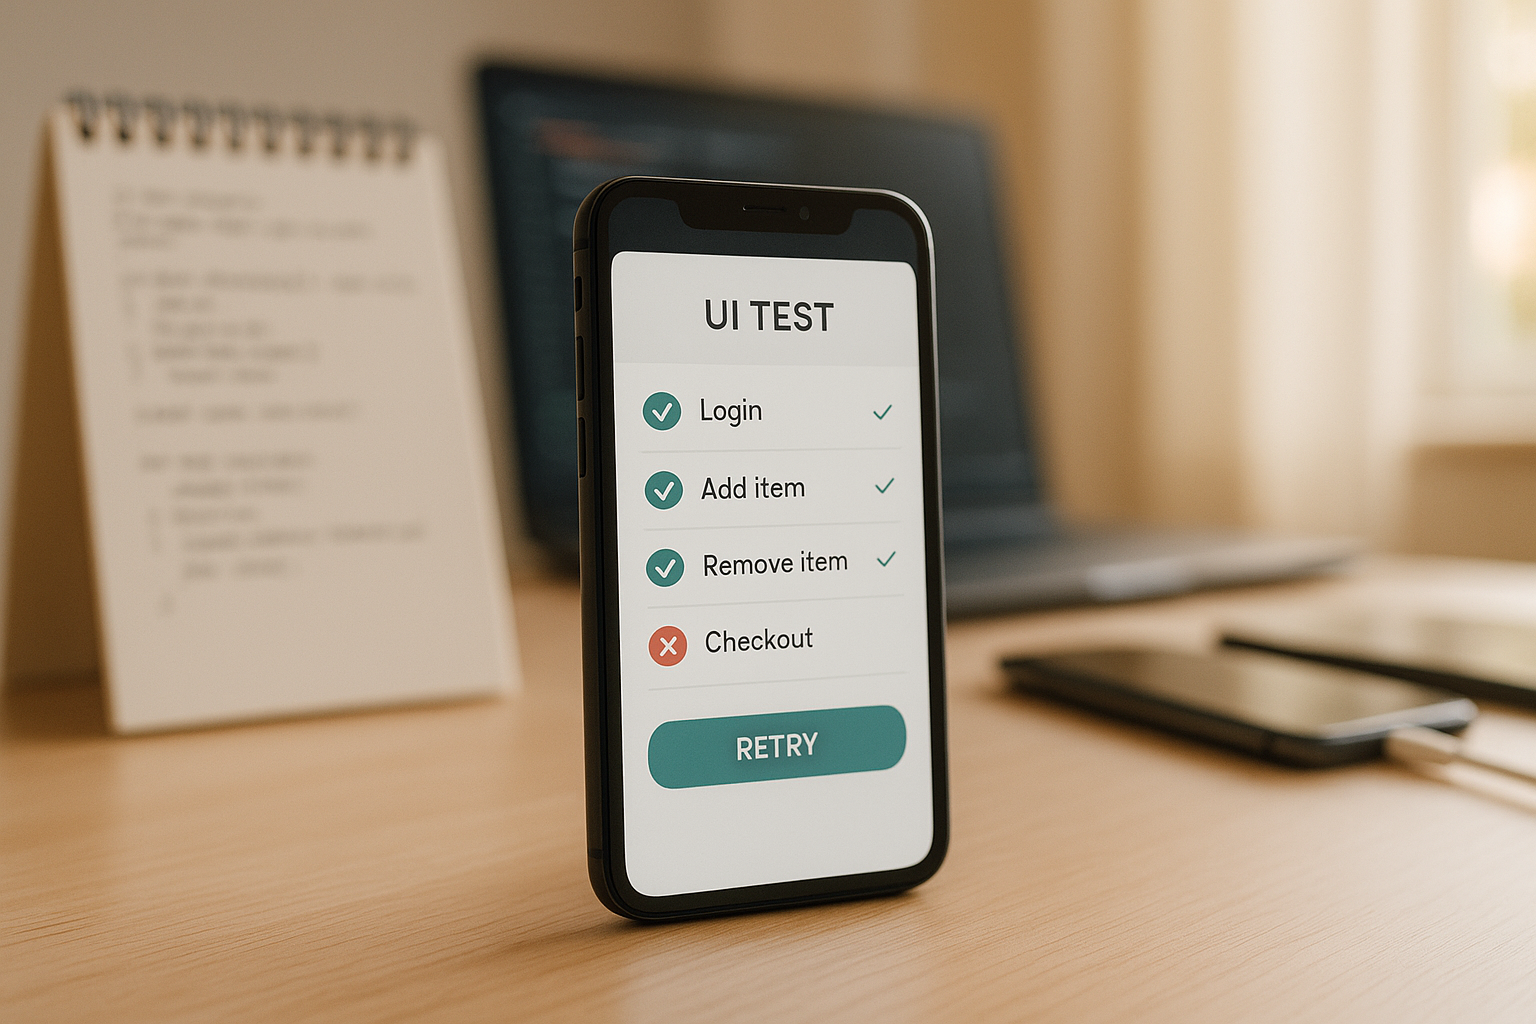
What Is a Self-Healing Test?
A self-healing test is an automated test that can automatically detect and adapt to UI changes — such as element locator shifts, renamed attributes, or layout adjustments — without requiring manual intervention. Instead of failing immediately when a locator (like an ID or CSS selector) changes, a self-healing test uses alternative strategies (e.g., visual matching, accessibility attributes, or contextual positioning) to find the target element and continue executing.
Self-healing tests rely on techniques like multi-attribute element fingerprinting, AI-driven pattern recognition, and fallback locator strategies to maintain test stability across application updates.
Flaky UI tests waste time. They fail due to minor changes like a button moving or a slow page load. Self-healing tests solve this problem by using AI to fix broken locators automatically. Instead of relying on one static locator, they create a "fingerprint" for each element using multiple attributes like text, style, and position. This allows tests to recover and continue without interruptions, reducing failures by up to 90% and cutting maintenance efforts by 95%.
Key Benefits:
- Automatically adjusts to UI changes in real-time.
- Reduces false positives and manual fixes.
- Saves 70%+ of the time spent on test maintenance.
- Keeps delivery pipelines running smoothly.
How It Works:
- Builds a detailed element profile during test creation.
- Uses backups (CSS, XPath, etc.) when primary locators fail.
- Updates locators dynamically during runtime.
- Learns from past failures to improve future accuracy.
Tools like Maestro make self-healing easier, offering YAML-based test definitions and cross-platform support for Android, iOS, and web apps. This approach simplifies UI testing by focusing on user intent rather than technical details.
Self Healing Test Automation | The Next Big Thing
sbb-itb-e343f3a
How Self-Healing Test Automation Works
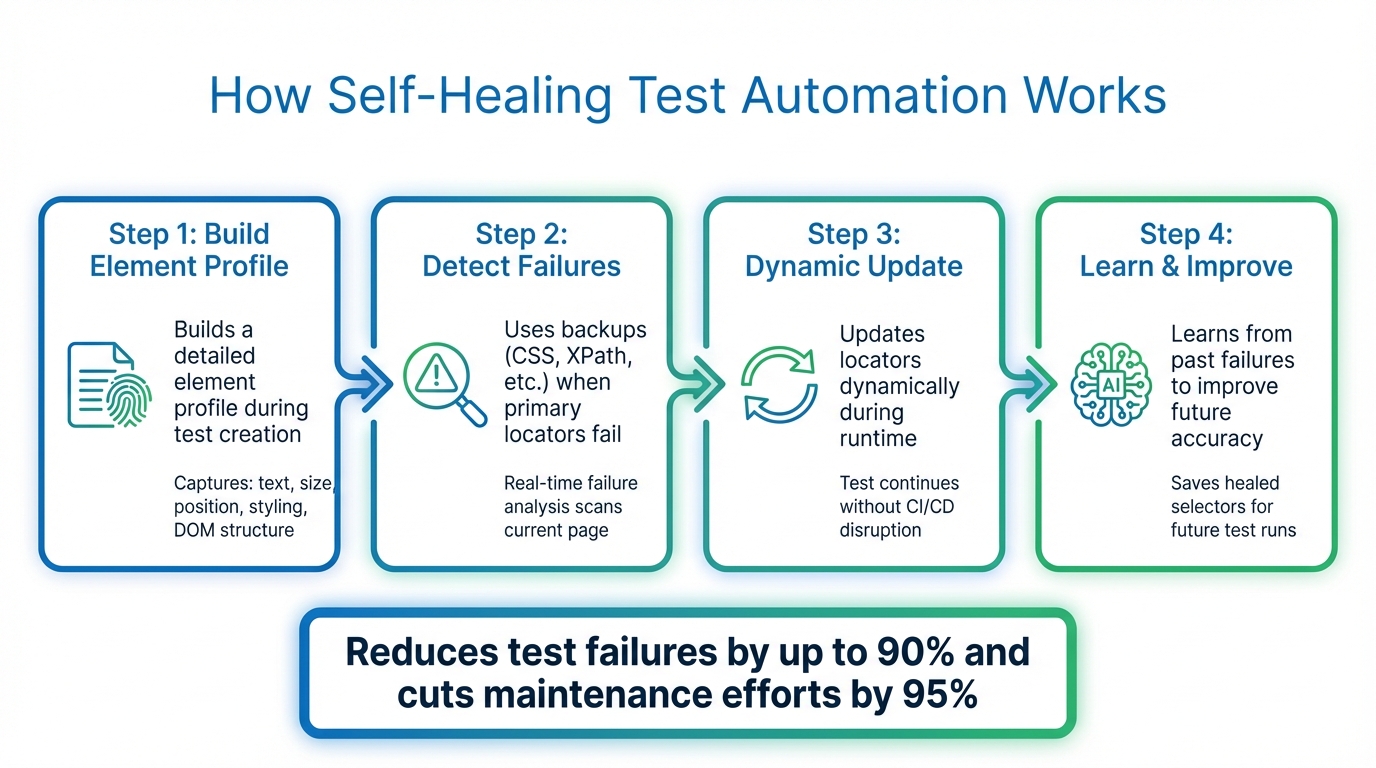
How Self-Healing Test Automation Works in 4 Steps
Self-healing test automation shifts from relying on a single locator to using multi-attribute fingerprinting. When you create a test, the system builds a detailed profile for each element, capturing attributes like text, size, position, styling, and DOM structure. These properties act as a unique identifier for the element. So, if a developer changes a button's ID from submit-btn to submit-button, the system doesn’t break. Instead, it evaluates the updated UI in real time and identifies the element that best fits the stored profile.
Detecting UI Changes During Runtime
If a primary locator fails during test execution, the system doesn’t just stop working. Instead, real-time failure analysis steps in. It scans the current page, compares it against the stored fingerprint, and checks a priority list of alternative selectors like CSS, XPath, ID, or text. These backups ensure that the test continues running without interruptions.
Self-healing test automation automatically detects and adjusts to UI changes, eliminating the need for manual fixes.
This process blends structural DOM information with visual indicators, such as layout and relative positioning. Even if the underlying code is significantly restructured, the system can still pinpoint the correct element. This swift detection enables immediate, automated adjustments.
Dynamic Adaptation and Error Correction
When the system identifies a matching element, it updates the locator on the fly. The test keeps running without disrupting the CI/CD pipeline. What’s particularly effective is the self-learning mechanism - the system saves these updated selectors (known as "healed selectors") and uses them alongside the original ones in future test runs. For instance, if a classID changes, both the old and new values are stored to improve accuracy moving forward.
AI and Machine Learning in Self-Healing
AI takes this process a step further by refining how locators are predicted and errors are resolved. Machine learning models analyze historical test data to determine the most reliable alternative locator when the primary one fails. Some frameworks even leverage Large Language Models like OpenAI or Claude to examine the HTML of a failed page and dynamically generate JavaScript code to resolve the issue.
AI also uses contextual clues - such as "the button below the password field" - to ensure the correct element is selected, even if its technical attributes have changed. This added layer of understanding helps prevent errors like clicking the wrong button simply because it shares a single attribute with the original element’s fingerprint.
Techniques for Implementing Self-Healing Tests
Implementing self-healing tests requires thoughtful design and consistent oversight. The best results often come from combining multi-attribute element profiling with intelligent fallback strategies. Instead of relying on a single locator, your framework should capture a variety of element attributes during successful test runs. These attributes could include surrounding text, element size, position, style classes, and parent/child DOM relationships. Together, they create a detailed fingerprint that the system can reference if the primary locator fails.
These methods build on automated adjustments, enhancing test design and supporting ongoing improvements.
Structural vs. Visual Self-Healing
Self-healing can generally be divided into two categories: structural and visual. Structural healing focuses on DOM attributes like IDs, classes, and XPath expressions. It's quick and effective, especially when developers follow consistent naming conventions. On the other hand, visual healing relies on stylistic and positional cues, making it particularly useful when significant changes to the DOM structure occur but the visual layout remains consistent.
The most reliable systems often use a hybrid approach, blending structural and visual methods. For instance, if a button's ID changes from submit-btn to submit-button, structural healing might resolve the issue by identifying class attributes. However, if the entire DOM is restructured, visual context - like identifying "the blue button below the password field" - provides an additional safety layer. This combination reduces false positives and enhances accuracy.
Designing Tests for Self-Healing
Effective test design is key to making self-healing mechanisms work. Start by running a successful test to establish a baseline context. This ensures the system has accurate data to reference if failures occur later. Consistency is also critical - use the same elementIdentifier values across builds. If these identifiers change between successful and failed runs, the healing algorithm may struggle to recognize the context.
Another powerful tool is declarative healing recipes. These recipes define how tests should respond to specific failure patterns. For example, if a modal overlay blocks a button click, the recipe might automatically close the modal and retry the action. This simplifies test scripts by handling common UI issues behind the scenes using standard automation commands. Recipes can be tied to specific actions like click or fillField, or even to tests tagged with metadata like @flaky.
To maintain accuracy, assign unique session identifiers for each test run. This ensures that self-healing data from one test doesn’t interfere with another, keeping decisions relevant to each specific scenario. Regularly reviewing the performance of these mechanisms helps maintain the integrity of your tests.
Monitoring and Improving Healing Accuracy
Self-healing mechanisms can dramatically reduce manual test maintenance - by as much as 95% - but only if their performance is actively monitored. Regularly check healed selector reports to see which locators are frequently breaking. These reports highlight what changed in the UI and which alternative selectors were used. Use this information to update your test scripts with more resilient locators, reducing execution errors and improving long-term stability.
"If a test failure indicates a genuine problem, not just a cosmetic change... automated healing can potentially mask application changes that teams should know about." - Deboshree Banerjee, Autify
Track how often healing occurs across your test suite. If certain tests are healing repeatedly, it might point to deeper issues with your locator strategy or the application's UI stability. Addressing these patterns helps ensure that healing decisions remain accurate and contextually appropriate for each scenario.
Maestro: Built-In Flakiness Tolerance for Mobile Testing

Self-healing techniques can reduce test maintenance, but their complexity often discourages adoption. Maestro addresses this by embedding flakiness tolerance directly into its architecture, so there’s no need for extra configuration.
Built-In Tolerance for Flakiness and Delays
Traditional mobile test frameworks tend to be fragile because they depend on precise locator matches - like IDs, XPaths, or text labels. If a button's ID changes or a screen element shifts slightly, these frameworks fail instantly, throwing errors like "NoSuchElementException." Maestro, however, is designed to handle the unpredictable nature of mobile apps by managing common UI inconsistencies automatically.
Instead of rigidly waiting for elements to load, Maestro waits just long enough for content to appear - whether it's delayed by network activity or a complex animation. This smart handling of delays ensures your tests align with real-world conditions without requiring manual adjustments.
Declarative YAML-Based Test Definitions
Maestro uses a simple YAML syntax that prioritizes what the test is meant to achieve (user intent) over the technical details of how it’s done. This makes tests not only easier to write but also accessible to team members who aren’t developers. Here's an example of a typical Maestro test flow:
appId: com.twitter.android
---
- launchApp
- tapOn: Search and Explore
- tapOn: Search Twitter
- inputText: "@mobile__dev"
- tapOn: mobile.dev
- tapOn: Follow
- assertVisible: Following
With commands like tapOn and assertVisible, anyone can quickly understand and modify the test flow, even if they didn’t write it. If UI elements change, you simply update the visible text or intent in the YAML file - no digging through XPath or CSS selectors. This simplicity is a game-changer, especially for teams working across multiple platforms.
Cross-Platform Testing with Maestro
Maestro supports testing on Android, iOS, and web apps - whether they’re native or hybrid - all through a single binary and unified syntax. It works seamlessly with native Views, Jetpack Compose, UIKit, SwiftUI, React Native, Flutter, and web views. This eliminates the hassle of managing separate test frameworks for different platforms, cutting down on both complexity and maintenance.
You can run tests locally for free using the Maestro CLI or Maestro Studio, and scale up to parallel execution with Maestro Cloud. This cross-platform flexibility allows teams to focus on testing user flows without getting bogged down by platform-specific challenges.
Conclusion
Key Takeaways
Broken locators and unstable tests are a major drain on engineering resources, eating up 20–30% of an engineer's time. Self-healing test automation tackles this issue by dynamically identifying elements during runtime. Instead of relying on a single attribute, it uses multiple factors - like size, position, surrounding text, and visual context - to locate elements, making tests far more resilient.
With AI-driven self-healing, manual test maintenance can be reduced by up to 95%, and build failures cut by as much as 40%. This not only stabilizes test execution but also frees up engineers to focus on more critical tasks. Plus, by logging healing events, these systems provide transparency, allowing developers to review and permanently update locators without slowing down release cycles.
While self-healing isn’t a cure-all - it can’t handle system-wide failures or elements that are completely removed - it becomes a game-changer when paired with best practices. Using stable accessibility labels and frameworks like the Page Object Model can amplify its effectiveness. To get the most out of self-healing, start small. Focus on your most unreliable tests and regularly review healing logs to ensure no real bugs are being overlooked. These methods make self-healing a powerful tool for improving UI test automation.
Why Maestro Complements Modern UI Testing
Maestro takes these self-healing principles and makes them accessible with a streamlined, user-friendly approach. It incorporates flakiness tolerance directly into its architecture, eliminating the need for complex AI configurations or fallback strategies. Maestro smoothly handles dynamic UI changes and network delays, while its declarative YAML syntax ensures that tests are easy to read and update - whether you’re an automation engineer or not. If a button’s text changes or a screen element shifts, all you need to do is tweak the YAML file, skipping the hassle of diving into messy XPaths or CSS selectors.
What sets Maestro apart is its cross-platform consistency. It works seamlessly with Android, iOS, and web apps, whether they’re native, hybrid, or built with frameworks like React Native or Flutter. Plus, its AI-powered Maestro Studio empowers non-technical QA team members to create and modify tests without needing command-line expertise. By blending simplicity, reliability, and cross-platform capability, Maestro embodies the best practices of self-healing automation and redefines what’s possible in UI testing.