
Parallel test execution is a method to divide and run test flows simultaneously across multiple devices or instances, drastically reducing testing time. Using a Command Line Interface (CLI) for this process allows for efficient test management, resource allocation, and seamless integration into CI/CD pipelines.
Key Takeaways:
- Sharding splits test flows (e.g., YAML files) across devices for faster execution.
-
CLI commands like
--shardsand--shard-splitmanage test distribution. - Benefits include reduced testing time, faster feedback loops, and better resource use.
- Tools like Maestro CLI simplify parallel execution with YAML-based flows, environment variables, and detailed logs.
- Local sharding supports up to 64 device pairs, while Maestro Cloud offers unlimited scaling for $250/device/month.
Best Practices:
-
Setup: Use
--shard-splitto evenly distribute tests or--shard-allfor compatibility checks. -
Timeouts: Adjust
MAESTRO_DRIVER_STARTUP_TIMEOUTfor slower environments. -
State Isolation: Use
clearState: trueto prevent shared state conflicts. -
Retry Mechanisms: Enable
continueOnFailure: trueto avoid halts from shard failures. -
CI/CD Integration: Use named parameters, JUnit reports (
--format junit), and centralized artifact directories for streamlined workflows.
By following these steps, you can achieve faster, more reliable test execution locally or at scale with cloud-based solutions.
How to Run Playwright Test in "Parallel", "Serial", or "Default" Mode
While this guide focuses on Playwright, you can also run Maestro tests in the cloud to achieve similar parallel execution for mobile and web apps.
How Parallel Test Execution Works
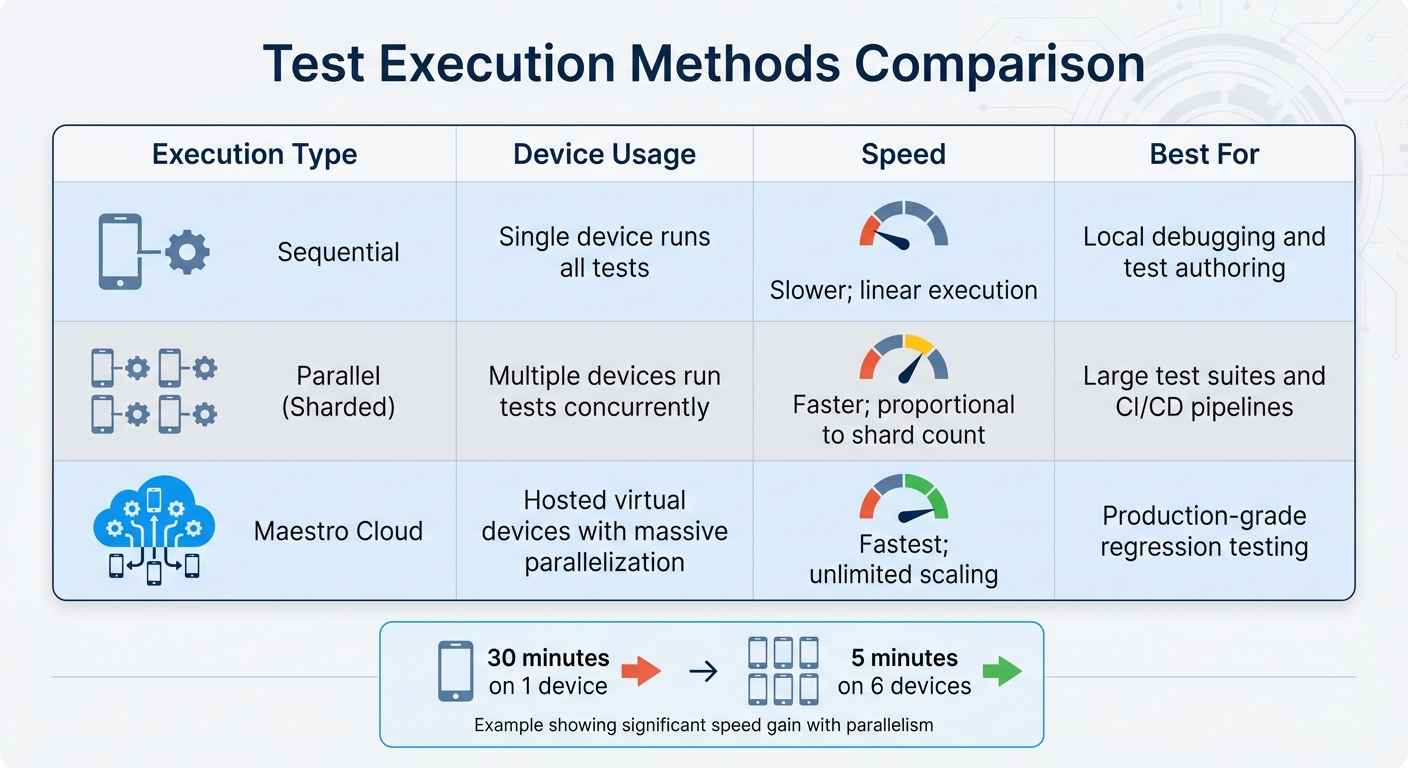
Sequential vs Parallel vs Cloud Test Execution Comparison
Core Concepts of Parallelization
In Maestro, parallel test execution revolves around sharding, which spreads test flows (YAML files) across multiple devices or emulators to run them simultaneously. Instead of working through tests one at a time on a single device, sharding lets you assign different parts of your test suite to multiple devices, significantly boosting efficiency.
The process is managed through the CLI, using the --shards (or -s) flag. For instance, running maestro test -s 4 ~/Desktop tells the CLI to allocate or launch four devices and split the test suite among them. This setup enables test-file-level parallelization, where each Flow file is executed on its own device instance.
To ensure smooth operation, the CLI uses JVM Coroutines for tasks like port allocation and thread synchronization. This approach prevents communication conflicts between shards. A synchronization mechanism ensures all shards are ready before testing begins. However, local sharding has practical limits - typically around 64 device pairs per Maestro instance - due to ADB port restrictions. This method not only organizes test execution but also helps improve overall performance.
Maestro offers two primary sharding strategies:
-
--shard-split: Distributes the test suite evenly across available devices, minimizing runtime. -
--shard-all: Executes the entire suite on every connected device, which is handy for checking compatibility across different OS versions or device models.
Benefits of Parallel Test Execution
Once you understand the mechanics, the benefits of parallel execution become evident.
First, it dramatically reduces test completion time. By running tests on multiple devices at once, you can cut down runtime significantly. For example, a test suite that takes 30 minutes on one device could finish in just 5 minutes when split across six devices.
This speed boost translates into faster feedback loops. Developers can get test results sooner, enabling them to integrate changes more frequently without lengthy delays. According to Maestro's documentation, Maestro Cloud takes this further by supporting massive parallelization while maintaining reliable and fast feedback loops.
Another advantage is better resource utilization. Parallel execution ensures all available devices are actively engaged, as opposed to leaving some idle during sequential testing. This is particularly valuable in CI/CD pipelines, where efficient resource use directly affects deployment speed and costs.
| Execution Type | Device Usage | Speed | Best For |
|---|---|---|---|
| Sequential | Single device runs all tests | Slower; linear execution | Local debugging and test authoring |
| Parallel (Sharded) | Multiple devices run tests concurrently | Faster; proportional to shard count | Large test suites and CI/CD pipelines |
| Maestro Cloud | Hosted virtual devices with massive parallelization | Fastest; unlimited scaling | Production-grade regression testing |
Setting Up CLI for Parallel Test Execution
Configuring Test Workers
To configure your test workers for parallel execution, you can use Maestro's sharding feature. For instance, the following command divides your test suite across four devices:
maestro test --shard-split 4 ./myTests
If you want to target specific devices, use the --device flag with a comma-separated list of device IDs:
maestro test --device "emulator-5554,emulator-5556" --shard-split 2 ./myTests
This command will run the tests on the specified emulators while splitting the tests into two shards.
Before running sharded tests, make sure all required devices are booted and connected. If the number of shards exceeds the available devices, Maestro will throw an error. Keep in mind that local sharding has practical limitations - typically around 64 device pairs per instance due to ADB port constraints.
Once your test workers are configured, fine-tune timeout settings and handle dependencies to ensure smooth parallel execution.
Setting Timeouts and Dependencies
Timeouts play a critical role in parallel testing. By default, the driver startup timeout is set to 15 seconds (15,000 ms) for Android and 120 seconds (120,000 ms) for iOS. If you're initializing multiple devices at once, these defaults might not suffice. To avoid connection failures, increase the timeout by setting the MAESTRO_DRIVER_STARTUP_TIMEOUT environment variable. For example, in resource-limited CI environments, you can extend the timeout to 3 minutes like this:
MAESTRO_DRIVER_STARTUP_TIMEOUT=180000
Parallel testing works best with tests that are isolated and stateless. If you’ve specified an execution order in your config.yaml, note that sharding will override sequential execution. Structuring your tests to run independently helps minimize conflicts.
With test workers and timeouts in place, you can use YAML files to define test flows and manage outputs effectively.
Using YAML for Maestro CLI
Maestro's YAML-based syntax simplifies the process of creating and running parallel tests. Each Flow file represents a complete test scenario, and the CLI processes these files without needing compilation. Here's an example of a login flow:
appId: com.example.app
---
- launchApp:
    clearState: true
- tapOn: "Login"
- inputText: "${USERNAME}"
- tapOn: "Password"
- inputText: "${PASSWORD}"
- tapOn: "Sign In"
- assertVisible: "Welcome"
When running tests in parallel, avoid overwriting artifacts from different shards. Leverage environment variables like MAESTRO_SHARD_INDEX and MAESTRO_DEVICE_UDID to generate unique filenames:
- takeScreenshot: "LoginScreen-shard_${MAESTRO_SHARD_INDEX}-device_${MAESTRO_DEVICE_UDID}.png"
To manage multiple flows, create a config.yaml file in your workspace root. This file can define global parameters, include or exclude directories (e.g., exclude long-running tests with "!slow/*"), and set continueOnFailure: true to ensure failures in one shard don’t halt the others. You can also inject environment variables using the -e flag:
maestro test -e BASE_URL=https://staging.com --shard-split 3 ./myTests
For CI/CD pipelines, use named parameters instead of positional ones for improved script reliability. Additionally, flags like --format junit and --output ./test-results can generate reports compatible with tools such as GitHub Actions or Jenkins.
Preventing Flakiness in Parallel Test Execution
Isolating Tests to Prevent State Conflicts
Running tests in parallel can be tricky, especially when it comes to shared state conflicts. If multiple tests modify the same app data or user state at the same time, you risk random failures that are tough to debug. The solution? Make sure every test starts with a clean slate.
One way to achieve this is by using the clearState: true parameter in your launchApp command. This ensures the app resets to a fresh state before each test begins, eliminating leftover data from previous runs. Here's an example:
appId: com.example.app
---
- launchApp:
    clearState: true
- tapOn: "Get Started"
- inputText: "test@example.com"
Beyond resetting app state, it's equally important to isolate other resources. Assign unique device IDs and dedicated ports (usually in the 7000–7128 range) for each test shard to avoid conflicts. On iOS, ensure each device has a distinct name to prevent "device already connected" errors. With these measures in place, you can focus on timing and synchronization to further minimize test flakiness.
Handling Timing and Synchronization
Even with isolated environments, timing issues can still cause random failures. Network delays, slow animations, or elements that take time to load can all disrupt test execution. Fortunately, Maestro helps by automatically waiting for the screen to settle before moving on to the next command.
For elements that load slowly - especially those dependent on network responses - you can set explicit timeouts in your selectors. For instance:
- tapOn:
    text: "Submit"
    timeout: 10000
To handle UI transitions, use the waitForAnimationToEnd command. This ensures all animations finish before the test continues, reducing errors like "Element not found."
Also, when running multiple shards, keep in mind that driver initialization might take longer due to resource contention. For more information, check the "Setting Timeouts and Dependencies" section to adjust driver startup timeouts effectively.
Using Retry Mechanisms
Even with careful isolation and timing adjustments, occasional failures are inevitable. This is where retry mechanisms come in handy to keep your tests running smoothly.
By setting continueOnFailure: true in your config.yaml file, you ensure that a failure in one shard doesn’t stop the entire test suite. This allows other shards to complete their tasks, giving you a full set of results instead of halting at the first error.
To make debugging easier in parallel environments, use unique artifact names for logs and screenshots. Incorporate environment variables into file names to prevent shards from overwriting each other’s outputs. This way, you can quickly identify which device or shard encountered an issue and dive straight into debugging.
sbb-itb-e343f3a
Optimizing Performance for Parallel Test Execution
Balancing Resource Allocation
When it comes to reducing execution time, smart resource allocation plays a big role in boosting performance.
The memory of your host machine sets the upper limit for performance. While theoretically, up to 64 parallel Maestro instances are possible (because of ADB port constraints), internal tests suggest that most standard development machines handle 5 to 7 shards comfortably before performance starts dropping off.
As you add more shards, CPU and memory usage grow in a predictable, linear way. However, initializing drivers for multiple emulators or simulators can slow things down. To mitigate this, set the MAESTRO_DRIVER_STARTUP_TIMEOUT to at least 180,000 ms when running more than two shards.
"MAESTRO_DRIVER_STARTUP_TIMEOUT with even 2 sharded wait time easily crosses the default time of 15 secs. Maybe the default value could be increased a bit to a more realistic 20-30 secs instead."
- sdfgsdfgd, Contributor, Maestro
Efficient port management is another key factor. Maestro uses dynamic port allocation - usually in the 7000–7128 range - for Android drivers, while assigning unique ports for iOS XCTest servers. This approach helps avoid I/O bottlenecks.
Once you've optimized resource allocation, the next step is to tackle large test suites with effective sharding.
Test Sharding for Large Test Suites
Sharding breaks your test suite into smaller chunks that run simultaneously on multiple devices. Maestro's CLI offers two main options for sharding: --shard-split and --shard-all. The --shard-split flag distributes tests evenly across connected devices, ensuring each test runs only once, which can drastically cut down the execution time for large suites.
You can specify the number of shards with the -s or --shards flag and target specific devices using the --device flag with comma-separated device IDs:
maestro test --shards 5 --shard-split --flows flows/
maestro test --shards 2 --device 'emulator-5554,emulator-5556' --flows flows/
However, keep in mind that --shard-split divides tests by quantity rather than execution time. If some tests take much longer than others, you might end up with one device finishing early while another struggles to complete its allocation.
"What we end up with is a device that finishes way ahead of the others, and another device that's trying to finish its allocation of tests while the other sit idle."
- dsyrstad, Contributor, Maestro
To address this imbalance, you can group tests of similar durations together or use a queue-based system where idle devices pull the next available test from a shared list.
Monitoring Resource Usage
Once your resources are configured and tests are sharded, it's crucial to monitor performance closely to catch potential bottlenecks early.
Use the --verbose flag during parallel execution to get detailed logs that map specific tests to the devices running them:
maestro test --shards 5 --shard-split --verbose --flows flows/
Verbose logging helps you pinpoint which shard might be slowing things down or causing errors. For smoother CI/CD operations, rely on named parameters like --app-file and --flows instead of positional arguments. This reduces the chance of execution errors as you scale up the number of shards. Additionally, avoid file I/O conflicts by assigning unique artifact names (like logs and screenshots) to each shard using environment variables.
| Strategy | CLI Flag / Variable | Purpose |
|---|---|---|
| Even Distribution | --shard-split |
Distributes tests evenly across devices to save time |
| Startup Buffer | MAESTRO_DRIVER_STARTUP_TIMEOUT |
Prevents timeouts when multiple devices boot simultaneously |
| Resource Tracking | --verbose |
Offers detailed logs to identify bottlenecks and shard-specific issues |
If you need to scale beyond local resources, consider running Maestro tests in the cloud. At $250 per device per month, it supports unlimited test runs on hosted devices, saving you the hassle of managing your own infrastructure.
Integrating Parallel Execution into CI/CD Pipelines
To take your CI/CD pipeline to the next level, you can integrate parallel tests by distributing them across multiple machines. This approach saves time and resources while ensuring your testing process remains efficient.
Distributing Tests Across Multiple Machines
You can distribute your tests across several machines by using the --shards flag. When configuring your CI scripts, opt for named parameters like --app-file and --flows instead of positional arguments for better clarity and flexibility:
maestro test --shards 5 --shard-split --app-file app.apk --flows flows/
This setup works well with earlier resource allocation and sharding strategies.
Since device initialization in CI environments can be slower, ensure the MAESTRO_DRIVER_STARTUP_TIMEOUT is set to 180,000 ms in your configuration:
export MAESTRO_DRIVER_STARTUP_TIMEOUT=180000
maestro test --shards 5 --shard-split --flows flows/
For targeting specific devices, use the --device flag with a comma-separated list of device IDs:
maestro test --shards 2 --device 'emulator-5554,emulator-5556' --flows flows/
Aggregating Test Results and Logs
To streamline result collection, Maestro CLI supports output in JUnit XML format using the --format junit flag. This format integrates seamlessly with tools like Jenkins, GitHub Actions, and Azure DevOps:
maestro test --shards 5 --shard-split --format junit --output report.xml --flows flows/
Maestro automatically consolidates shard summaries into a single report.
For managing artifacts like screenshots, videos, and logs, use the --test-output-dir flag. To centralize everything, set both --test-output-dir and --debug-output to the same directory, simplifying artifact uploads in CI pipelines:
maestro test --shards 5 --shard-split --test-output-dir ./artifacts --debug-output ./artifacts --flows flows/
Additionally, you can enhance traceability by injecting custom metadata into your JUnit reports. Just add properties to the Flow YAML header:
appId: com.example.app
properties:
  testCaseId: TC-1234
  priority: high
---
- launchApp
- tapOn: "Login"
| CLI Flag | Purpose in CI/CD |
|---|---|
--format junit |
Generates standard XML reports for CI tools |
--output <path> |
Specifies the filename/path for the test report |
--test-output-dir |
Consolidates screenshots, videos, and metadata |
--debug-output |
Captures technical logs like maestro.log |
For teams requiring even greater scalability, Maestro Cloud offers a managed execution environment.
Scaling with Maestro Cloud
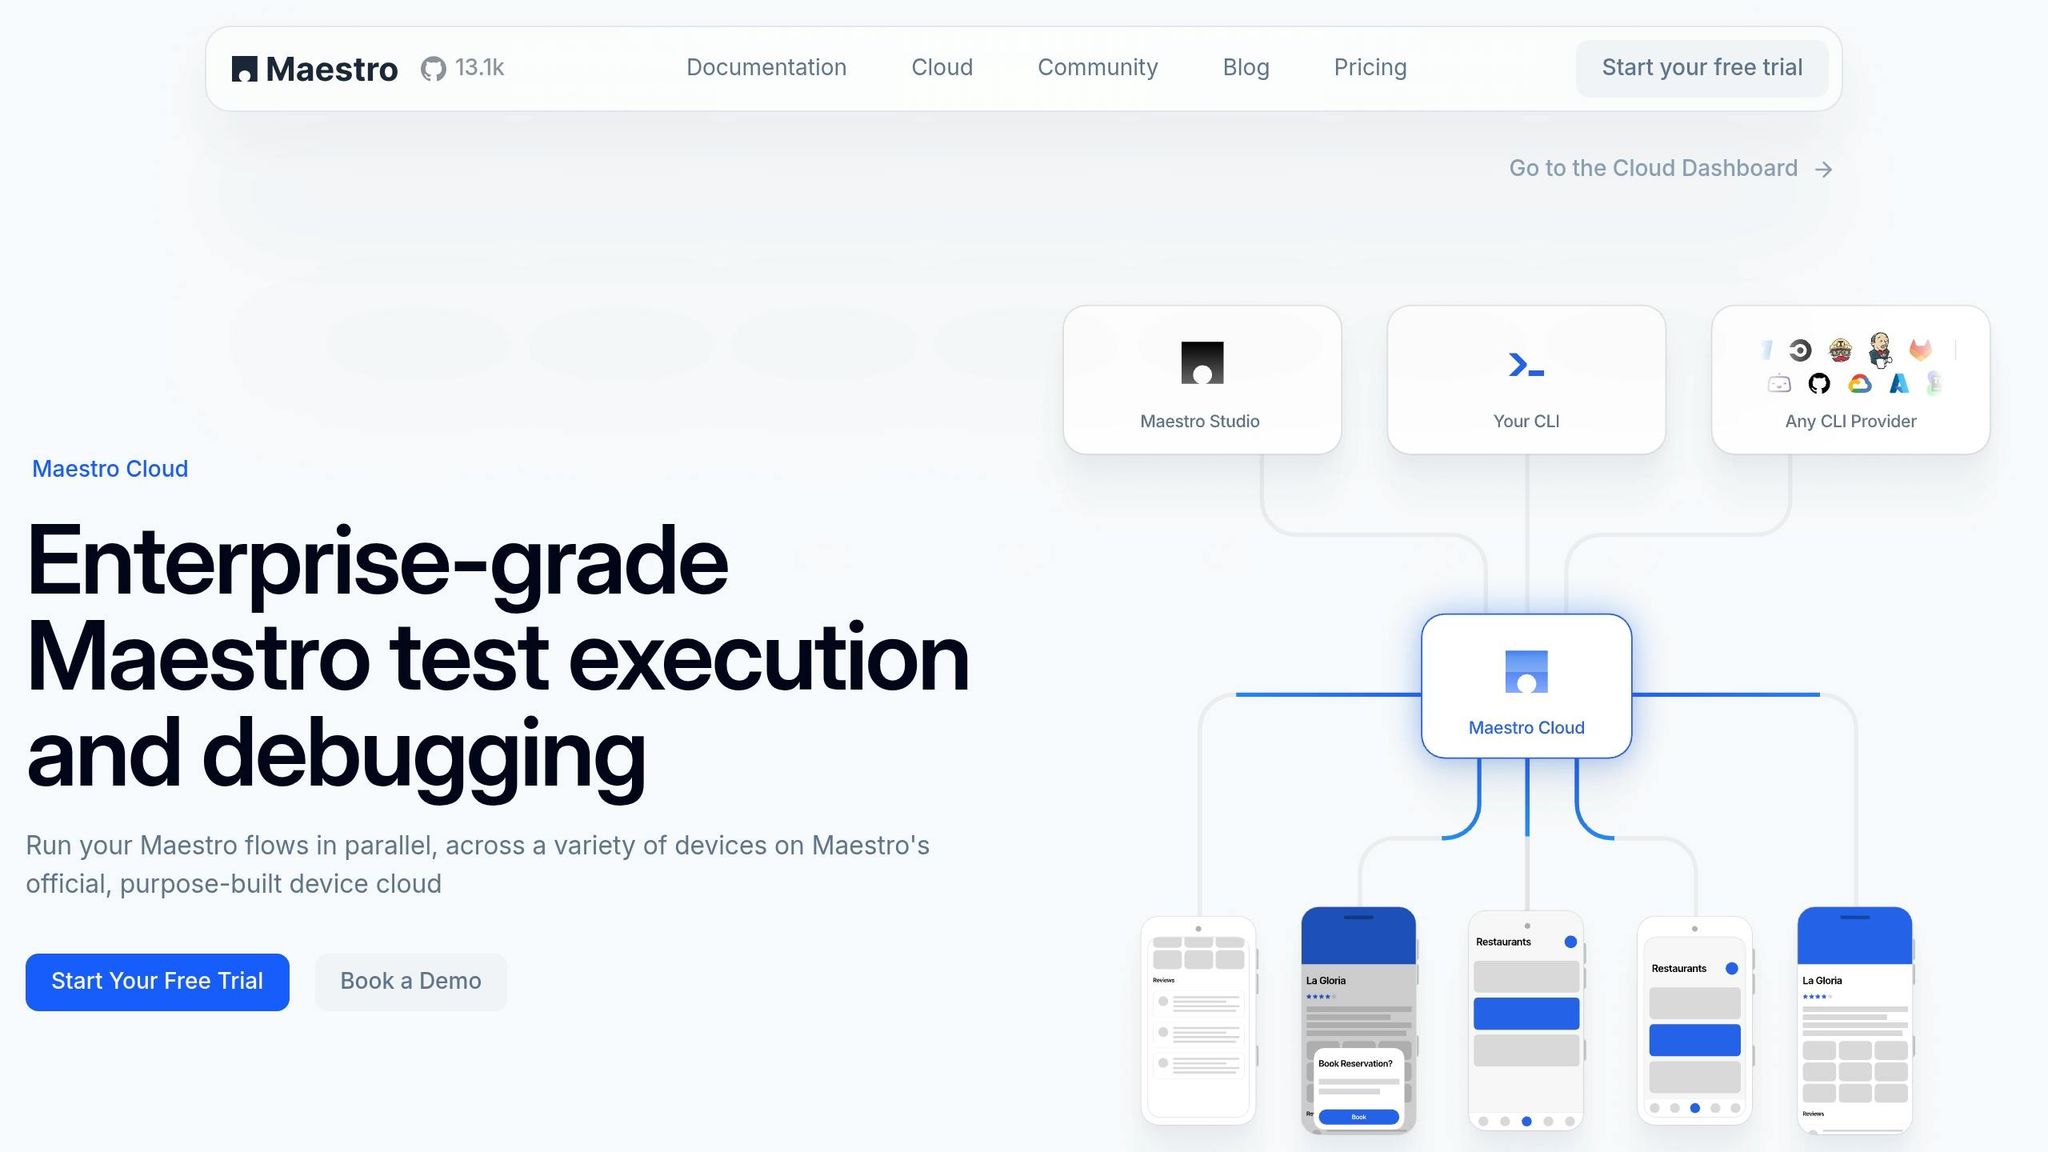
If your team needs to scale beyond local infrastructure, Maestro Cloud provides a managed environment with hosted virtual devices. This eliminates the need to maintain your own device farms while enabling extensive parallel testing across multiple devices.
The maestro cloud command fits directly into CI/CD workflows. Use the --api-key flag for authentication and the --project-id flag to specify projects in multi-project setups:
maestro cloud --api-key $MAESTRO_API_KEY --project-id my-project flows/
For workflows where waiting for test completion isn't required, the --async flag allows the CLI to exit immediately after the upload succeeds.
Maestro Cloud supports various configurations, including Android API levels and iOS models like the iPhone 11 running iOS 18. Pricing starts at $250 per device per month for Android and iOS, and $125 per browser per month for web. This includes unlimited test runs on hosted devices [Pricing].
Companies like Eneco and Wahed have seen dramatic improvements using Maestro's parallel execution. Eneco reduced regression testing from over 16 hours to under an hour, while Wahed cut test creation time by 95%, going from 3–4 hours per test to just 10–15 minutes.
"What used to take 4 teams a full 16+ hours of testing now takes under an hour with Maestro."
- Eneco Case Study
| Feature | Local CLI (maestro test) |
Maestro Cloud (maestro cloud) |
|---|---|---|
| Best For | Local debugging & basic CI | Scalable parallel execution for PRs |
| Execution | Sequential or limited sharding | Extensive parallel (simultaneous) |
| Environment | Local Emulator/Simulator | Hosted Virtual Devices |
| Maintenance | User manages device state | Managed infrastructure |
Conclusion
Combining these strategies ensures efficient and reliable CLI testing. Parallel testing through the CLI requires careful setup, including state isolation and resource management. Using named parameters like --app-file and --flows helps maintain consistency in your CI/CD scripts, while features like clearState: true and the MAESTRO_DRIVER_STARTUP_TIMEOUT environment variable reduce the risk of flaky tests that can disrupt parallel execution.
Key practices outlined in this guide help you achieve fast and scalable testing with Maestro. Strategic sharding can significantly cut down execution times, and the --format junit flag integrates smoothly with CI tools like Jenkins and GitHub Actions. Additionally, the --test-output-dir parameter simplifies artifact management by consolidating screenshots, logs, and videos into one location.
Maestro’s built-in handling of flakiness and delays further simplifies testing by waiting for screens to stabilize before moving forward. Its declarative YAML syntax makes test creation and maintenance straightforward, and the single-binary CLI ensures compatibility across Android, iOS, and web platforms.
For teams constrained by local infrastructure, Maestro Cloud offers a solution with managed virtual devices. At $250 per device per month for unlimited test runs, it eliminates the need for maintaining device farms while providing rapid feedback on pull requests.