Want to improve your iOS app testing process? XCTest is Apple's official framework for unit, UI, and performance testing. It integrates directly with Xcode, supports Swift and Objective-C, and offers a range of assertion methods to validate your app’s behavior. Here’s a quick rundown of how to use it effectively:
-
Set up XCTest: Add test targets in Xcode (e.g., Unit Tests, UI Tests), link them to your app, and use
@testable importfor better code access. - Organize tests: Separate test targets by purpose (e.g., "UnitTests", "UITests"), use clear naming conventions, and structure files logically.
-
Write better tests: Use descriptive names (
testLoginWithValidCredentials_shouldReturnSuccessResponse), group related assertions, and mock dependencies for stable results. - Fix flaky tests: Use XCTest expectations for async operations, avoid hardcoding values, and isolate tests to run independently.
- Debugging & coverage: Use Xcode’s tools to debug failed tests and monitor code coverage to ensure critical paths are tested.
- Speed up tests: Optimize setup/teardown, use parallel testing, and mock expensive operations to reduce execution time.
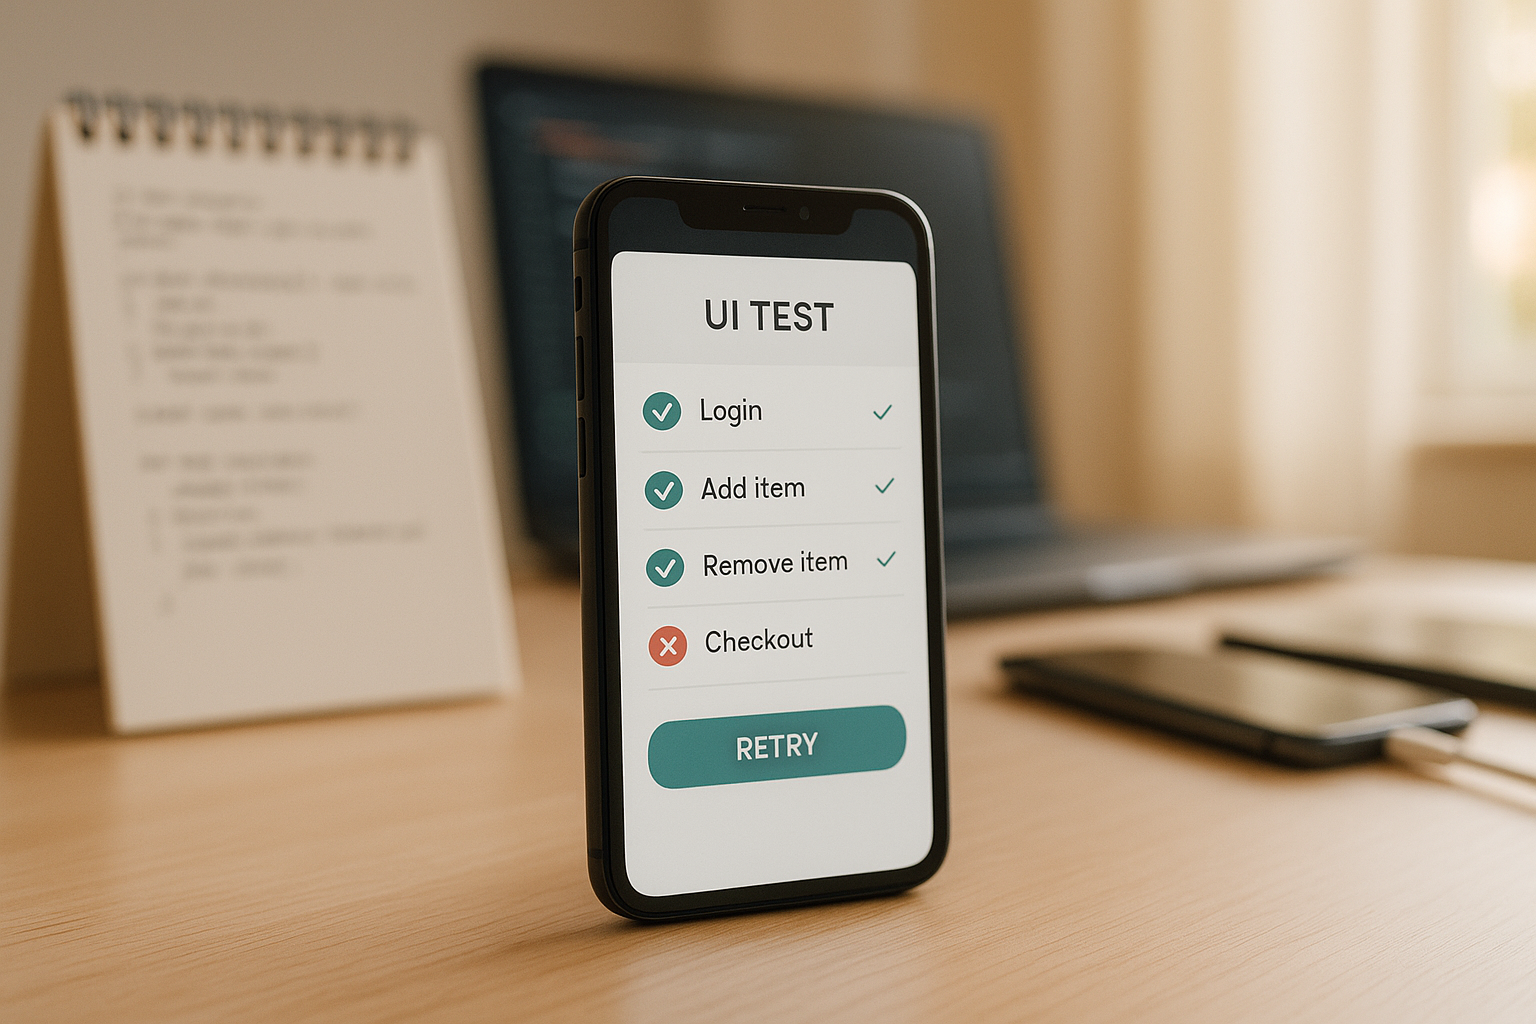
For full user journey testing, consider pairing XCTest with tools like Maestro, which simplifies end-to-end test creation using YAML scripts. Together, these tools can help you ensure both component-level precision and seamless user experiences.
Automation Testing for Swift iOS Apps - Unit Tests, UI Tests and Performance Tests with XCTest
Setting Up XCTest for Better Testing
Setting up XCTest properly in your iOS project is the first step toward creating reliable, maintainable tests that save you time and effort in the long run. A good configuration ensures smoother debugging and a more efficient development cycle.
Adding XCTest to Your Project
To start, open your project in Xcode and navigate to File > New > Target. From here, choose either "iOS Unit Testing Bundle" or "iOS UI Testing Bundle", depending on the type of tests you need.
When naming your test target, be descriptive and specific. Avoid generic names like "Tests" or "MyAppTests." Instead, go for something like "MyAppUnitTests" or "MyAppUITests." This approach keeps things clear, especially as your project grows and you add more test targets.
During the setup process, link your test target to your main app target. Xcode will prompt you to specify which app target your tests should be associated with. This step is crucial because it determines the code your tests can interact with.
Once the test target is created, configure the scheme to include it. Go to Product > Scheme > Edit Scheme, and add your new test target under the Test section. This ensures that your tests will run when you execute the test command, whether through Xcode or command line tools.
Finally, don’t forget to include the @testable import statement at the top of your test files. This allows your tests to access internal methods and properties in your app code, making your unit testing more thorough. Without this, you’d be limited to testing only public interfaces, which can restrict your ability to cover edge cases effectively.
With these steps completed, your tests are ready to go, and the groundwork is set for efficient testing.
Organizing Your Test Targets
Once your test targets are configured, organizing them thoughtfully can make a big difference in how efficiently your tests run and how easy they are to maintain. Each test target should serve a distinct purpose, aligning with the type of testing it performs.
- Unit tests should have their own target, such as "MyAppUnitTests." These focus on testing individual components, methods, or classes in isolation. Since they don’t require the app to launch, they run quickly and are ideal for frequent checks during development.
- UI tests, like those in a "MyAppUITests" target, simulate user interactions by launching the entire app. Because they take longer to execute, it’s best to run them less frequently or in specific scenarios, such as before releases or in staging environments.
- Performance tests deserve a separate target, such as "MyAppPerformanceTests." These measure execution time and resource usage under different configurations. Keeping them separate ensures they don’t interfere with your regular testing workflow.
To keep things neat, structure your project directories to mirror this organization. For example, create folders like "UnitTests/Networking" or "UITests/Networking" to group test files by the app components they cover. This makes it easier to locate and update tests as your app evolves.
Scheme management is another critical aspect when dealing with multiple test targets. You can create different schemes tailored to specific testing needs. For instance, you might have one scheme that runs only unit tests for quick feedback, another for running all tests for comprehensive validation, and a third for UI tests alone. This flexibility allows team members to focus on the tests most relevant to their tasks, improving overall productivity.
Lastly, adopt a clear naming convention for your test classes. Use prefixes like "Unit" for unit tests and "UITest" for UI tests. For example, names like "UnitLoginViewModelTests" and "UITestLoginFlowTests" make it immediately obvious what each class is testing and its purpose within your project. This clarity pays off as your codebase grows, making it easier for everyone on the team to navigate.
Writing and Organizing Quality Tests
Quality tests do more than just pass - they serve as a detailed record of how your app behaves, making future maintenance much smoother. Well-structured tests double as documentation, helping both current and future team members understand the intended functionality of your app.
Test Naming and Organization
A good test name does more than identify the test - it tells a complete story. Avoid generic names like test1 or testLogin. Instead, use descriptive names that clearly communicate the purpose of the test and the expected outcome. A helpful pattern is methodName_expectedOutcome, such as testLoginWithValidCredentials_shouldReturnSuccessResponse or testPasswordValidation_withShortPassword_shouldThrowValidationError.
This naming convention makes it easy to scan test results and immediately spot which scenario failed. It saves time by reducing the need to dive into the code to understand the issue.
Keep your test classes manageable. If a single class starts to balloon beyond 15-20 methods, it’s time to split it up. For instance, a UserAuthenticationTests class could be divided into smaller, more focused classes like UserLoginTests, UserRegistrationTests, and PasswordResetTests. This approach keeps your test suite easy to navigate.
Consistency is key across your test suite. If you choose to start test method names with the component being tested, stick to that format throughout the project. A consistent structure allows team members to quickly understand and contribute to the tests, regardless of who originally wrote them.
For more complex scenarios, include concise comments to explain the reasoning behind specific setups or assertions. These comments can be a lifesaver when troubleshooting or modifying tests later.
Once your tests are well-organized, focus on making your assertions precise and meaningful.
Using XCTest Assertions
XCTest offers a powerful set of assertions that can validate a variety of conditions. Always opt for the most specific assertion available to make test failures easier to diagnose.
For example, XCTAssertEqual is perfect for comparing values like strings, numbers, or objects that implement equality checks. A test like XCTAssertEqual(user.email, "john@example.com") clearly communicates both the expected and actual results if the test fails.
When working with optionals, use XCTAssertNotNil to confirm that a value exists before attempting to use it. This is particularly useful when verifying data from API responses or database queries. After confirming the value isn’t nil, you can proceed with further assertions to validate its contents.
For error-handling scenarios, XCTAssertThrowsError is invaluable. It ensures your code gracefully handles invalid inputs or unexpected conditions by throwing appropriate errors instead of crashing.
Add descriptive messages to your assertions to provide context. For instance, instead of simply writing XCTAssertEqual(result.count, 5), include a message like XCTAssertEqual(result.count, 5, "Should return exactly 5 search results for valid query"). These messages are especially helpful in continuous integration environments where immediate debugging isn’t always possible.
Group related assertions within your test methods to improve readability. For example, when testing a user registration flow, first validate the user object, then check the response status, and finally verify side effects like database updates. This structure makes it easier to follow the test logic.
With precise assertions in place, the next step is ensuring your tests are stable and predictable.
Creating Stable and Predictable Tests
Flaky tests are productivity killers. Tests that sometimes pass and sometimes fail undermine confidence in the test suite and waste hours of debugging time. The best defense against flakiness is a solid setup and teardown process.
Avoid hardcoding values. Instead, use constants or factory methods to generate test data. This ensures your tests remain consistent even if external conditions change.
Mock external dependencies like network requests, database queries, or file system operations. These external factors can introduce variability, making tests unreliable. Mock objects provide predictable responses, allowing you to focus on testing your app’s logic without interference from external systems.
Run tests in isolation to eliminate dependencies between methods. Each test should produce the same result regardless of the order in which it’s run. If tests only pass when executed in a specific sequence, shared state is likely the culprit and needs to be addressed.
For asynchronous operations, rely on XCTest’s expectation APIs rather than arbitrary delays like sleep calls. XCTestExpectation allows you to wait for specific conditions without introducing unnecessary timing issues or flakiness.
sbb-itb-e343f3a
Debugging and Improving XCTest Suites
A well-organized test suite is just the start. To keep your XCTest suite effective, it's crucial to stay on top of debugging, monitoring, and performance optimization - especially as your app grows and evolves.
Fixing Failed Tests
When a test fails, the failure message is your starting point. XCTest provides detailed output that often pinpoints the issue. Look for assertion failures, unexpected exceptions, or timeout errors. In Xcode, failed tests are marked with a red X in the test navigator. Clicking on one will take you directly to the problematic line of code.
Take advantage of Xcode's debugging tools. Use breakpoints and the debug console to inspect variables and step through your code. For UI tests, the accessibility inspector can help identify elements that might not be found during execution.
Failures related to asynchronous code often stem from timing issues. If a test fails intermittently with a timeout error, check your XCTestExpectation usage. Ensure the test is waiting for the correct conditions and consider increasing wait times if necessary.
Environment-specific issues can also cause headaches. A test that works fine on a developer's machine but fails in continuous integration might depend on specific simulator settings, device orientations, or even system languages. To avoid this, explicitly define the conditions your tests require during setup.
For intermittent failures, re-run the test multiple times in Xcode to uncover patterns. Document what you find, as these clues can guide you toward a solution. Once failures are resolved, it’s time to evaluate your test coverage.
Checking Test Coverage
XCTest includes built-in code coverage tools that show which parts of your app are untested. To access this, enable coverage reporting in your scheme and review the coverage reports in Xcode.
Start by focusing on critical user flows. While achieving 100% coverage isn’t always practical, it’s essential to ensure that the app’s core functionality - like payment processing, user authentication, or data syncing - is well-tested.
In the coverage report, untested code paths are highlighted in red, while partially tested paths appear in yellow. Pay close attention to areas like error handling, edge cases, and conditional logic, as these are often where bugs lurk.
Rather than obsessing over the overall coverage percentage, monitor trends over time. A decline in coverage might indicate that new features are being added without adequate tests. Automating coverage tracking in your CI pipeline can help you stay on top of this.
Use coverage data to prioritize test creation. Target the methods and classes with low coverage first, instead of randomly adding tests. This targeted approach ensures your efforts have the greatest impact.
Once you’ve improved coverage, the next step is to focus on speeding up your tests.
Making Tests Run Faster
Efficient test design isn’t just about accuracy - it’s also about speed. Faster tests mean quicker feedback, which is crucial for continuous integration. One effective way to reduce test execution time is parallel testing. XCTest supports parallel test execution, but your tests must be isolated and free of shared mutable state for this to work.
Streamline setup and teardown operations to save time. If multiple tests need the same data, use class-level setup methods instead of duplicating initialization code in every test, while still maintaining isolation.
Parallel testing can slash execution times by up to 70%, but this requires reviewing dependencies to ensure maximum parallelism.
For particularly slow tests, use Xcode’s profiling tools to identify bottlenecks. Mocking expensive operations - like network requests, file I/O, or complex calculations - can significantly speed up execution.
Cloud-based testing solutions are another way to boost speed. Tools like Maestro Cloud enable parallel testing on dedicated infrastructure, potentially reducing execution times significantly.
Don’t forget to clean up your test suite by archiving outdated tests. Tests for deprecated features or old implementations can waste resources without adding value. Regular maintenance keeps your suite lean and efficient.
For large test suites, prioritize critical tests to get faster feedback. Running smoke tests and core feature tests first ensures that the most important aspects of your app are validated early, leaving comprehensive regression testing for later stages.
When to Use End-to-End Tools Like Maestro with XCTest
XCTest is excellent for running detailed unit and UI tests, but when it comes to validating entire user journeys across multiple screens and interactions, tools like Maestro can take your testing strategy to the next level. Maestro fills in the gaps XCTest might miss, especially when testing end-to-end workflows or involving team members who aren't developers. By combining the strengths of both tools, you can achieve precise component testing while also ensuring full user flow validation.
Maestro as a Partner to XCTest
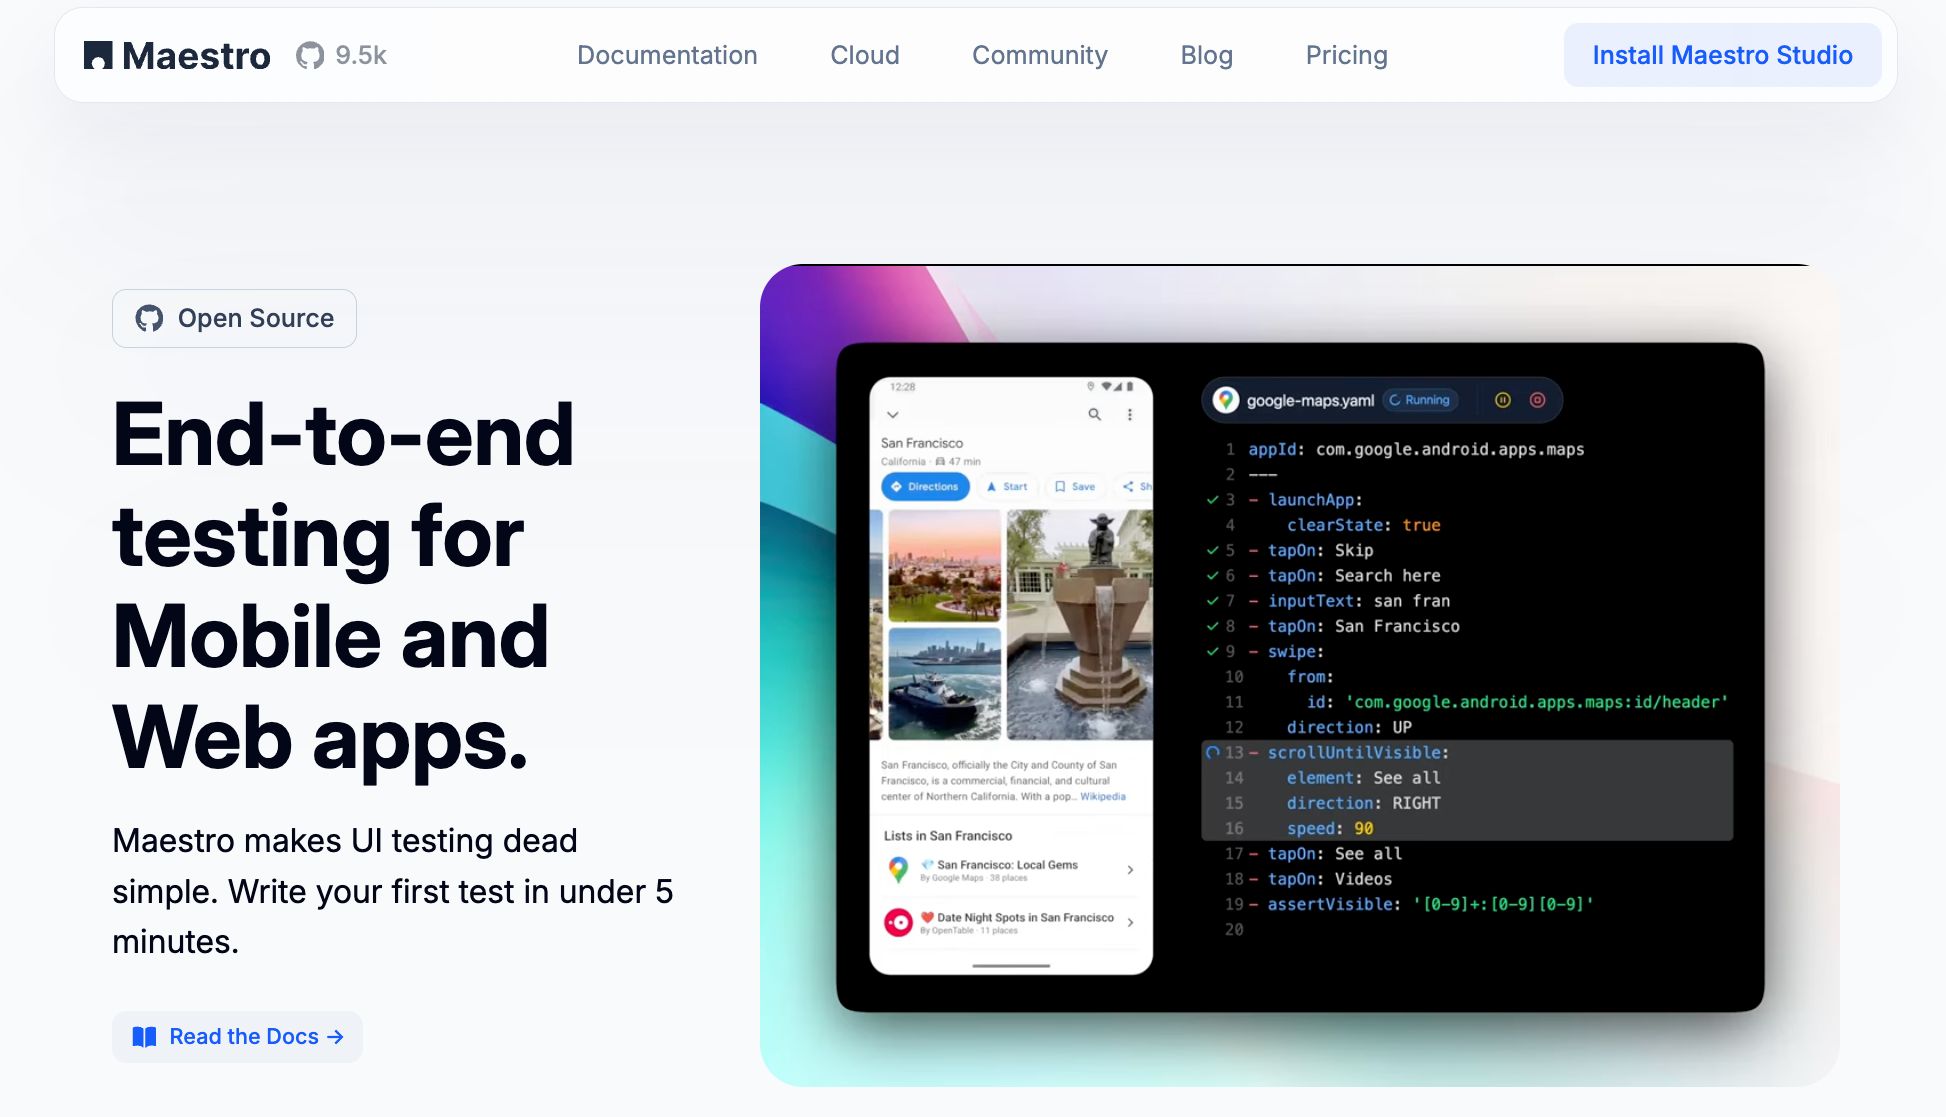
Maestro shines when it comes to testing complete user journeys. Unlike XCTest, which relies on Swift code for UI tests, Maestro uses a YAML-based declarative syntax that’s easy to read and write. It also handles timing and flakiness automatically, making tests more reliable. For example, think of an e-commerce checkout flow. Writing this in XCTest would involve multiple lines of Swift code to navigate through product browsing, cart management, and payment processing. With Maestro, the same flow becomes a straightforward YAML script:
appId: com.yourapp.ios
---
- launchApp
- tapOn: "Browse Products"
- tapOn: "Add to Cart"
- tapOn: "Checkout"
- inputText: "4111111111111111"
- tapOn: "Complete Purchase"
- assertVisible: "Order Confirmed"
One of Maestro's key advantages is that its tests are interpreted rather than compiled. This means you can tweak and rerun tests instantly without waiting for Xcode to rebuild your project, saving time and speeding up debugging.
To make things even easier, Maestro Studio offers an AI-powered visual interface that records user actions and generates the YAML commands for you. This bridges the gap between manual and automated testing. You can run your XCTest suite for unit and integration testing, then layer in Maestro flows for comprehensive end-to-end validation - all within your existing CI pipeline.
Cross-Platform and Accessibility Advantages
Maestro isn’t just about streamlining workflows - it also simplifies testing across platforms. If your app supports both iOS and Android, or if you’re using frameworks like React Native or Flutter, Maestro allows you to create tests once and run them on all platforms. This reduces the time and effort spent on maintaining separate test scripts.
Traditional XCTest UI tests require knowledge of Swift and Xcode, which often limits test creation to developers. Maestro’s user-friendly visual interface and YAML-based syntax open up testing to a broader group of contributors, including QA professionals, product managers, and even customer support staff. This inclusivity doesn’t compromise the reliability or maintainability of your tests.
If your team includes non-technical stakeholders who understand user workflows but aren’t comfortable writing XCTest code, Maestro is a game-changer. By using XCTest for detailed component tests and Maestro for validating user journeys, you can achieve both precise testing and comprehensive coverage, ensuring your app delivers a seamless experience.
Conclusion and Key Takeaways
XCTest best practices can transform your testing process from a basic safety measure into a full-fledged quality assurance strategy. By focusing on structured organization, reliable assertions, and consistent test environments, your test suite becomes a powerful tool for catching bugs early and ensuring confidence with every release.
However, testing doesn't stop at organization. Efficient debugging and improving test coverage and execution speed are just as important. Faster tests encourage more frequent runs, which means continuous improvements in code quality as your app evolves.
While XCTest excels at precise unit and UI testing, more complex user flows often require additional tools. This is where Maestro shines. With its declarative syntax and built-in tolerance for flakiness, Maestro is ideal for testing workflows that involve multiple screens and interactions.
Combining focused component testing with broader end-to-end validation creates a well-rounded QA strategy. XCTest handles unit tests and component-level UI checks, while Maestro takes care of user flow testing. This layered approach is especially helpful for cross-platform apps and teams with non-technical members, thanks to Maestro Studio's visual interface.
As your app and team grow, your testing strategy should grow with them. Start with a solid foundation using XCTest, then expand to include tools like Maestro for validating complete user experiences and involving a wider range of team members in the QA process. Together, these practices ensure every aspect of your app's functionality is secure and reliable.